Maintenance 7-5
7.4 Running the Scanner Maintenance Program
The way you start and run the Scanner Maintenance Program depends on your scanner
model and configuration.
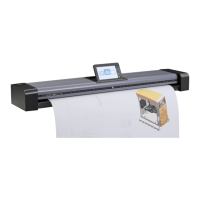
7.4.1 Starting Scanner Maintenance from the iJET Panel
On some scanner models you can activate the Scanner Maintenance program from the iJET
Panel.
To start the program on these scanners:
On the iJET Panel
1. Select the Menu button.
2. Select Advanced > Options > Scanner Maintenance
3. Press Enter to start.
4. Follow the Scanner Maintenance instructions described below.
7.4.2 Starting Scanner Maintenance from a PC on the LAN
If the Scanner Maintenance option does not exists in your iJET Panel, you must run the
Scanner Maintenance program from a PC that recognizes the scanner. This can be done from a
PC on the LAN that has WIDEsystemNET setup to recognize the scanner and Scanner
Maintenance installed. The scanner must also be enabled for sharing. See the sections
“Scanner on Network Setup” and “Setup to Share the Scanner” for instructions. See your
WIDEsystemNET on-line help for details on adding a scanner to the list of recognized scanners
on a PC.
To start scanner maintenance from a PC on the LAN:
1. Start WIDEsystemNET and select the scanner from your list of scanners.
2. Right-click on the WIDEsystemNET icon and select Scanner Maintenance.
3. Follow the Scanner Maintenance instructions described below.
7.4.3 Starting Scanner Maintenance from a Local PC
If the Scanner Maintenance option does not exists in your iJET Panel and is not enabled for
network/shared scanning, you must run the Scanner Maintenance program from a PC
connected locally through the USB port. The PC must have WIDEsystemNET and Scanner
Maintenance installed. See the section: Scanner Configuration and Setup – Connect the
Scanner to a PC.
To start Scanner Maintenance from a local PC:
1. Right-click on the WIDEsystemNET icon and select Launch Scanner Maintenance.
2. Follow the Scanner Maintenance instructions described below.
Menu