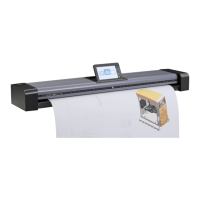
Using the scanner, how do I …? 6-2
6.1 Scan to Local or Network PC with the iJET Panel
1. Load your original. See the section “How do I load originals?” for information
regarding your specific scanner model.
2.
On the iJET Panel –Select the Scan to button. The first of the recognized scan targets
(PCs) will be displayed.
3. Repeated pressing on the Scan to button will step through the list of recognized scan
targets (PCs). Stop when the right scan target is displayed. A target name that includes
“(USB)” will be a PC connected directly to the scanner. “No Clients” will be displayed if no
PCs with Designated Folder functionality were detected locally or on the network. See your
WIDEsystemNET help for instructions on setting a PC for Designated Folder functionality
with a scanner connected directly to the LAN.
4.
Set the Size of your original
The value your set here determines the scan area. Usually this would be the size of the
original unless you wish only to input a portion. Press the Size button to activate size
setting.
You then change the value each time you again press the Size button or with the
arrow up/down buttons
. You can select Auto detection or a standard size setting.
Auto will detect the edges of the original and always set the scan area to the full original
size every time. You will probably use Auto for most jobs. You can always crop the image in
an image editor on the PC after scanning-to-file. Press
Enter
to confirm your setting.
NOTE: About the Size value: Size is a global system variable that can be changed in 3
different ways: 1. With the Size button 2. With the Menu button > Size option and 3. With
the Scan to button > Size option. This means that when you change the size for a copy job,
it will also apply for a scan-to-file job and vise versa until you change it again.
5.
Make your scan-to-file settings. The latest (or “default” if none were made) scan to
file settings are always attached to the scan target, so each available scan target will have
stored its own settings. If you know your target’s settings to be correct for your current job,
press the Scan button to send the scan. Otherwise, continue to the next step.
Size
Change the value (Auto or a standard size) and
press
Enter
to confirm.
Size
> Auto
Local PC set as scan target
Scan to
PC_nr8 (USB)
Network PC named “PC_nr3” set as scan target
Scan to
PC_nr3
Scan
Scan to