Maintenance 7-10
8. Each lever is attached to the scanner chassis with a small hook that rests on a pin.
Simultaneously lift both levers upwards to detach their hooks for the pins and free the
glass-plate from the scanner.
9. To reinsert a new glass-plate – Fit the new glass-plate’s lever hooks on the pins on
each side of the scanner.
10. While supporting the glass-plate with your thumbs on the finger handles, carefully push
the glass-plate backwards (away from your body) and ease it down into place.
11. Close the scanning area lid.
NOTE
: Make sure you clean a new glass-plate before using it with the scanner.
NOTE: Be sure to reset the part replacement warning flag though WIDEsystem’s “Status” tab.
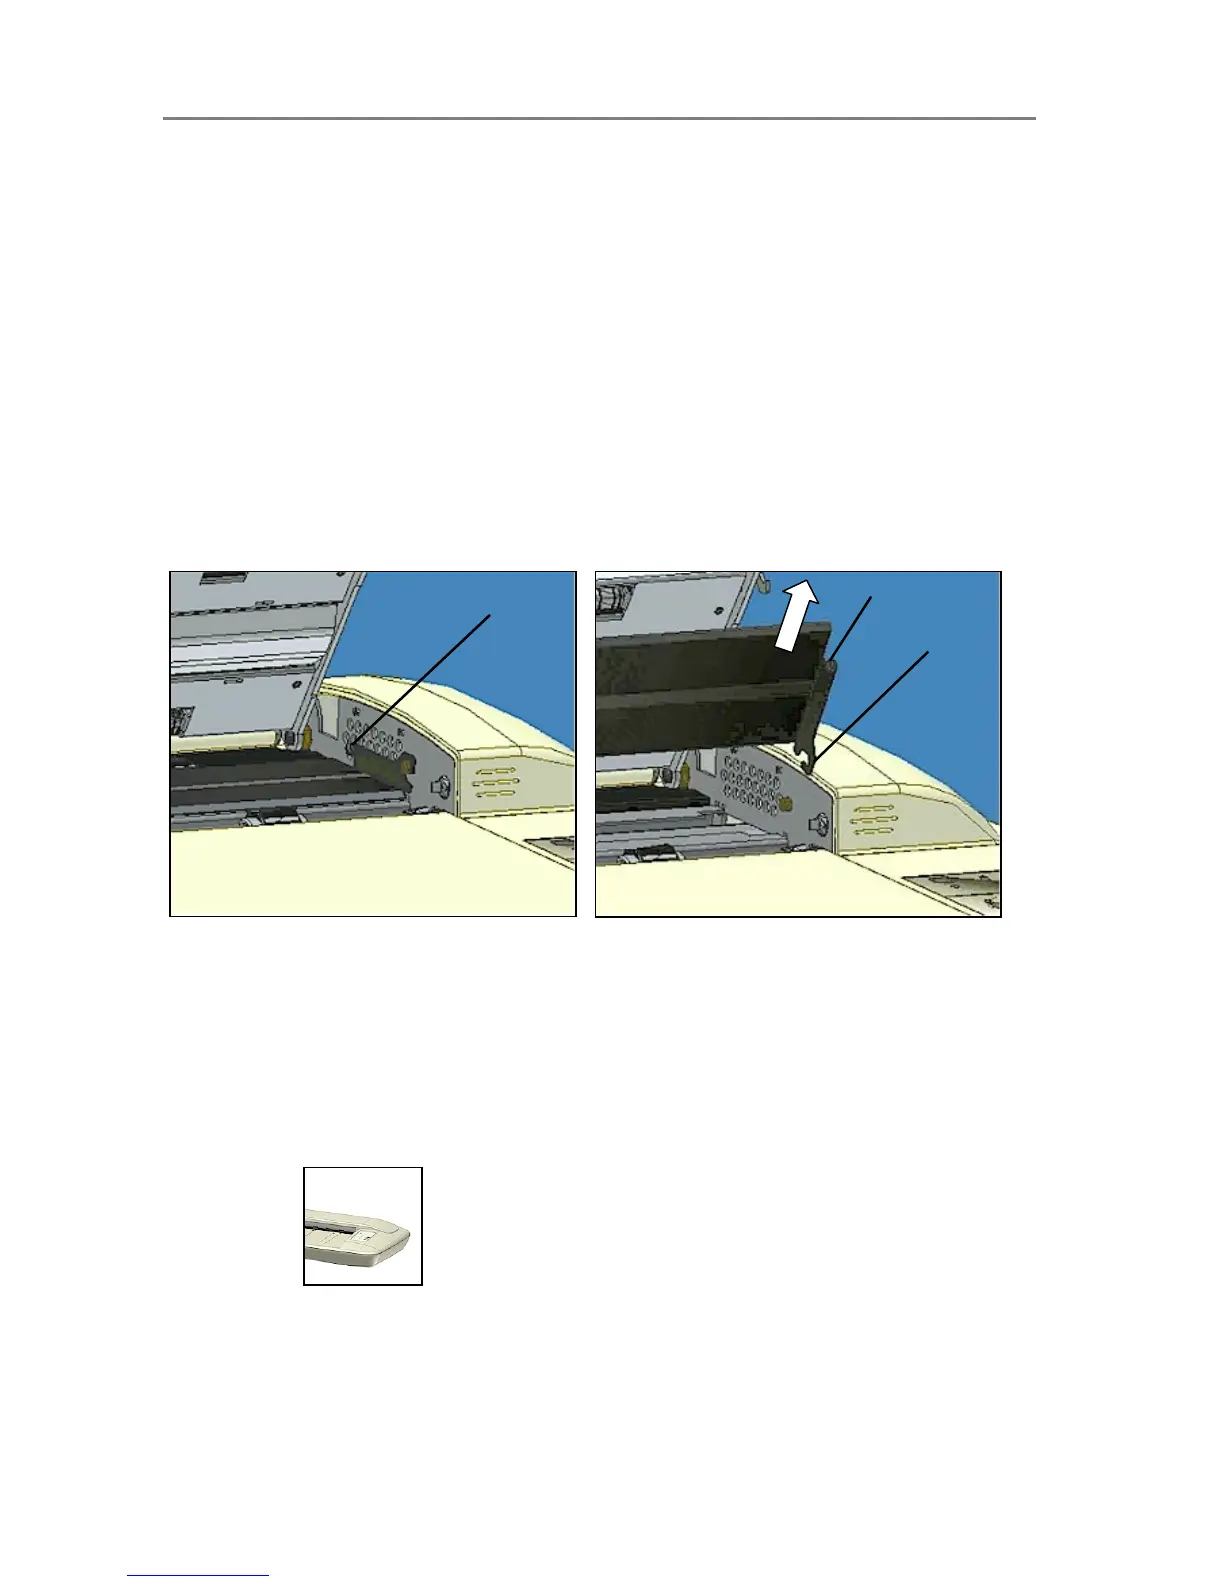
Remove the glass-plate:
Step 1: Open the lid. Locate the lever’s finger handle on
each side.
Shown below: Right side finger-handle.
Step 2: Flip back. Lift the lever’s hooks and glass-plate
free of the scanner.
Hook
Finger handle
Finger handle
7.4.2 Replacing the White-Background-Platen
Some scanner models are designed so users can replace the white-background-platen. On
other models, a service technician must perform this process. See your scanner’s model
specifications to see if the white background is user-replaceable on your scanner.
A white-background-platen can become worn and discolored after long periods of use and
replacement with a fresh white-background-platen is recommended. WIDEsystem monitors
scanner usage and will warn you when it is time for a replacement.
Replacing the White-background-platen:
On Scanners:
On these scanner models, the pressure-platen itself functions also as the white-background-
platen. Replacing the white-background-platen means replacing the scanner’s (white) pressure-
platen.