Secon 10 - Diagnosc and Maintenance Procedures
Technical Manual
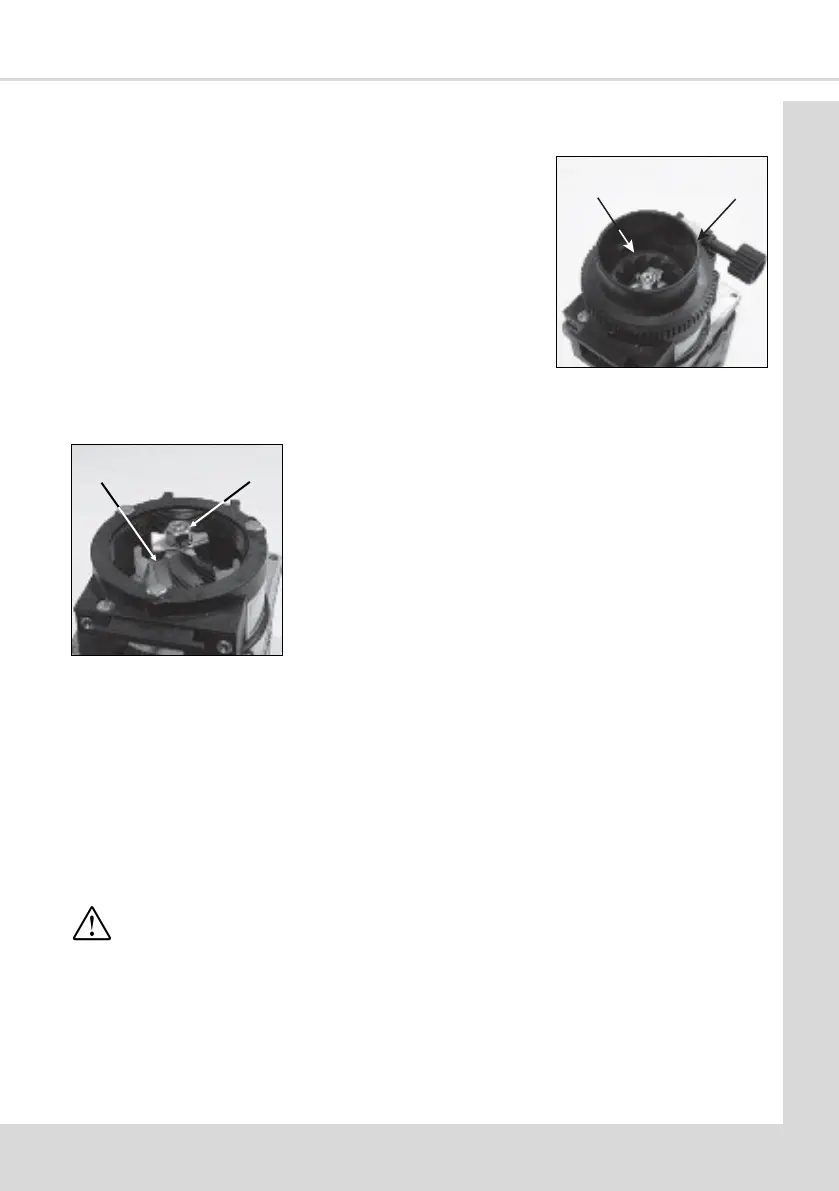
10.4.2 Replacing the Grinder Blades.
1. Isolate the machine from the Mains power supply.
Push in the bean canister shut-o to close the fresh
beans outlet. Carefully remove the fresh beans canister
from the machine and place it to one side.
Pull up and remove the grinder adjusng wheel
assembly (b) from the rear of the grinder body.
Unscrew the grinder body (c) an-clockwise and remove
it from the blade housing.
Note: Grinder mechanism removed from the machine for clarity.
3. Take the new grinder body complete with inner grinder ring from the service kit.
Screw the grinder body clockwise into the blade housing unl it stops.
Re-set the grinder blades. An approximate starng posion is achieved by turning the
grinder body back one full turn an-clockwise. Re-assemble the grinder adjuster wheel
assembly to the grinder unit.
4. Ret the fresh beans container to the machine. Pull the bean canister shut- o to its
fully extended posion.
5. Turn on the electricity supply to the machine.
Important! Before returning the machine to service, the Grinder Calibraon roune
(refer to Secon 5.7.1.2) must be carried out to ensure correct operaon of the
grinder with the type of beans used in the machine. Use the grinder adjuster wheel to
ne tune the blade sengs in order to obtain the desired grind quality.
b
c
d e
2. Unscrew and remove the nut, star washer and agitator (d)
from the drive sha.
Note: Nut is a le hand thread. Remove the Grinder blade
block (e) and discard. Replace with the new grinder blade
block included with the service kit.
Ret the agitator, star washer and nut. Ensure that the nut
is ghtened securely.