WINDOW REPLACEMENT
INSTRUCTION MANUAL
107
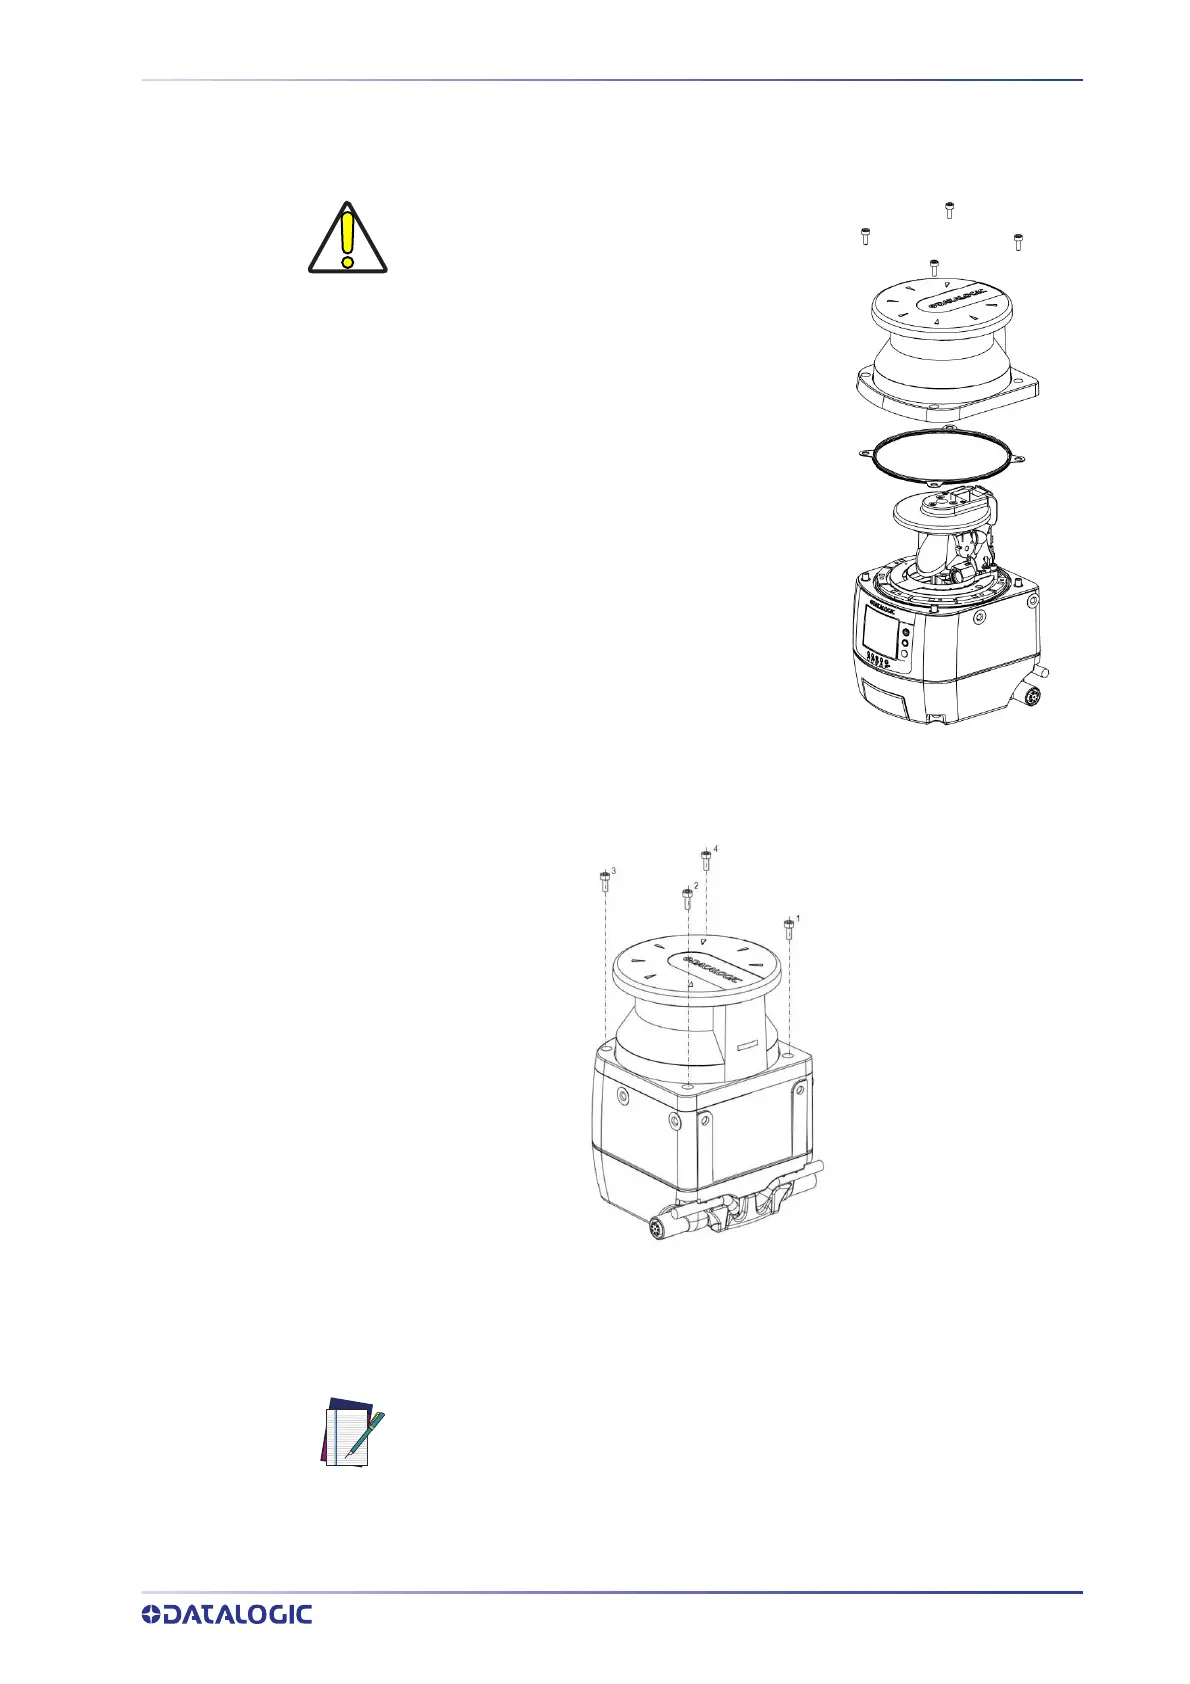
5. Position the new seal, gently pressing it on the device body and making sure it
perfectly adheres to it.
CAUTION
Before closing the window, take
sufficient measure to prevent dust
and any polluting agent from enter-
ing the device, as this could affect
the detection capability of the
Safety Laser Scanner. In case of
contamination, use dry compressed
air to remove it.
6. Hold the new optical window on the sides
and carefully place it in the correct position.
Exert pressure on the angles and make sure
that the window is perfectly attached to the
device body without any inclination.
7. Snug the 4 Tuflok® screws down (do not overtighten them). Use a 2.5x100 ball-
end hex screwdriver with a shank long enough to avoid damaging the optical win-
dow.
8. Tighten the screws with a torque wrench (tightening torque 0.5 Nm, bit 2.5 mm).
9. Remove any contamination (e.g. fingerprints, dust, etc.) on the optical window.
NOTE
After replacing the window, always perform window calibration to guaran-
tee proper working of the device.
 Loading...