PICTURE menu continued
Color submenu
• Press ENTER to open the Color submenu.
Color Temperature
• Native gives you the brightest possible image.
• A value between 5000K and 9300K selects the relevant color
temperature.
Trim
• Set the Red, Green and Blue Lift and Gain settings, to improve the
appearance of the projected image.
Hue, Saturation, Gain
• Set the Red, Green, Blue, Cyan, Magenta and Yellow settings as
required.
White Balance
• Set the Red, Green and Blue levels as required.
Sharpness, Noise Reduction
• Adjust the sliders for these settings, as required.
Notes
See also Using the Menus, earlier
in this guide and Menu Map, later in
this guide.
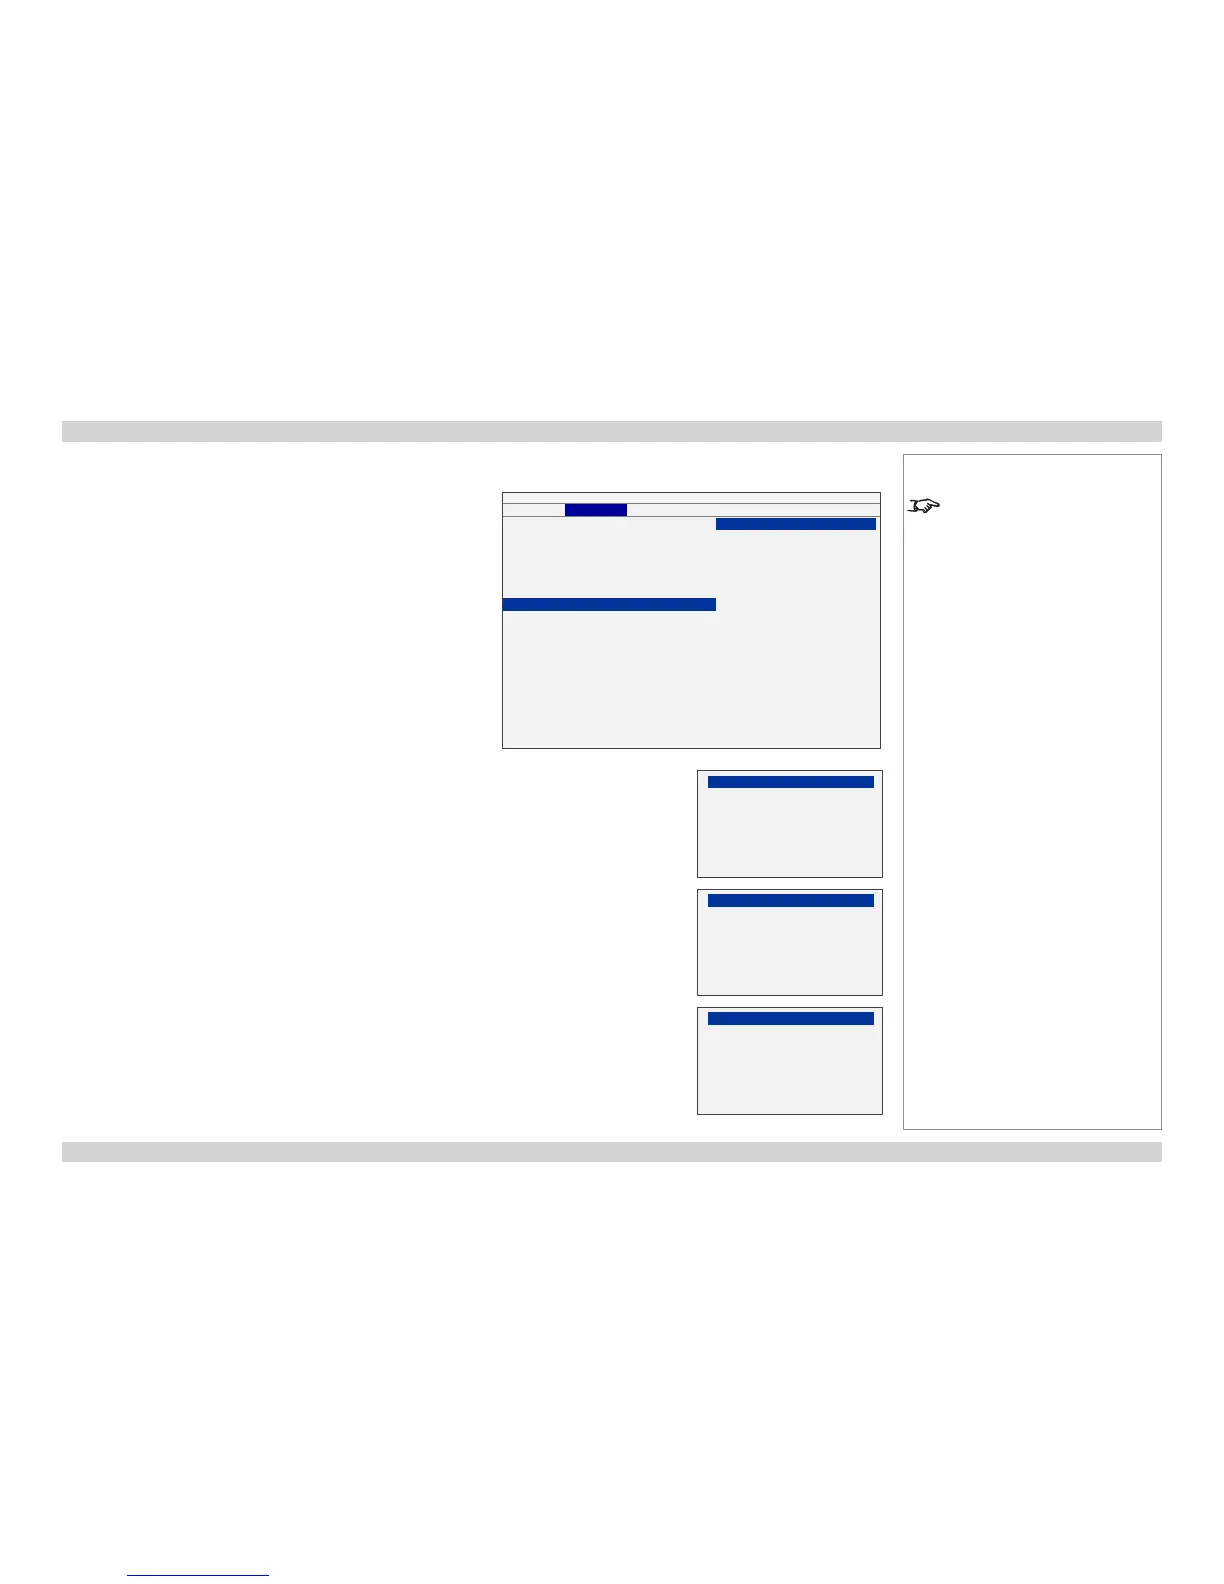
INPUT
PICTURE
LAMPS ALIGNMENT CONTROL SERVICE
Picture Mode < High Bright >
Contrast < 100 >
Brightness < 100 >
Saturation < 100 >
Hue < 100 >
Gamma < Video >
Color Enter
Sharpness < 0 >
Noise Reduction < 0 >
Aspect Ratio < Letterbox >
Overscan < Off >
VGA Setup Enter
Autosync Execute
Color
Color Temperature < Native >
Trim Enter
Hue Enter
Saturation Enter
Gain Enter
White Balance Enter
Trim
Red Lift < 0 >
Green Lift < 0 >
Blue Lift < 0 >
Red Gain < 0 >
Green Gain < 0 >
Blue Gain < 0 >
Hue
Red < 0 >
Green < 0 >
Blue < 0 >
Cyan < 0 >
Magenta < 0 >
Yellow < 0 >
White Balance
Red < 0 >
Green < 0 >
Blue < 0 >

 Loading...


