EasyManuals Logo

dynabook PORTEGE X40-J Series Maintenance Manual

dynabook PORTEGE X40-J Series
155 pages
To Next Page IconTo Next Page
To Previous Page IconTo Previous Page
Page #101 background imageLoading...
Page #101 background image
Maintenance Manual (960-942) 4-28
Replacement Procedures
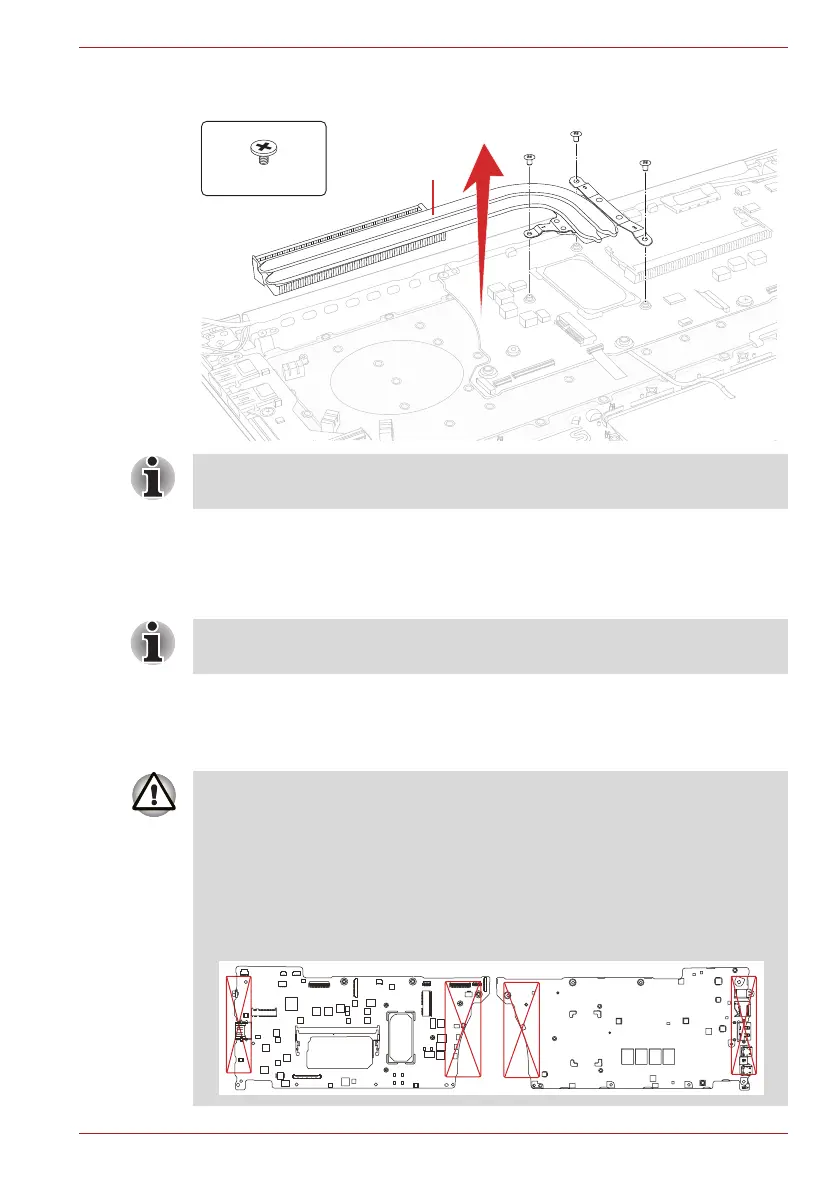
Figure 4-33 Removing the Fin
4.20.2 Installing the Fin
To install the Fin, follow the steps below and refer to Figure 4-33.
1. Set the Fin in place and secure it with the screws.
4.21 System board
S2 x 2.3CT
Fin
1
2
3
When removing the Fin, be sure to remove the screws in the reverse order
of the number marked on the Fin.
When installing the Fin, be sure to install the screws in the order of the
number marked on the Fin.
1. If replacing with a new system board, update the DMI information as
described in Chapter 3, Tests and Diagnostics. Also update with the
latest BIOS and EC/KBC as described in Appendix G, BIOS Rewrite
Procedures, and Appendix H, EC/KBC Rewrite Procedures.
2. When replacing the system board with a new one, the ProductKey
(MBR-DPK) must be written on the system board.
3. When removing/installing the system board, do not handle with the
handling prohibition area.

Table of Contents

Other manuals for dynabook PORTEGE X40-J Series

Questions and Answers:

Question and Answer IconNeed help?

Do you have a question about the dynabook PORTEGE X40-J Series and is the answer not in the manual?

dynabook PORTEGE X40-J Series Specifications

General IconGeneral
GraphicsIntel Iris Xe Graphics
WirelessWi-Fi 6 (802.11ax), Bluetooth 5.1
ProcessorUp to 11th Gen Intel® Core™ i7 Processors
Display14.0" FHD (1920 x 1080) Anti-glare
RAMUp to 32GB DDR4
StorageUp to 1TB PCIe SSD
Operating SystemWindows 10 Pro
WeightApprox. 1.05 kg
SecurityFingerprint Reader, TPM 2.0
Ports2 x Thunderbolt 4, 1 x USB 3.2, HDMI, microSD card slot

Related product manuals