EasyManuals Logo

dynabook PORTEGE X40-J Series Maintenance Manual

dynabook PORTEGE X40-J Series
155 pages
To Next Page IconTo Next Page
To Previous Page IconTo Previous Page
Page #87 background imageLoading...
Page #87 background image
Maintenance Manual (960-942) 4-14
Replacement Procedures
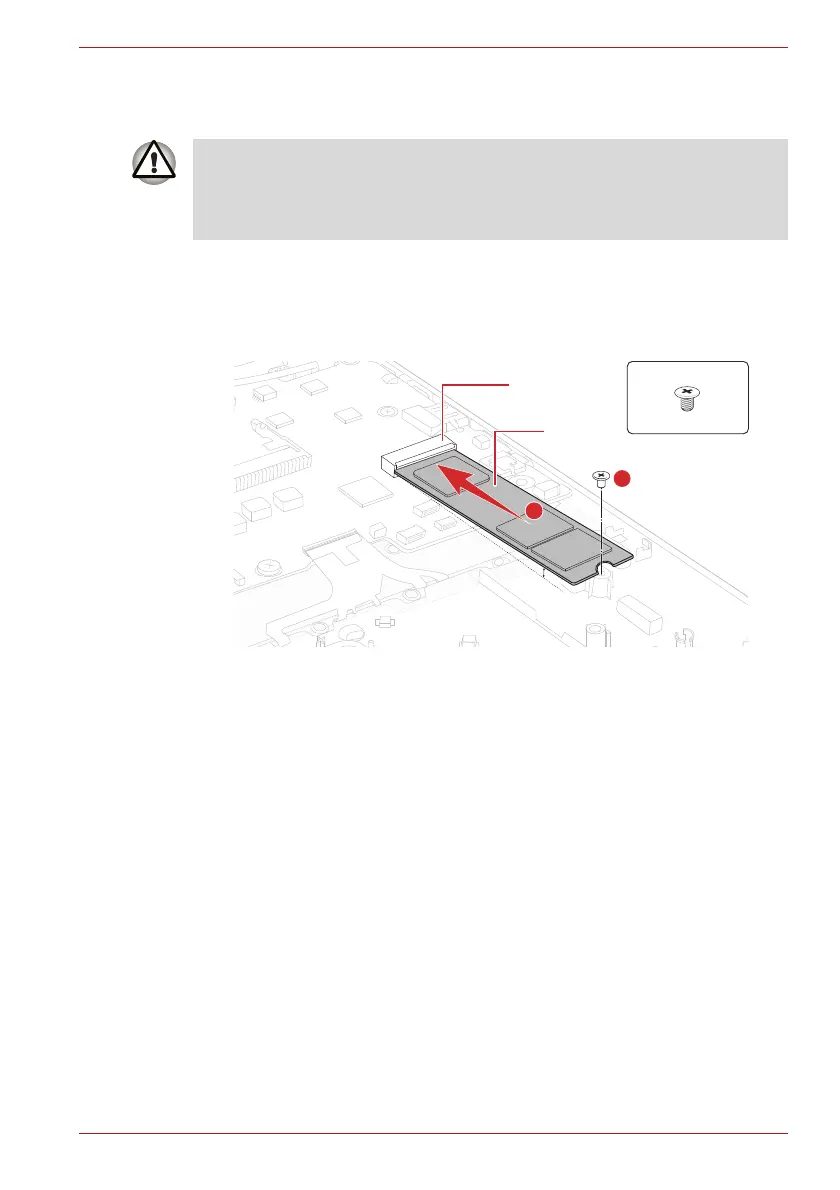
4.13.2 Installing the SSD
To install the SSD, follow the steps below and refer to Figure 4-10.
1. Insert the SSD to the connector CN1900 on the System Board
(FSAPSY*) slantwise.
2. Push down the SSD and secure it with the screw.
Figure 4-10 Installing the SSD
4.14 Smart Card slot
4.14.1 Removing the Smart Card slot
To remove the Smart Card slot unit, follow the steps below and refer to
Figure 4-11 to Figure 4-13.
1. Disconnect the FPC (FSAPYN*) from the connector CN9602 on the
SYSTEM board and CN9801 on the USB board.
To avoid damage, always hold the SSD only by its sides.
To prevent the SSD from being distorted when installing the SSD pack into
the computer, do not press the center of the SSD pack. Always hold the
SSD pack by its sides.
0~15
S2x3.5BT
CN1900
SSD
1
2

Table of Contents

Other manuals for dynabook PORTEGE X40-J Series

Questions and Answers:

Question and Answer IconNeed help?

Do you have a question about the dynabook PORTEGE X40-J Series and is the answer not in the manual?

dynabook PORTEGE X40-J Series Specifications

General IconGeneral
GraphicsIntel Iris Xe Graphics
WirelessWi-Fi 6 (802.11ax), Bluetooth 5.1
ProcessorUp to 11th Gen Intel® Core™ i7 Processors
Display14.0" FHD (1920 x 1080) Anti-glare
RAMUp to 32GB DDR4
StorageUp to 1TB PCIe SSD
Operating SystemWindows 10 Pro
WeightApprox. 1.05 kg
SecurityFingerprint Reader, TPM 2.0
Ports2 x Thunderbolt 4, 1 x USB 3.2, HDMI, microSD card slot

Related product manuals