EasyManuals Logo

dynabook PORTEGE X40-J Series Maintenance Manual

dynabook PORTEGE X40-J Series
155 pages
To Next Page IconTo Next Page
To Previous Page IconTo Previous Page
Page #97 background imageLoading...
Page #97 background image
Maintenance Manual (960-942) 4-24
Replacement Procedures
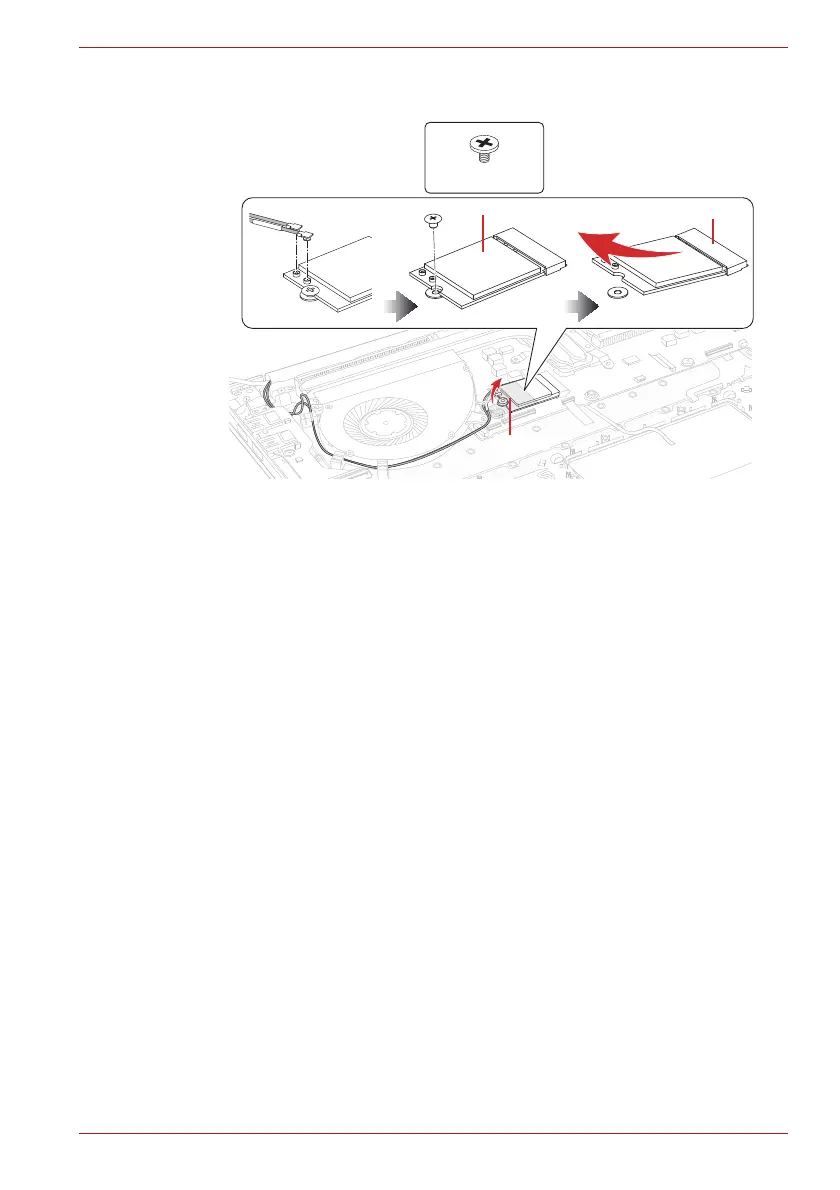
Figure 4-28 Removing the Wireless LAN card
4.17.2 Installing the Wireless LAN card
To install the Wireless LAN card, follow the steps below.
1. Insert the Wireless LAN card to the connector CN2630 on the System
Board (FSAPSY*) slantwise and press it to connect firmly.
2. Push down the Wireless LAN card and secure it with the screw.
3. Arrange the Wireless LAN antenna cables and Camera harness to
the guides as below.
4. Connect the Camera harness to the connector CN9540 on the system
board.
5. Connect the Wireless LAN antenna cables to the connectors (black
cable to “AUX” or “1” and black cable with white cover to “Main” or “2”)
on the Wireless LAN card.
S2 x 2.3CT
INSU WL
AUX (1)
Main (2)
WLAN Card
CN2630

Table of Contents

Other manuals for dynabook PORTEGE X40-J Series

Questions and Answers:

Question and Answer IconNeed help?

Do you have a question about the dynabook PORTEGE X40-J Series and is the answer not in the manual?

dynabook PORTEGE X40-J Series Specifications

General IconGeneral
GraphicsIntel Iris Xe Graphics
WirelessWi-Fi 6 (802.11ax), Bluetooth 5.1
ProcessorUp to 11th Gen Intel® Core™ i7 Processors
Display14.0" FHD (1920 x 1080) Anti-glare
RAMUp to 32GB DDR4
StorageUp to 1TB PCIe SSD
Operating SystemWindows 10 Pro
WeightApprox. 1.05 kg
SecurityFingerprint Reader, TPM 2.0
Ports2 x Thunderbolt 4, 1 x USB 3.2, HDMI, microSD card slot

Related product manuals