EasyManuals Logo

dynabook PORTEGE X40-J Series Maintenance Manual

dynabook PORTEGE X40-J Series
155 pages
To Next Page IconTo Next Page
To Previous Page IconTo Previous Page
Page #86 background imageLoading...
Page #86 background image
Maintenance Manual (960-942) 4-13
Replacement Procedures
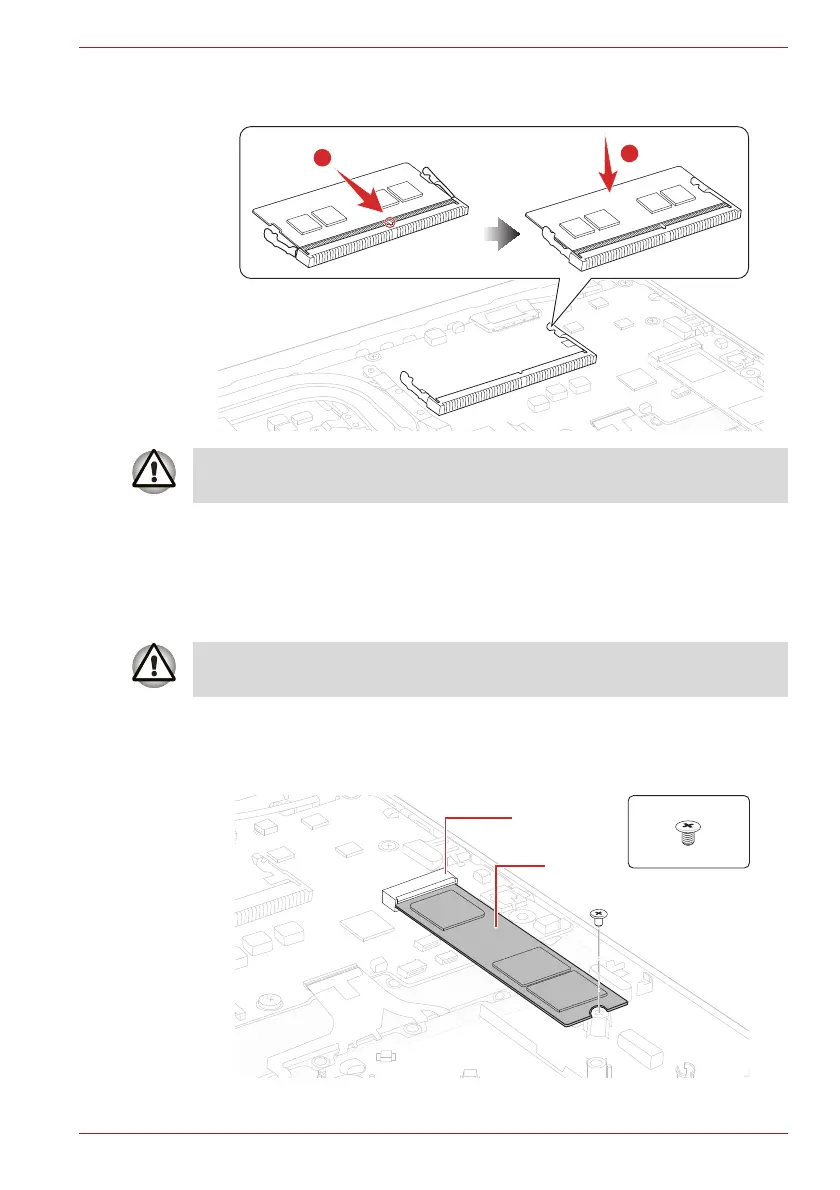
Figure 4-8 Seating the memory module
4.13 SSD
4.13.1 Removing the SSD
To remove the SSD, follow the steps below and refer to Figure 4-9.
1. Remove the the following screw and disconnect the SSD from the
connector CN1900 on the SYSTEM board.
Figure 4-9 Removing the SSD
2
1
After installing the memory module, make sure that the memory module is
secured with the left and right latches.
Take care not to press on the top or bottom of a SSD. Pressure may cause
the data loss or damage to the device.
S2x3.5BT
CN1900
SSD

Table of Contents

Other manuals for dynabook PORTEGE X40-J Series

Questions and Answers:

Question and Answer IconNeed help?

Do you have a question about the dynabook PORTEGE X40-J Series and is the answer not in the manual?

dynabook PORTEGE X40-J Series Specifications

General IconGeneral
GraphicsIntel Iris Xe Graphics
WirelessWi-Fi 6 (802.11ax), Bluetooth 5.1
ProcessorUp to 11th Gen Intel® Core™ i7 Processors
Display14.0" FHD (1920 x 1080) Anti-glare
RAMUp to 32GB DDR4
StorageUp to 1TB PCIe SSD
Operating SystemWindows 10 Pro
WeightApprox. 1.05 kg
SecurityFingerprint Reader, TPM 2.0
Ports2 x Thunderbolt 4, 1 x USB 3.2, HDMI, microSD card slot

Related product manuals