Maintenance Manual (960-942) 4-31
Replacement Procedures
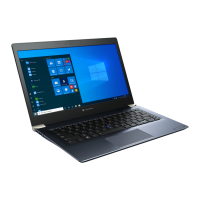
Figure 4-36 Removing the system board (3)
4.21.2 Installing the System board
To install the system board, follow the steps below and refer to Figure 4-34
to Figure 4-37.
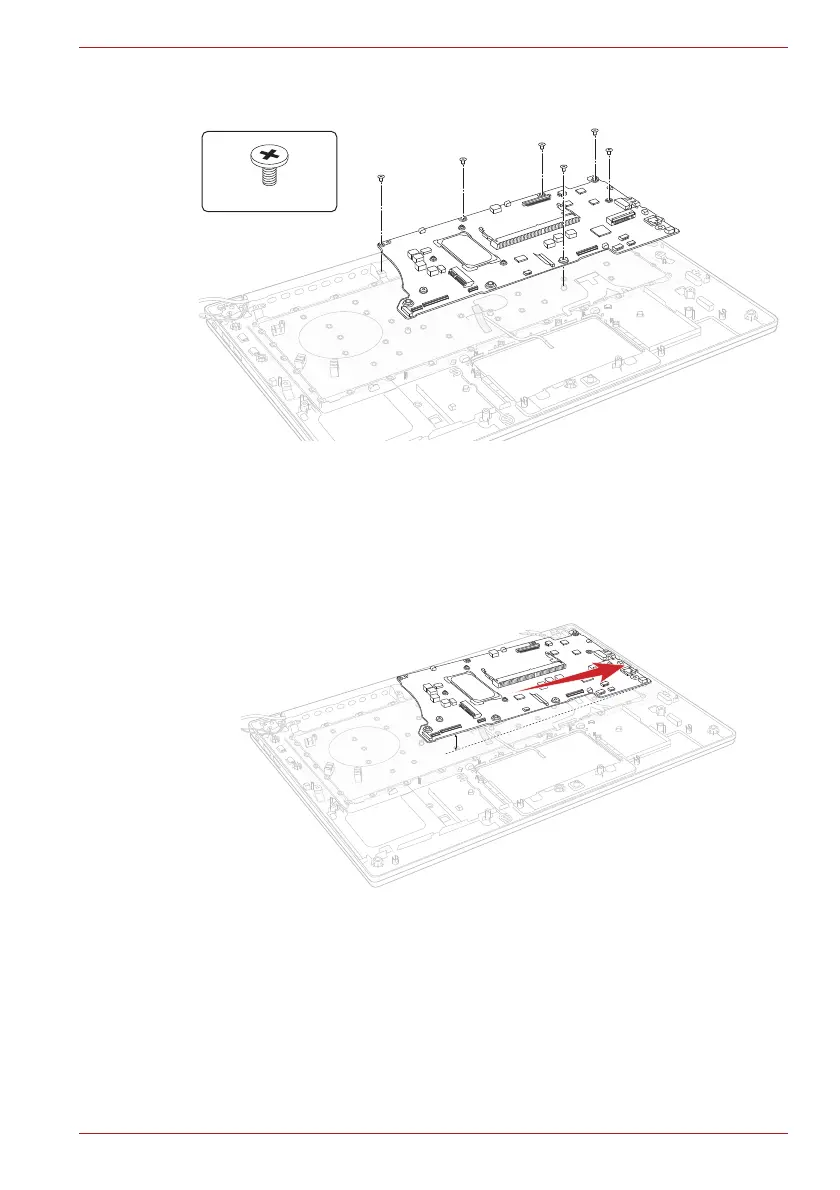
1. Set the system board in place.
Figure 4-37 Installing the system board
2. Secure the system board with the screws.
3. Connect the LCD harness to the connector CN5390 on the System
Board (FSAPSY*) and arrange the harness to the guide on the Cover
Assembly.
4. Connect the Keyboard FPC to the connector CN3260 and Keyboard
Backlight harness to the connector CN3240 on the System Board
(FSAPSY*).
S2 x 3CT
 Loading...