Maintenance Manual (960-942) 4-10
Replacement Procedures
4.10.2 Installing the Base Assembly
To install the Base Assembly, follow the steps below and refer to Figure 4-3
to Figure 4-5.
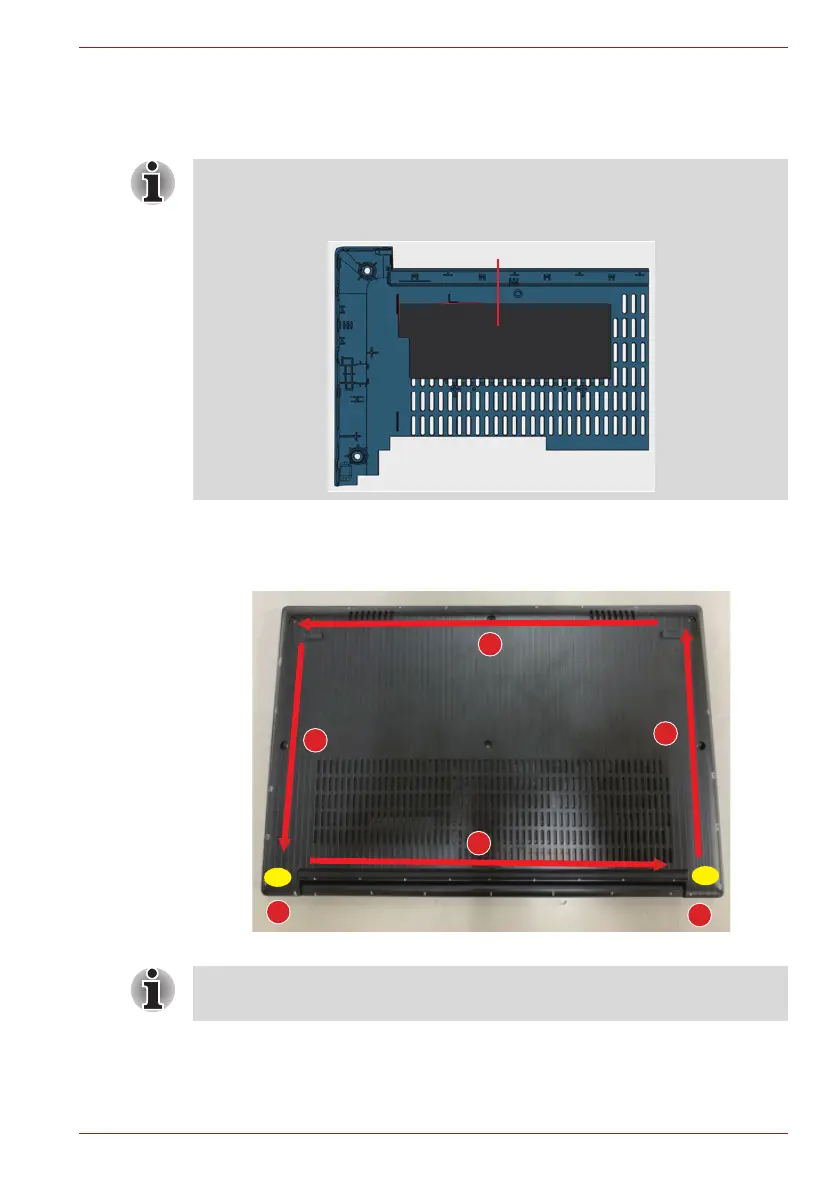
1. Set the Cover Assembly on the Base Assembly while securing the
latches.
Figure 4-5 Installing the Base Assembly
2. Secure the Cover Assembly and Base Assembly with the screws.
3. Turn the computer, and open the display.
For models with 0GB/4GB/8GB/16GB memory module installed:
■ When replacing the Base Assembly with a new one, stick a new INSU
BASE MEM on the new Base Assembly in place.
When securing the Base Assembly, be sure to drive the screws in the
order of the number on Figure 4-3.

 Loading...