EasyManuals Logo

dynabook PORTEGE X40-J Series Maintenance Manual

dynabook PORTEGE X40-J Series
155 pages
To Next Page IconTo Next Page
To Previous Page IconTo Previous Page
Page #89 background imageLoading...
Page #89 background image
Maintenance Manual (960-942) 4-16
Replacement Procedures
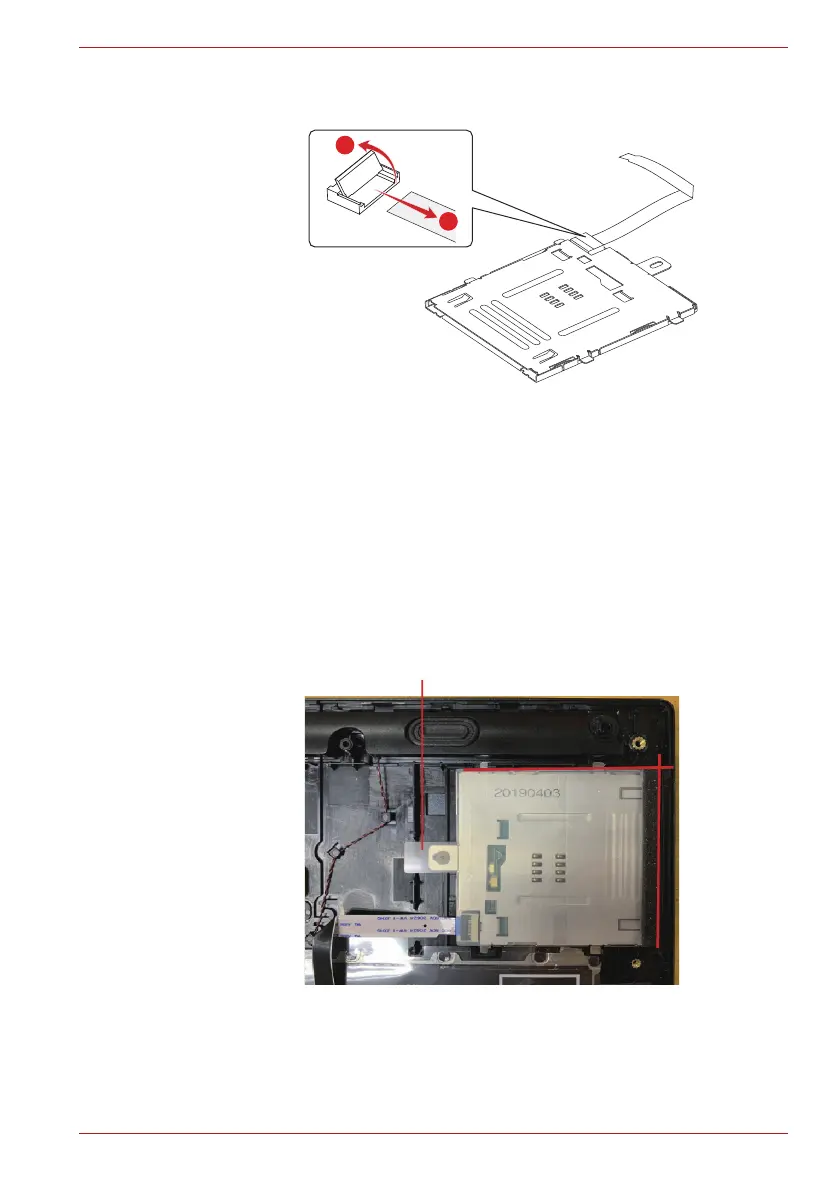
Figure 4-13 Removing the Smart Card slot (3)
4.14.2 Installing the Smart Card slot
To install the Smart Card slot, follow the steps below and refer to Figure 4-
11 to Figure 4-14.
1. Connect the Smart Card FFC to the connector on the Smart Card slot.
2. Set the Smart Card slot in place and secure it the with the screw.
3. Connect the Smart Card FFC to the connector CN2170 on the system
board.
4. Stick the INSU SC in place.
Figure 4-14 Installing the Smart Card slot
5. Connect the FPC (FSAPYN*) to the connector CN9602 on the
SYSTEM board and CN9801 on the USB board.
2
1
INSU SC

Table of Contents

Other manuals for dynabook PORTEGE X40-J Series

Questions and Answers:

Question and Answer IconNeed help?

Do you have a question about the dynabook PORTEGE X40-J Series and is the answer not in the manual?

dynabook PORTEGE X40-J Series Specifications

General IconGeneral
GraphicsIntel Iris Xe Graphics
WirelessWi-Fi 6 (802.11ax), Bluetooth 5.1
ProcessorUp to 11th Gen Intel® Core™ i7 Processors
Display14.0" FHD (1920 x 1080) Anti-glare
RAMUp to 32GB DDR4
StorageUp to 1TB PCIe SSD
Operating SystemWindows 10 Pro
WeightApprox. 1.05 kg
SecurityFingerprint Reader, TPM 2.0
Ports2 x Thunderbolt 4, 1 x USB 3.2, HDMI, microSD card slot

Related product manuals