4-2
EV1000 Clinical Platform NI Quick Start
7 Wrap the Pressure Controller Band around the patient’s
wrist and attach the Pressure Controller to the band.
Either wrist can be used however the non-dominant arm
is preferred.
ClearSight Finger Cuff
Heart Reference Sensor
Pressure Controller
Pressure Controller Band
8 Select the proper size ClearSight Finger Cuff by using the
ClearSight Finger Cuff Sizing Aid.
9 Place the middle phalanx of the patient’s finger onto the
cuff and gently lead the cuff cable in between two fingers
to the back side of the hand. The cuff must be lined up
between the first and second knuckles.
10 Line the finger up between the two green lines on the cuff.
11 Wrap the ClearSight Finger Cuff tightly around the finger.
Do not rotate the ClearSight Finger Cuff after application.
Proper cuff placement is essential for accurate
monitoring. Always take enough time to select correct cuff
size and properly apply the ClearSight Finger Cuff. See
Chapter 7: Methodology and Monitoring and cuff direc-
tions for use for detailed instructions. For accumulated
monitoring lasting longer than 8 hours, a second cuff must
be used on an additional finger.
12 Connect the ClearSight Finger Cuff to the Pressure
Controller.
13 Connect the Heart Reference Sensor (HRS) to the
Pressure Controller.
14 Zero the HRS before attaching it to the patient.
Zero and Apply Heart Reference Sensor
(HRS)
1 Touch the Clinical Actions button.
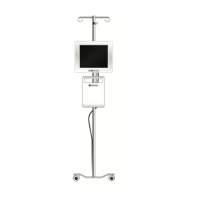
Figure 4-2 Patient Data Entry Screen
WARNING
Make sure that Demo Mode is not activated in a clinical
setting to ensure that simulated data is not mistaken for
clinical data.
Figure 4-3 EV1000 Pressure Controller
Attachments
Figure 4-4 ClearSight Finger Cuff Placement
WARNING
Do not apply ClearSight Finger Cuff(s) on a hand/finger
when external constriction (that may prevent circulation
to the hand/finger) is present.
CAUTION
Improper ClearSight Finger Cuff placement or sizing
can lead to inaccurate monitoring.