7-6
Methodology and Monitoring
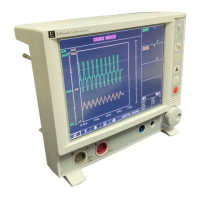
3 Touch Zero & Waveform.
4 Vertically align both ends of the HRS (see top
image in Figure 7-7 ) and touch the zero button.
5 Wait for indication that the HRS has been zeroed.
6 Apply the heart end of the HRS to the patient at phlebo-
static axis level by using an HRS body pad or clip. See
Figure 7-7 .
If the patient is rotated or moved, the phlebostatic axis
will rotate or move with the patient. If necessary, be sure to
reapply the heart end of the HRS to ensure that it is still at
the same vertical level as the heart in the patient’s new
position.
7 Attach the other end of the HRS to the ClearSight Finger
Cuff.
8 Touch the Start Monitoring button to begin
monitoring.
During measurement, the tip of the finger being
monitored by the cuff may show some coloring. This is
normal and will disappear within a few minutes of cuff
removal.
During measurement, a conscious patient may notice slight
pulsations in the finger to which the cuff is applied. These
pulsations will stop momentarily during Physiocals. The
patient should be made aware that these irregularities are
normal and not caused by the patient’s heart.
If the patient is responsive, instruct the patient to keep the
hand relaxed and not tense the muscles or overstretch the
hand.
Make sure that the blood flow to the hand is not (partially)
obstructed, e.g. because the wrist is pressing on a hard
surface.
Some situations, such as cold hands, may make it difficult to
start monitoring. If the patient has cold hands, try to warm
the hand.
9 Touch the Home button to navigate to the
monitoring screens. See “Monitor Views” on
page 5-2.
Figure 7-6 Zero & Waveform Screen
Figure 7-7 Alignment of HRS