EV1000 Clinical Platform NI Quick Start
4-3
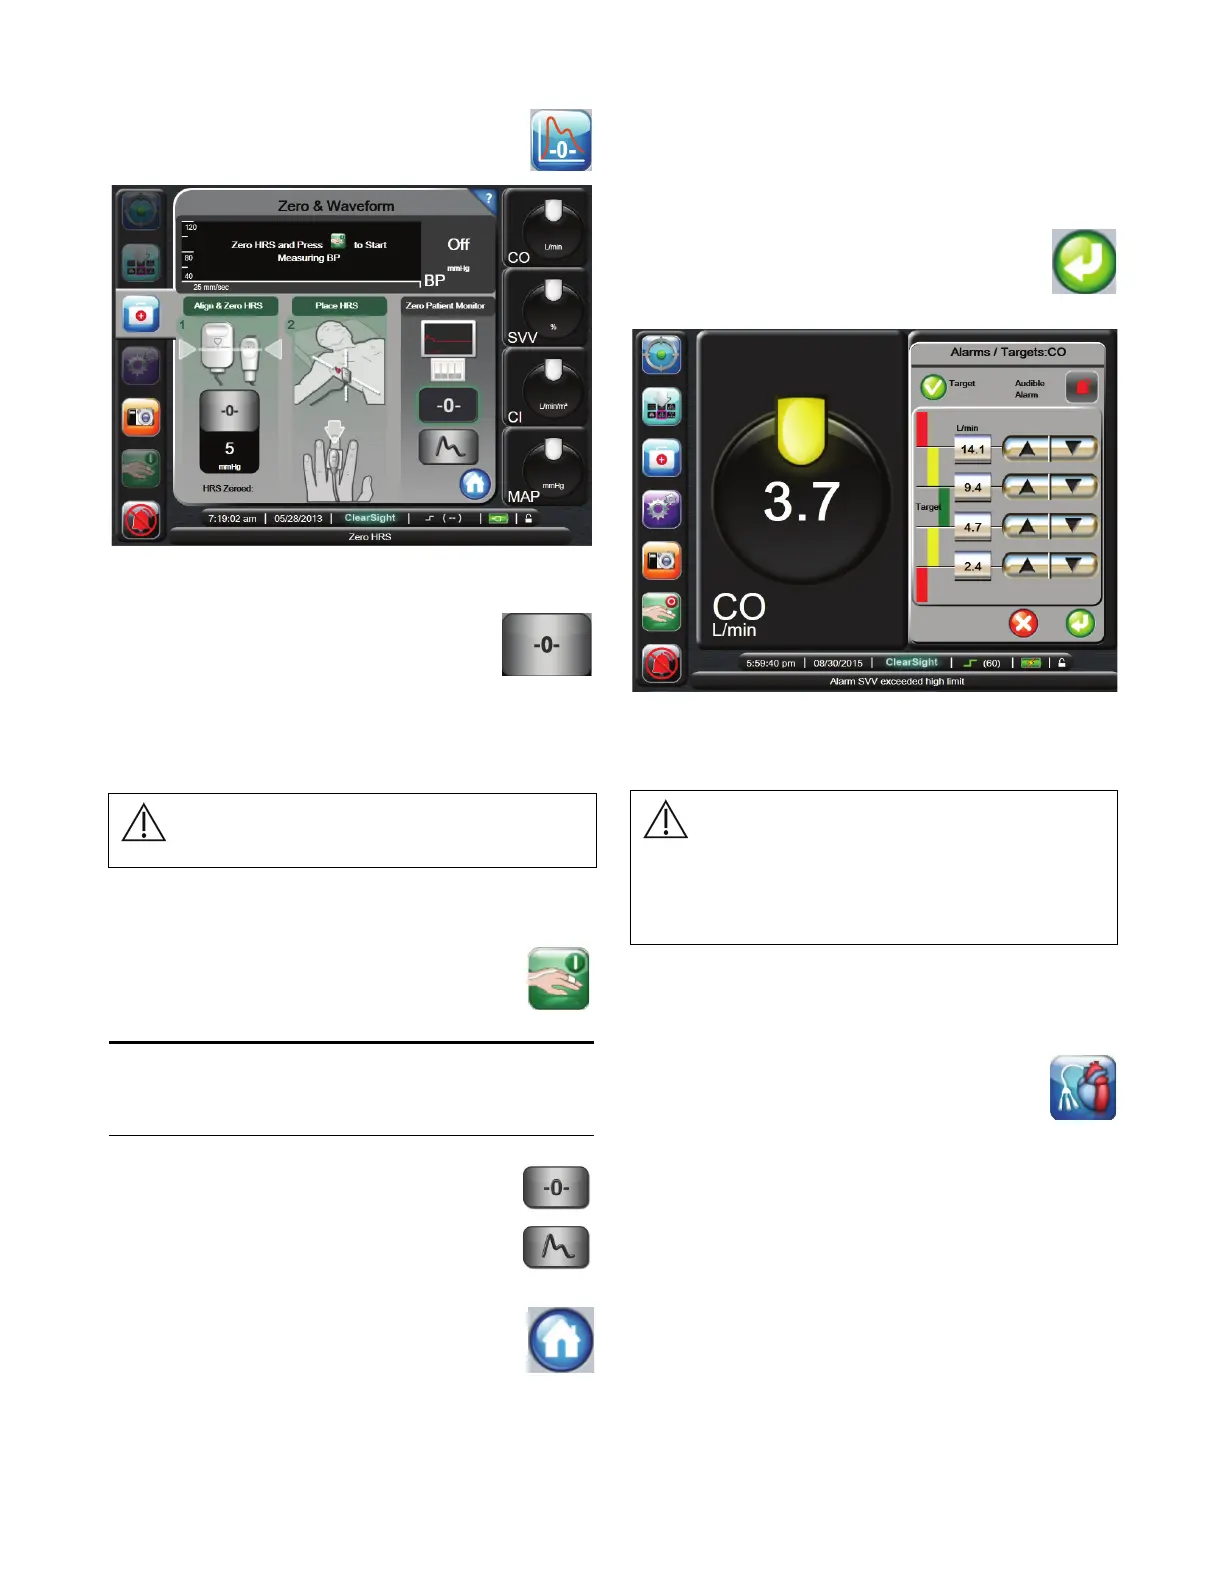
2 Touch Zero & Waveform.
3 Vertically align the two ends of the HRS and
touch the Zero button.
4 Keep the HRS ends vertically aligned until
the Zeroing procedure has ended.
5 Attach the heart end of the HRS to the patient at the
phlebostatic axis by using an HRS body pad or clip.
6 Attach the other end of the HRS to a single ClearSight
Finger Cuff.
7 Touch the Start Monitoring button to initiate
monitoring.
Steps 8-9 are Optional for waveform output to Patient
Monitor. For more information on this connection See
Chapter 7: Output Signal to Patient Monitor on page 7-8
8 Touch the Zero button of the Pressure Output
Selection and then zero the patient monitor.
9 Touch the Signal button of the Pressure
Output Selection to begin pressure signal
output.
10 Touch the Home button to begin parameter
monitoring.
Alarms and Targets
1 To change alarms and targets, touch inside the globe and
use the arrows or buttons to adjust the upper and lower
alarm limits.
2 Touch the Enter button.
Central Venous Pressure Manual Entry
(For SVR and SVRI calculations)
Touch the CVP entry button on the Clinical
Actions menu to enter a CVP value.
Figure 4-5 Zero HRS
CAUTION
Make sure that the HRS is correctly applied so that it
can be leveled to the phlebostatic axis.
Figure 4-6 Set Alarms and Targets
WARNING
Physiological visual and audible physiological alarms
are activated only if the parameter is selected and
displayed on the screens as a key parameter (1-4
parameters). If a parameter is not selected and
displayed as a key parameter, the audible physiological
alarms are silenced.