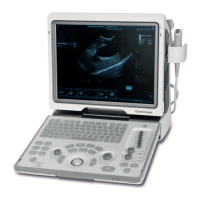
12-20 Probes and Biopsy
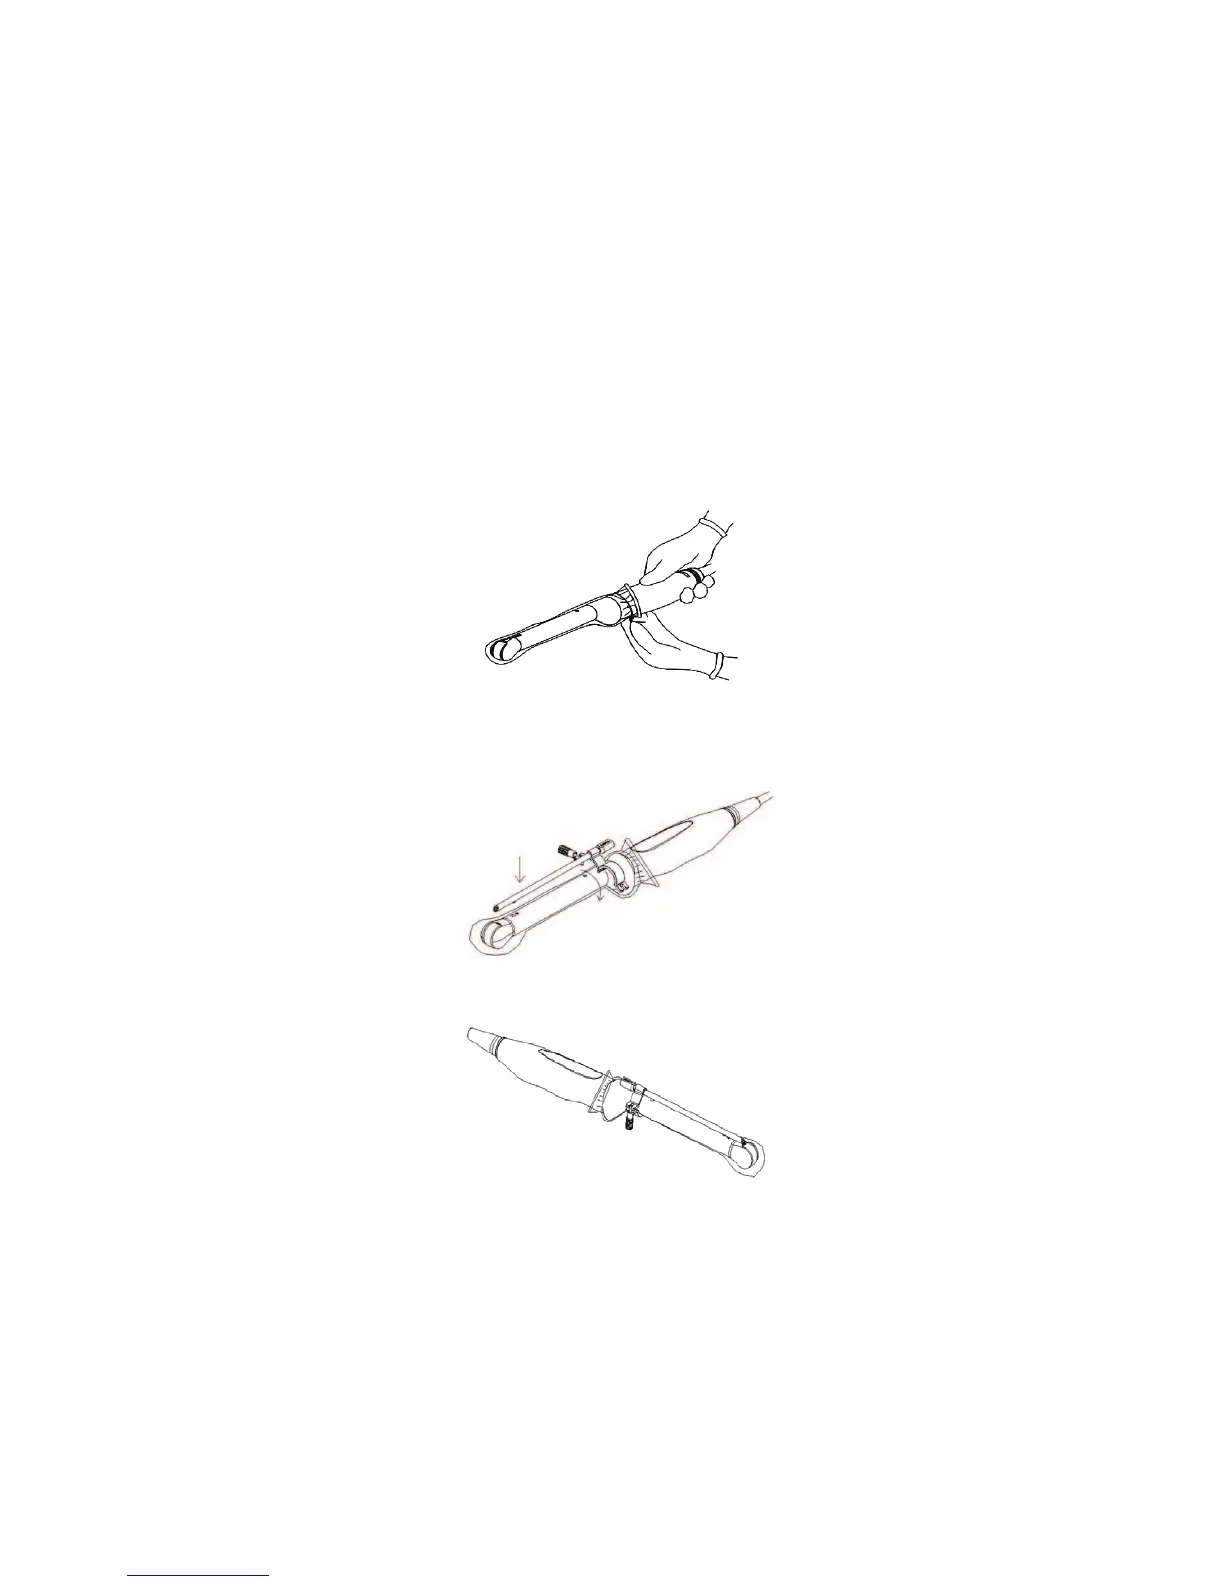
2. Inosculate the locating groove on the clamp with the two raised edges on the
transducer head and aligning the locating pit of the clamp to the convex point on the
transducer head.
3. Turn the grip knob at the tail of the needle-guided bracket tightly.
NGB-002
1. Put on the sterile transducer sheath.
2. Inosculate the locating groove on the clamp with the two raised edges on the transducer
head and aligning the locating pit of the clamp to the convex point on the transducer head.
3. Turn the grip knob at the tail of the needle-guided bracket tightly.
NGB-004˖
1. Put on the sterile probe sheath.
2. Open the retaining clamp, align the needle-guided bracket with the transducer to locate
the locating bulge on the needle guide to the locating grooves on the transducer, and
then turn the retaining clamp to match it with the transducer.
3. When the retaining clamp is turned to the right position, the locking nut will lock the
retaining clamp and the needle-guided bracket is then mounted to the right position.
NBG-005
1. Put on the sterile transducer sheath.
2. Inosculate the locating groove on the clamp with the two raised edges on the transducer
head and aligning the locating pit of the clamp to the convex point on the transducer head.
3. Turn the grip knob at the tail of the needle-guided bracket tightly.
NGB-007
z Metal
1) Put on the sterile transducer sheath.