23
GB
Installation
Air/Flue gas system
Installation Instructions - coaxial -
Installation
)LWWLQJWKHÀXHV\VWHPWRWKHDSSOLDQ-
ce must be carried out by a compe-
tent person in accordance with these
installation instructions
General
t Store material inside.
Fill out chimney label (when supplied)
and place it near boiler adaptor.
t Pipes must be installed free of
tension.
t 3D\DWWHQWLRQWRWKHÀXHGLUHFWLRQ
The sockets must be pointing to
the terminal.
t Don’t install the chimney on in-
ÀDPPDEOHRUZRRGHQZDOO
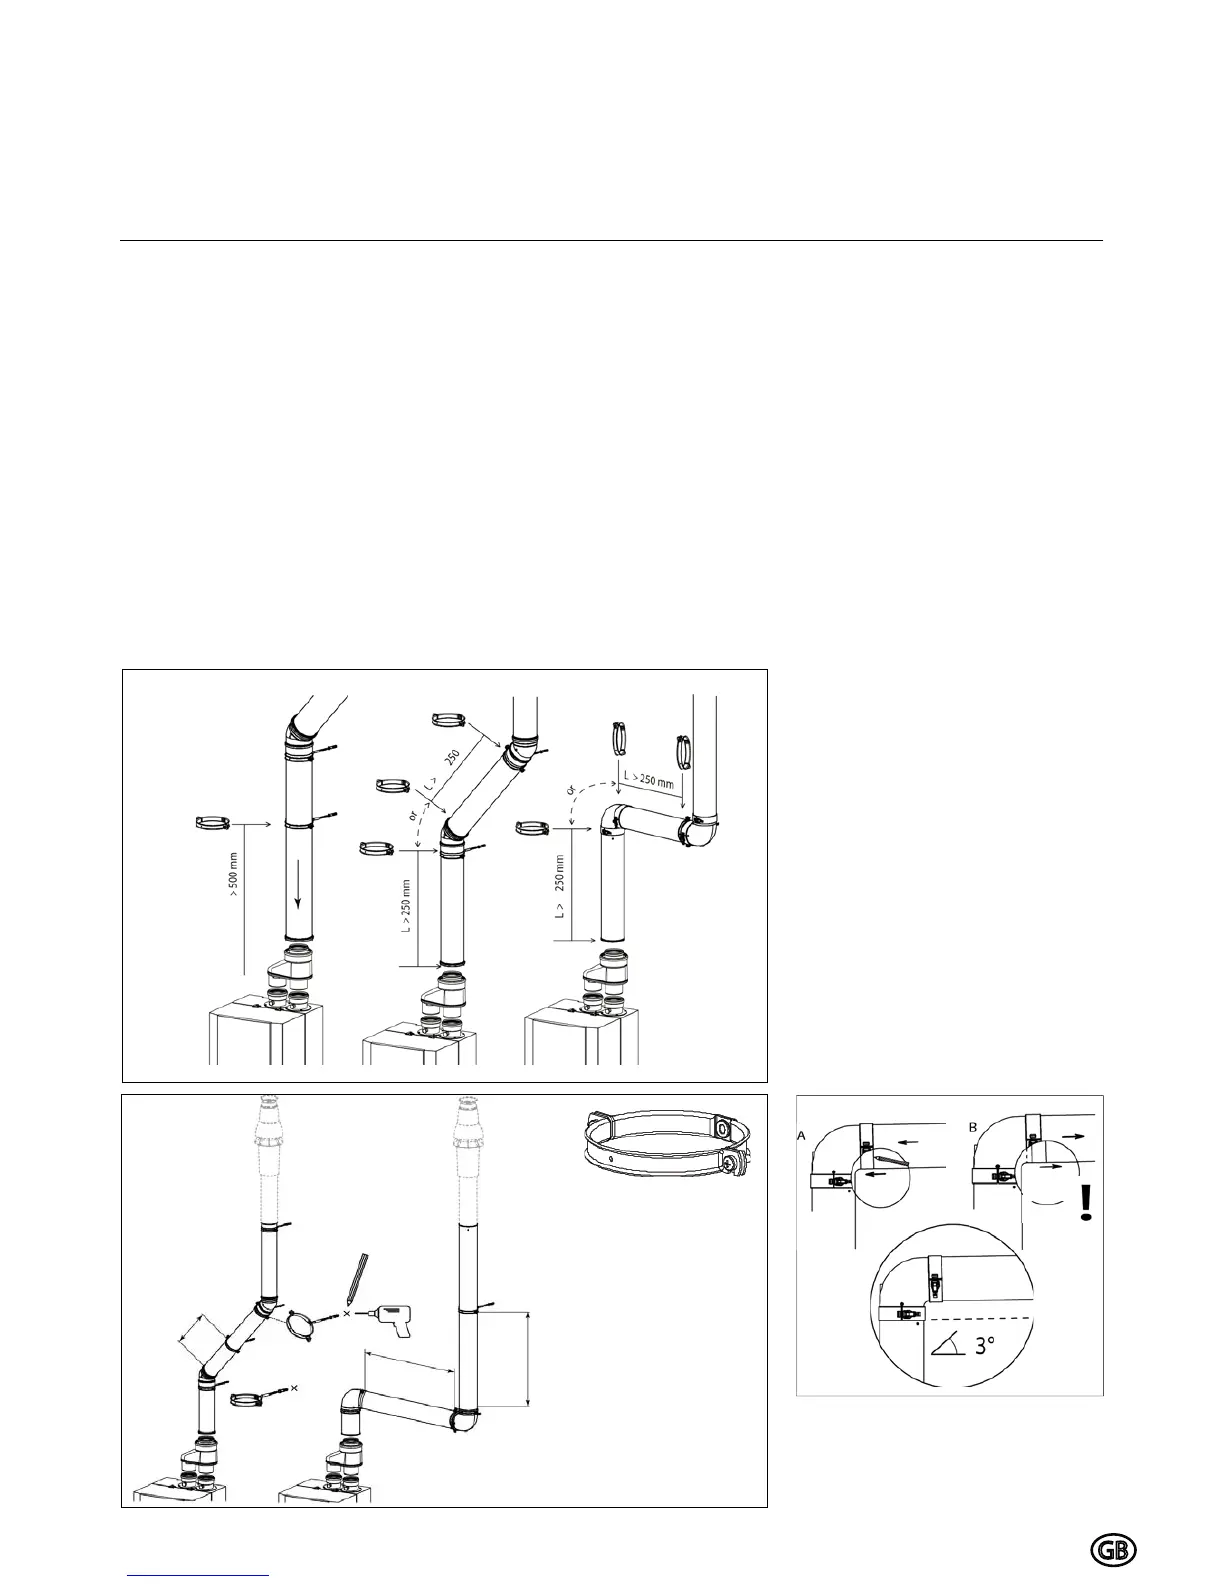
$VVHPEO\ÀXHJDVV\VWHP
Starting to assemble the pipes from
the boiler.
Assemble the pipes by turning and
pushing them till the bottom of the
seat.
127( 8VH RQO\ ZDWHU DV OXEULFDQW
Pipes bends
When using bends, the maximum
SHUPLVVLEOHOHQJWKRIÀXHJDVV\VWHP
can be deducted from the table on
page 21.
3LSHH[WHQVLRQVPXVWEH¿[HGWRWKH
wall using support clips. Use one
clamp for each extension directly be-
side the sleeve. Fit another clamp to
the extension after each 90° bend.
Important
,QVWDOORQO\RXWVLGHEXLOGLQJVRQXQÀD-
mable wall
Cleaning
Outside can be cleaned with a wet
towel or with some detergent.
Max 1 meter
Max 2 meters
Cutting the pipe
t Take out the inner tube by turning
it until it releases from its position
t Cut just as much from the air in-
WDNHSDUWDVIURPWKHÀXHJDVSDUW
t take off the burrs from the cutting
edge to prevent cutting the seals
t Re assembles the pipes
8-15 mm
Max 1 meter
Clamp
,QVWDOOWHQVLRQIUHH