Section 1 - Tutorial
The following
steps
will take
you
through
the process of selecting a 4 Source Config Preset,
which
is
the
type
of
Config
Preset you'll
want
to
use
when
working
with
four independent
input
signals
(such as
the
four aux.
sends
from a mixing board):
1.
Tum
the DP / 4
power
switch on.
2 Press
the
Config
button
.
3.
Using
the
Data
Entry
Knob, scroll to either Config Preset #59 "4 Src: Stereo
Out"
(if
you're
using
four
separate
mono
effects sends,
but
returning
to a single stereo effect
return
bus), or
Config
Preset
#60 "4 Src: 4
Mono
Out"
(if
you're
using
four separate effects sends
and
returning
to
four
independent
[mono] effect
return
busses). The Config Preset location
number
will
appear
in
the LED
Numeric
Display,
with
the description appearing
in
the two-
line LCD
display
to the right. As
soon
as
you
begin to scroll,
you
will notice
that
the LED
above the
Select
button
begins to flash. This indicates
that
the Config Preset
you
see
displayed
is
not
yet
selected,
and
you
must
press the Select
button
to activate it.
4.
Press the Select
button
to activate
the
Config Preset.
5. After
you've
selected a Config Preset,
the
DP
/ 4 automatically takes
you
to Unit A (the LED
for Unit A is lit).
For a
more
in-depth
discussion
on
Config Presets,
and
a thorough explanation of all of the
parameters
associated
with
Config Presets, see
Section
3 -
Config
Parameters
.
Setting Levels
8
After
you've
selected the
proper
Config Preset for
your
setup, the next thing you'll
need
to
do
is
set
your
input
and
output
levels. These levels affect the volume of audio signal going into
and
coming
out
of
the
DP
/4,
and
are controlled
by
the
two
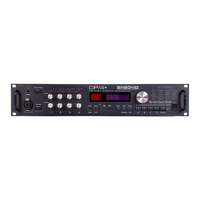
rows of four knobs on the left side of the
front panel. The
top
row
controls
the
input
levels for Inputs 1-4, the bottom row controls the
output
levels for
Outputs
1-4. Separate controls exist within the DP / 4 for setting
the
Mix
and
Volume of the
individual
units (See Simple Editing later
in
this section).
To
set
the
input
level(s):
1.
With
your
connections
made,
send
a signal into the DP / 4
and
slowly
tum
the corresponding
Input
Knob clockwise. The
green
LED above
that
Input
Knob will begin flashing as
soon
as
signal is detected.
2
Continue
turning
the knob clockwise
until
the
red
LED above the
Input
Knob begins to flash.
This
red
LED starts to flash
when
the
peak
level is reached, indicating that clipping is
about
to
begin.
3.
Tum
the
Input
Knob
back
down
(counterclockwise) just
enough
so that the
red
LED
no
longer flashes. You
have
now
attained
the
optimum
input
signal level.
4. Repeat this process for
any
additional
inputs
you
have connected.
ENSONIQ DP/4 Musician's Manual

 Loading...