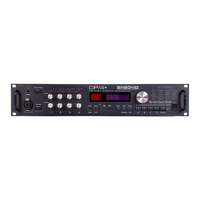
Section 1 - Tutorial
To
set
the
output
level(s):
1.
With
your
connections
made
and
the
input
level
properly
set,
send
a
signal
into
the
DP
/
4.
2
If
set to Config Preset #59 "4 Src: Stereo
Out,"
slowly
turn
Output
Knobs 1
and
2 clockwise.
You
should
begin
to
hear
signal
coming
through
the
DP
/ 4
into
your
amplifier,
mixer,
etc.
3.
If
set to Config
Preset
#60 "4 Src: 4
Mono
Out,"
slowly
turn
each
corresponding
Output
Knob
clockwise. You
should
begin
to
hear
signal
coming
through
the
DP
/ 4
into
your
amplifier,
mixer, etc.
4.
Continue
turning
the
knob(s) clockwise as far as
you
can
until
you
begin
to
hear
distortion
in
the
receiver. To optimize signal-to-noise ratio,
it
is
best
to
set
the
output
levels of
the
DP
/ 4 as
high
as possible
without
distortion,
turning
down
the
receiving
channel
if
necessary
.
5.
Turn
the
Output
Knob(s)
back
down
(counterclockwise)
just
enough
so
that
distortion
is
no
longer
present
.
Selecting a Unit
Because each
unit
is
routed
independently,
you
select a different
algorithm
for
each
unit.
Each
unit
then
processes
one
of
the
four
audio
sources
coming
into
the
DP
/
4.
To
select a unit:
• Press
the
individual
unit
buttons
(A,
B,
C,
or
D). Each
units
yellow
LED
should
light
individuall
y.
Selecting 1 Unit Presets
After
an
individual
unit
has
been
selected
within
a 4 Source Config Preset,
you
can
select
different 1 Unit Presets for
the
selected
unit
.
A 1
Unit
Preset consists
of
an
algorithm
and
discrete settings for
each
of
its
parameters.
The
1
Unit
Preset is the smallest
of
the
preset types
in
the
DP
/ 4,
and
the
basic
building
block
for all
others
(2
Unit, 4 Unit,
and
Config Preset).
To
do
this, after
having
selected
an
individual
unit
within
a 4 Source
Config
Preset as
described
above:
1.
Turn
the
Data
Entry
Knob
to view
the
different 1
Unit
presets
(there
are
50 RAM
and
50
ROM
locations).
The
top
line of
the
display
shows
the
name
of
the
1
Unit
Preset,
while
the
bottom
line
of
the
display
tells
you
the
name
of
the
algorithm
being
used
within
the
1
Unit
Preset. Again, notice
that
the LED above
the
Select
button
begins
to flash as
soon
as
you
begin
turning
the
Data
Entry
Knob,
indicating
that
the
1
Unit
Preset
you
see
displayed
is
not
yet
selected,
and
you
must
press
the
Select
button
to
activate it.
2 Press the Select
button
to activate
the
new
1
Unit
Preset.
3.
Repeat
the
above
process
for each of
the
four
units,
continuing
to
select
various
1
Unit
Presets,
to
get
a
sampling
of
the
variety
of
high-quality
digital effects
that
the
DP
/4
has
to
offer.
ENSONIQ DP/4 Musician's Manual 9

 Loading...