Section 2 - Getting Started
Selecting 1 and 2 Unit Presets in a 3 Source Config
Next,
we
will select a 3
Source
Config:
34
1.
Press Select,
then
press
Config.
2.
Use
the
Data
Entry
Knob
to
choose
Config
Preset
57:
3
dry
Src:Stereo
Out
dry
dry,,*dry
3.
Press
Select
again. This
loads
the
Config Preset,
changing
the
current
Config
type
to 3
Source,
and
loading
all 4 Units
with
the
Dry
(No
Effect) algorithm. The
DP
/4
automatically
takes
you
to
Unit
A.
Now,
press
any
of
the
other
Unit buttons,
B, C,
or
D. Notice
that
the A
and
B LEDs
light
independently
when
you
press
either A
or
B;
however,
C & D
light
together
as a
pair
when
you
press
Cor
D.
This is
because
in
a 3
Source
Config,
the
DP
/4
is
divided
into
3
separate
processors.
Remember!
In a 3 Source Config,
only
1 Unit Presets
can
be
selected
in
Units A
or
B;
and
only
2 Unit Presets
can
be
selected
in
the
paired
Units C & D. The
preset
will
be
loaded
into
whichever
unit
(or pair)
has
its
Unit
LEDs lit.
4.
Press A,
and
rotate
the
Data
Entry
Knob.
Now
you
see
the
100
I-Unit
presets
in
the
DP
/ 4
Memory.
Press
Select
to
load
a
preset
into
A.
5.
Press
B,
and
rotate
the
Data
Entry
Knob.
You
will
see
the
same
100
I-Unit
presets.
Press
Select
to
load
a
preset
into
B.
6.
Press
Cor
D,
and
rotate
the
Data
Entry
Knob.
You
will
see
the
100
2-Unit
presets.
Press
Select
to
load
a
preset
into C & D.
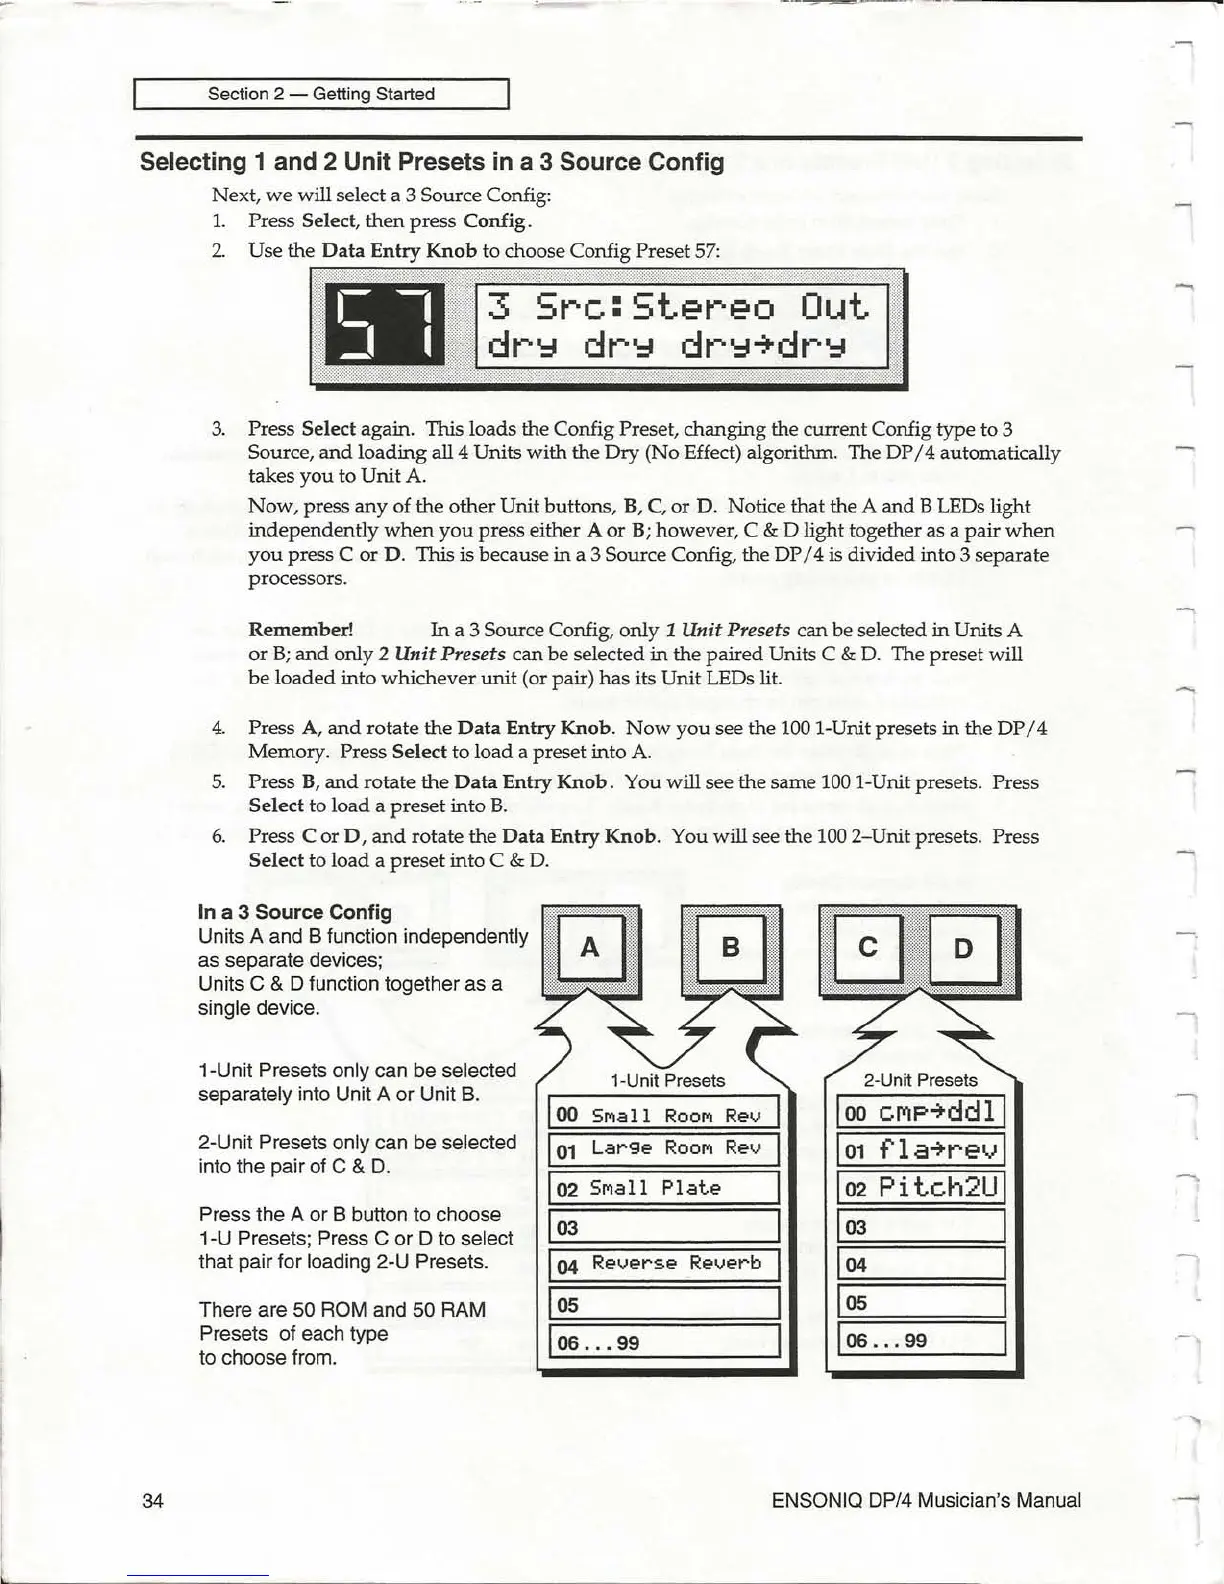
In a 3
Source
Config
Units A and B function independently
as separate devices;
Units
C & D function together as a
single device.
1-Unit Presets only can be selected
separately into Unit A or Unit
B.
2-Unit Presets only can be selected
into the pair of
C &
D.
Press the A or B button to choose
1-U Presets; Press
C or D to select
that pair for loading 2-U Presets.
There are
50 ROM and 50 RAM
Presets of each type
to choose from.
00
SMall
ROOM
Rev
00
cfilP~ddl
01
Large
ROOM
Rev
01
fla~rev
02
SMall
Plate
02
Pilch2U
03
03
04
Reverse
Reverb
04
05
05
06
...
99
06
...
99
ENSONIQ DP/4 Musician's Manual
-
 Loading...


