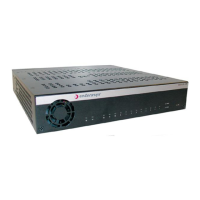
Mounting the Switch
2-4 Installation
Mounting the Switch
ThefollowingmountingoptionsareavailablefortheD2switch.Eachrequiresthatyoupurchasea
separatemountingkit.Proceedtomounttheswitchinyourdesired locationusingoneofthe
proceduresdescribedinthissection:
•Installtheswitchintherackmountkitandmounttheswitchtoa
48.26‐centimeter(19‐inch)
rackorothersecurelocation,asdescribedinInstallingtheSwitchintoaRack.
•Installtheswitchinatablemountkitandmounttheswitchunderatable,asdescribedin
“InstallingtheSwitchUnderaTable”onpage 2‐10 .
•Installtheswitchina
wallmountkitandmounttheswitchonawall,asdescribedin
“InstallingtheSwitchonaWall”onpage 2‐12.
•Installtheswitchinalockboxkitandmounttheswitchonawall,asdescribedin“Installing
theSwitchintheLockboxandMountingonaWall
”onpage 2‐15.
Installing the Switch into a Rack
TheD2switchcanbesingleordual‐mountedinastandardEIA‐310‐Dcompliant48.26‐centimeter
(19‐inch)equipmentrack.Tomountoneortwoswitchesintoarack,youmustfirstinstalleach
switchintoarackmountkitasdescribedinthefollowingprocedure.Youmustprovide
the
mountinghardwaretoattachtheassembledkittotherackrails.
Completethefollowingstepstoinstalloneortwoswitchesintherackmountkit:
1. “PositioningandSecuringOneorTwoSwitches”(page 2‐5)
2. “InstallingOneorMorePowerSupplies”(page 2‐6)
3. “MountingtheAssembledKitInto
aRack”(page 2‐9)
4. “ConnectingPower,Console,andNetworkCables”(page 2‐9)
Caution: Before installing the screws as described in this installation procedure, refer to “Torque
Values” on page A-3.
Precaución: Antes de retirar los tornillos, tal como se describe en las instrucciones de instalación,
consulte “Torque Values” on page A-3.
Note: The D2-PWR-POE is taller than one rack unit high. If you have installed one or more
D2-PWR-POE power supplies in the rack mount kit, ensure that your rack installation location
leaves at least one rack unit of free space above the mounted assembly kit.

 Loading...