Mounting the Switch
2-6 Installation
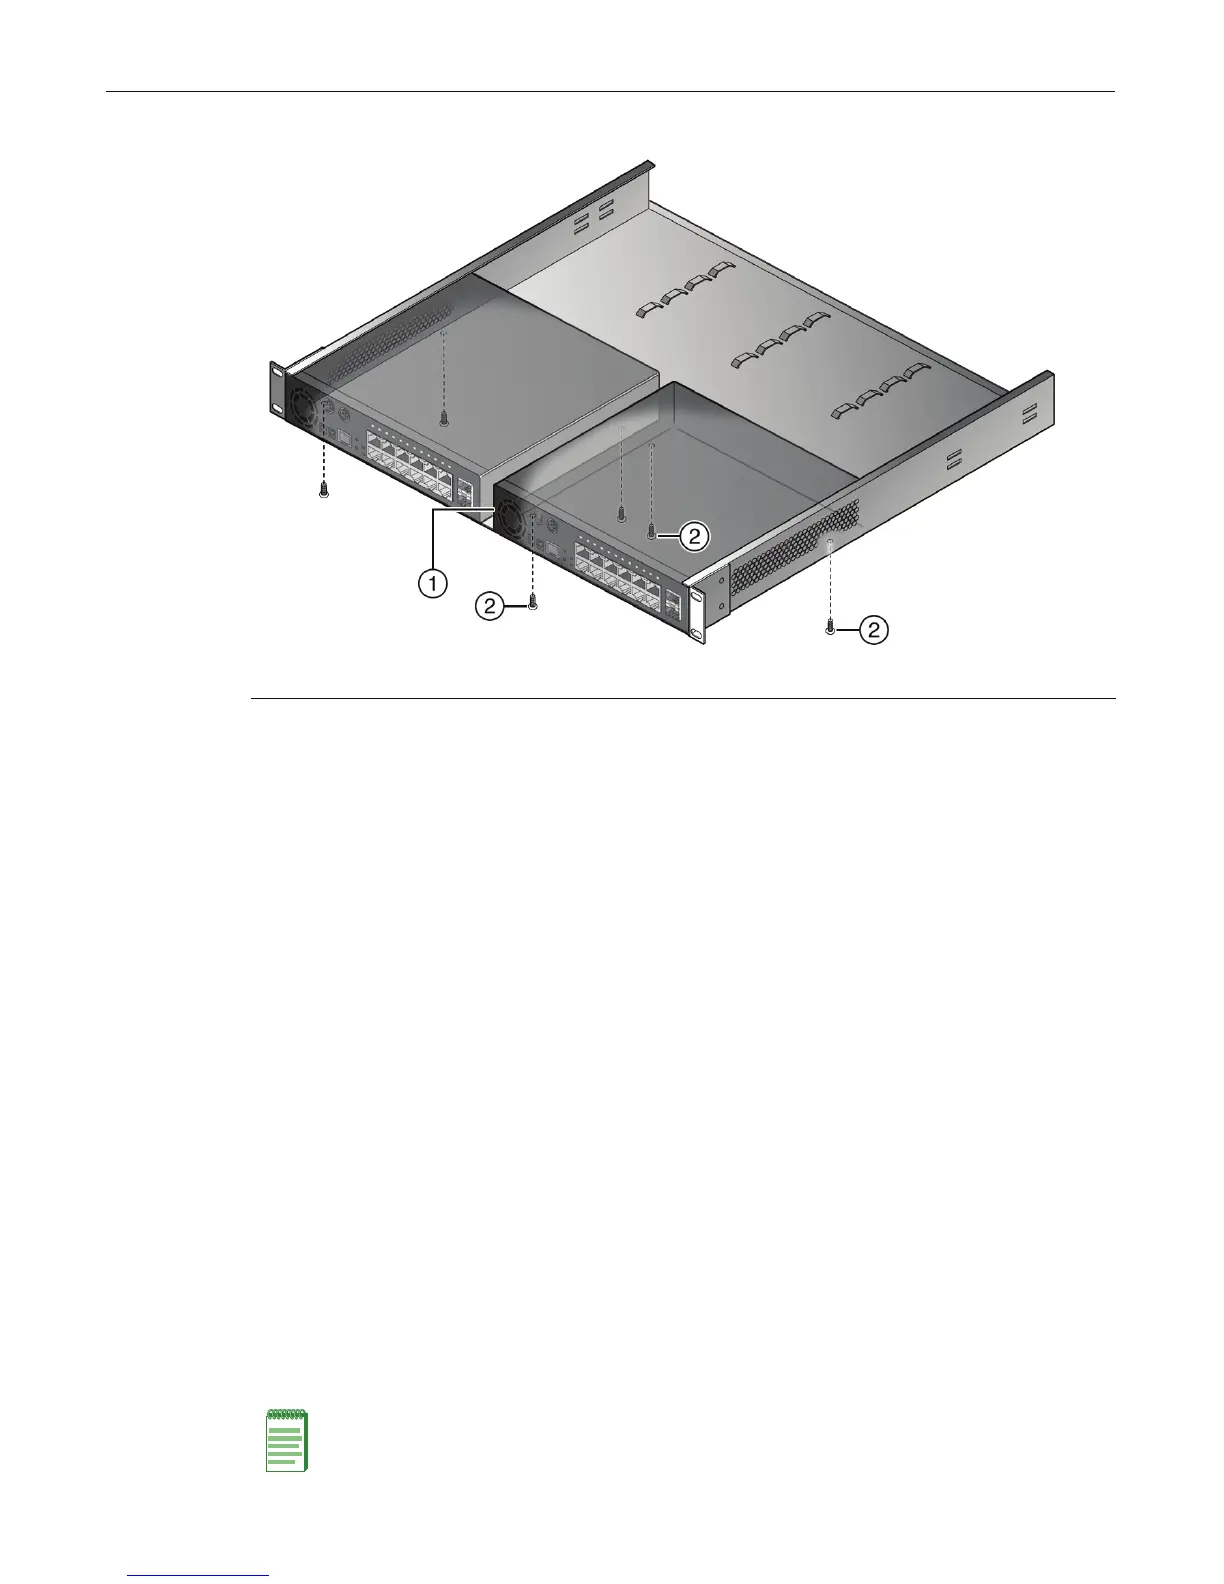
Figure 2-5 Fastening Switch(es) to the Rack Mounting Tray (two D2G124-12Ps shown)
3. Usingthescrewsprovided(threeforeachswitch),fasteneachswitchtotherackmounting
trayasshowninFigure 2‐5.
Installing One or More Power Supplies
TheD2rackmountkitprovidesmountingpositionsforuptofourpowersupplies(uptotwofor
eachmountedswitch).Dependingonwhetheryouhaveoneortwoswitchesintherackmount
kit,andwhetheryouwantoneortwopowersuppliesforeachswitch,themethodyouuse
to
secureeachpowersupplymayvaryslightly.
Chooseoneofthefollowingoptionsforinstallingapowersupplyintherackmountkit:
•“EdgeofTrayInstallation”(page 2‐6)
•“MiddleofTrayInstallation”(page 2 ‐8)
Edge of Tray Installation
Usingoneofthehook&loopstrapsprovided,secureapowersupplytooneoftheedgemounting
positionsontherackmountkitasfollows:
1. ThreadthestrapthroughthemountingtrayasshowninFigure 2‐6onpage 2‐7andaround
onesideofthepowersupplyin
thefollowingorder:
a. Outthroughthefirstmountingholeclosesttothetopofthemountingtray
b. Inthroughthemountingholejustbelowthefirstmountinghole
c. Underthepowersupply
d. Throughtheappropriatebridgeanchor
e. Wraptheendsofthestrapoverthetopofthepowersupplyandfastensecurely.
1 Rear edge of switch 2 Fastening screws (three per switch)
Note: The bridge anchors you use to secure each power supply will depend on the power supply’s
location in the rack mounting tray. Refer to Figure 2-8 on page 2-9 for an illustration showing how to
use all four sets of bridge anchors in staggered fashion to secure four power supplies.