Mounting the Switch
2-14 Installation
5. Usingthehook&loopstrapprovided,threadthestrapthroughthemountingtrayandover
thepowersupplyinthefollowingorder:
a. Upthroughthemountingtraybracketatthesideofthepowersupply
b. Through theopeninginthemountingtrayflange
6. Fastentheendsofthehook&loop
strapsecurelyaroundthepowersupply.RepeatStep 5and
Step 6tosecureasecondpowersupply.
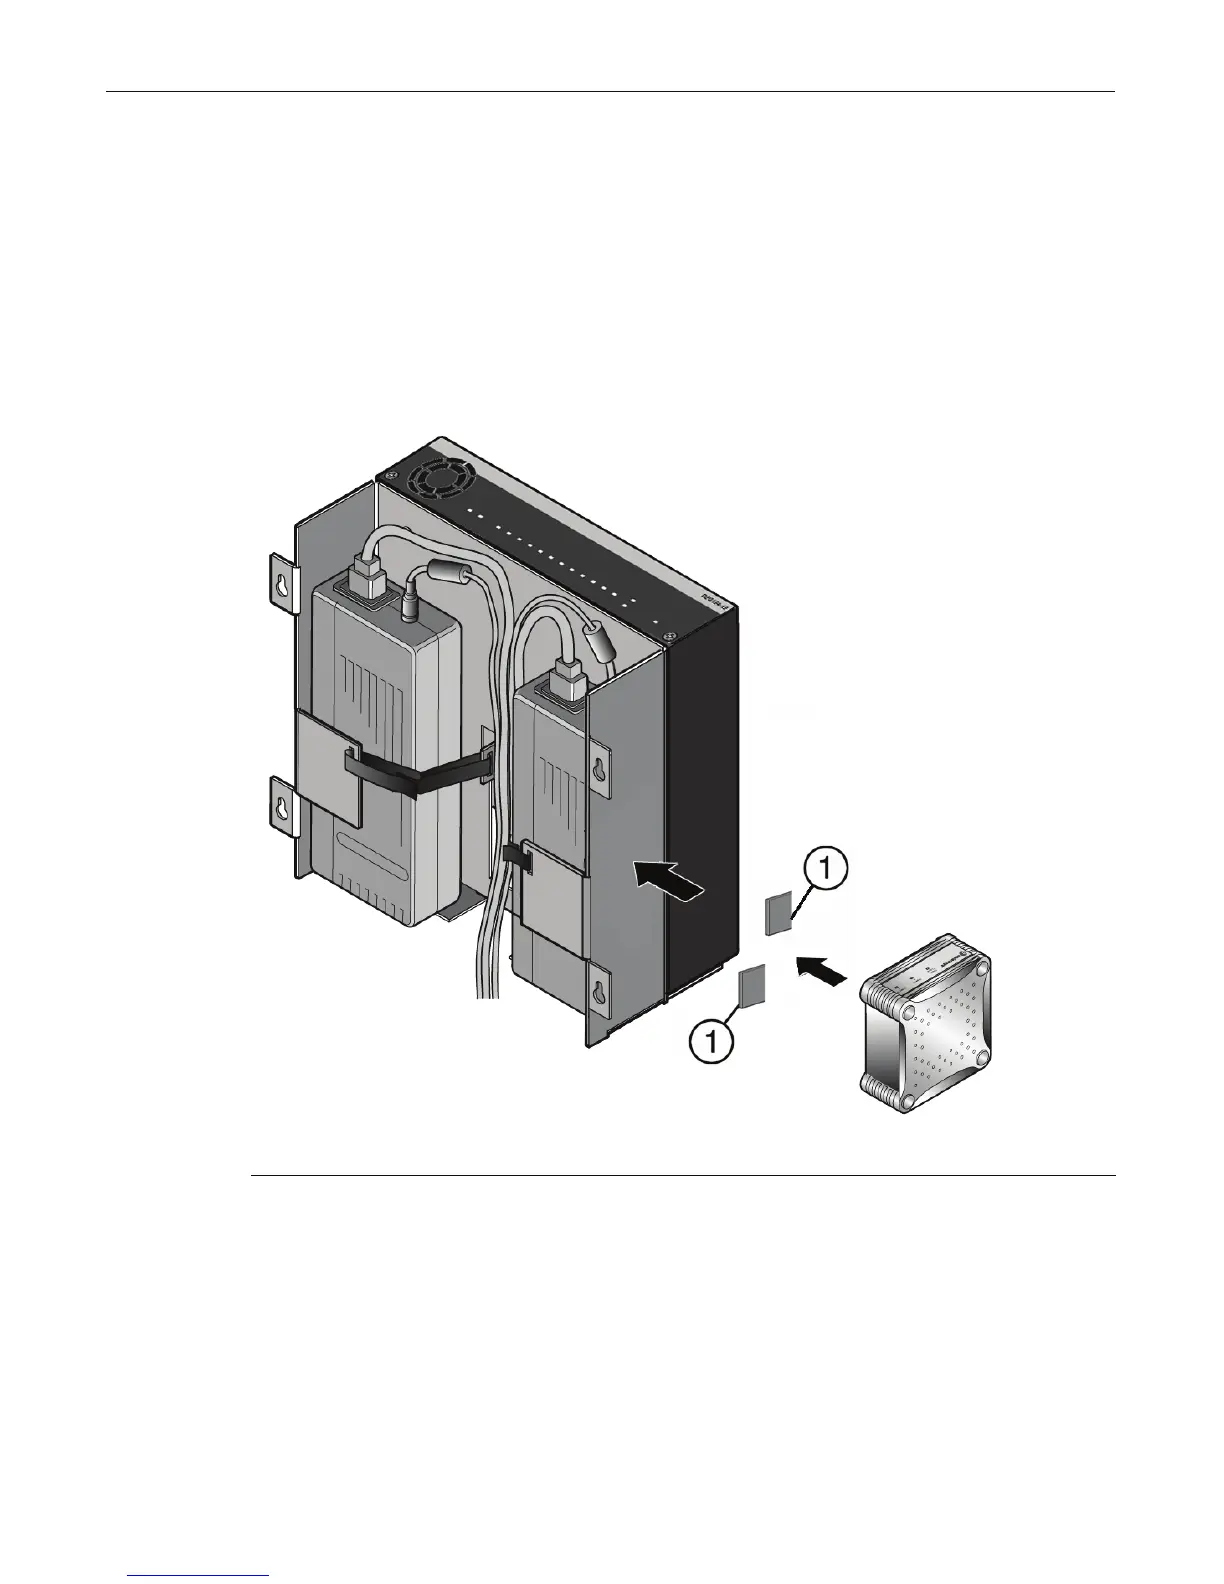
7. (Optional)IfmountingaD2‐HIPWR‐POEtothewallmounting tray,refertoFigure 2‐12and
proceedasfollows:
Figure 2-12 Mounting the D2-HIPWR-POE to the Wall Mounting Tray
‘‘
a. Withthehookandloopsidesattachedtogether,peelbacktheadhesivecoveringonone
sideofeachhook&loopfastenerandapplytooppositecornersonthebottomofthe
D2‐HIPWR‐POE.
b. Oncethehook&loopfastenersareadheredtothebottomoftheD2‐HIPWR‐POE,
remove
theadhesivecoveringontheothersideofbothhook&loopfastenersandadheretothe
tablemountingtray.
c. FirmlypresstheD2‐HIPWR‐POEagainstthetablemountingtrayandholdtogetherfora
fewseconds.
1 Hook & loop fasteners with adhesive