Mounting the Switch
Enterasys D-Series Hardware Installation Guide 2-9
Mounting the Assembled Kit Into a Rack
Oncethekitisfullyassembledwithoneormoreswitchesandpowersupplies,mountittoyour
racklocationasfollows:
1. Ensurethatyouhaveappropriatescrewsforsecuringtheassembledkittoyourracklocation.
Thesefourscrewsarerequiredandarenotprovidedintherackmountkit.
2. Using
appropriatescrewsandthefourscrewholesinthecorneredgesoftherackmounting
tray,attachtheassembledkittoyourdesiredracklocation.Tightensecurely.
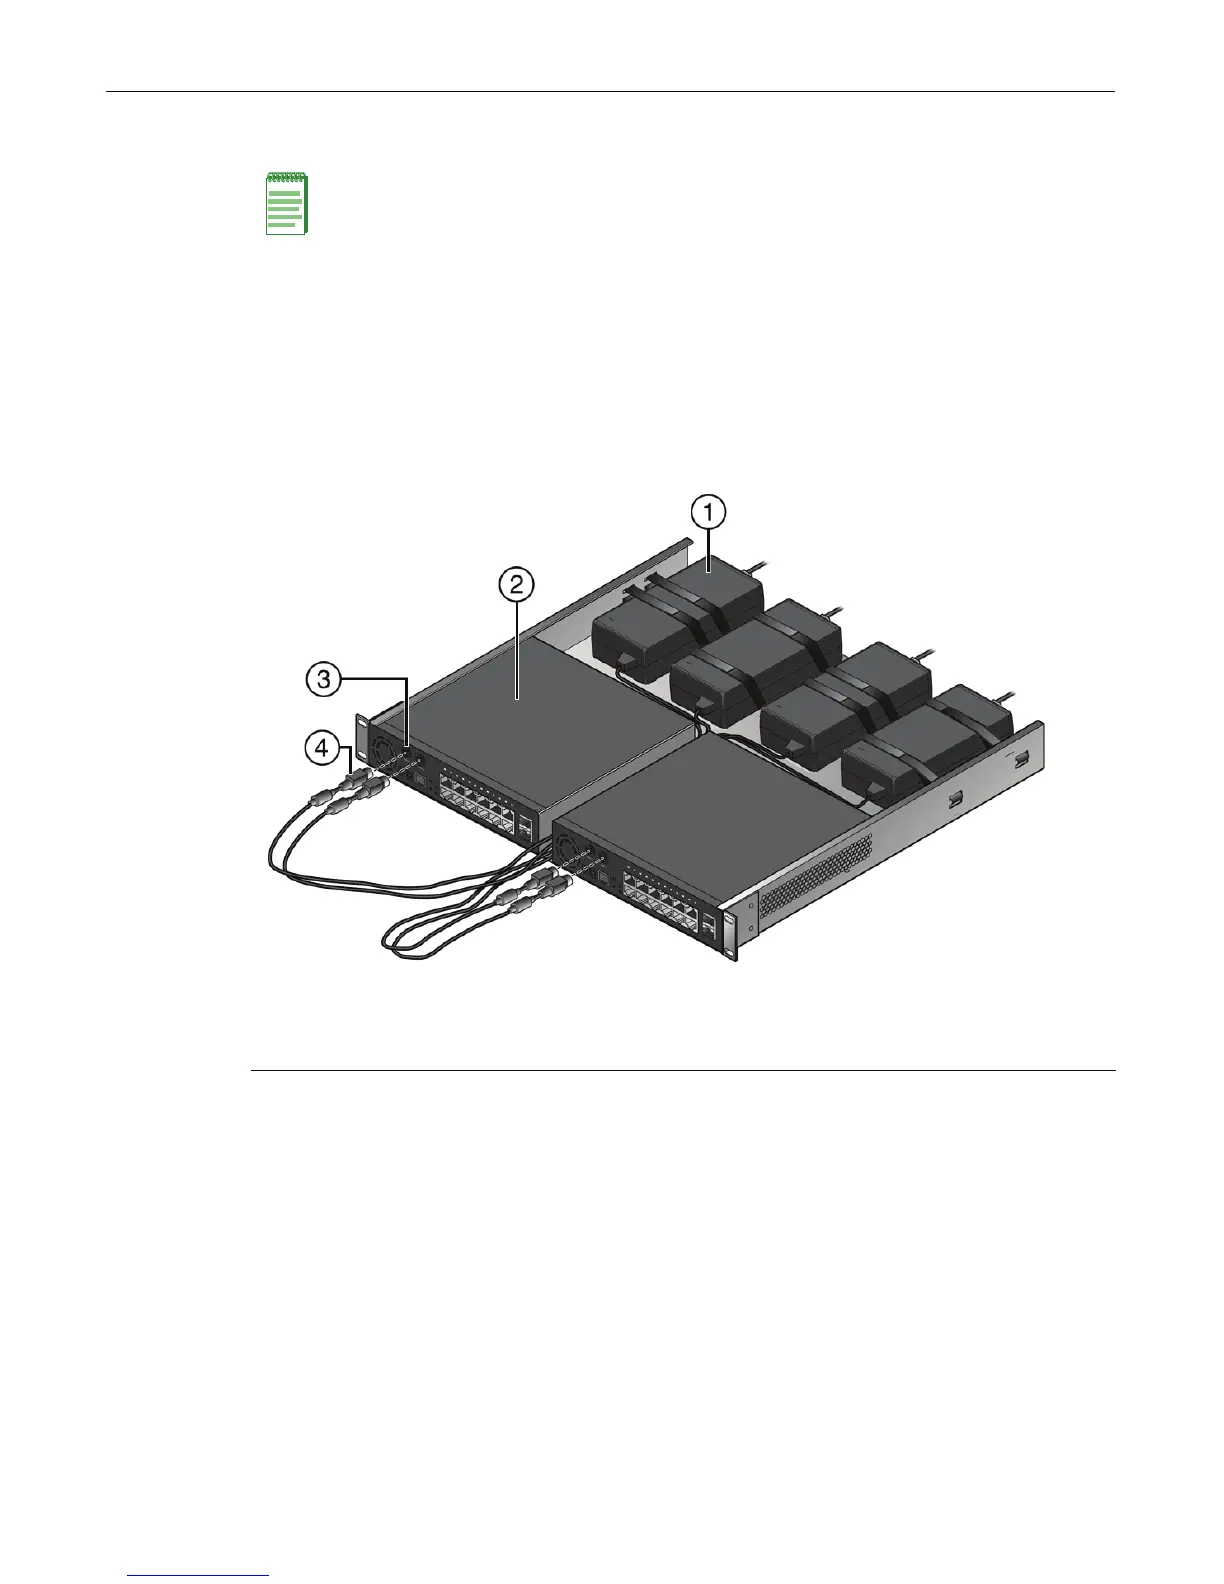
Figure 2-8 Rack Mount Switch Kit with Dual D2124-12Ps and Four D2-POE-PWRs
Connecting Power, Console, and Network Cables
Oncetheassembledrackmountkitisattachedtoyourracklocation,proceedto:
• Connectpowertotheswitch(es)bypluggingeachACpowercordintoadedicated,grounded
ACoutlet.Referto“ConnectingPowertotheSwitch”onpage 2‐26.
• Attachconsolecable(s).Referto“ConnectingtotheConsole
Port”onpage 2‐27formore
information.
• Attachnetworkcables.Referto“ConnectingtotheNetwork”onpage 2‐28formore
information.
Note: The D2-PWR-POE is taller than one rack unit high. If you have installed one or more D2-
PWR-POE power supplies in the rack mount kit, ensure that your rack installation location leaves at
least one rack unit of free space above the mounted assembly kit.
1 Power supply (D2-PWR-POEs shown) 3 PWR1-B and PWR2-B PoE DC power receptacles
2 D2 switch (Dual D2124-12Ps shown) 4 DC power chords