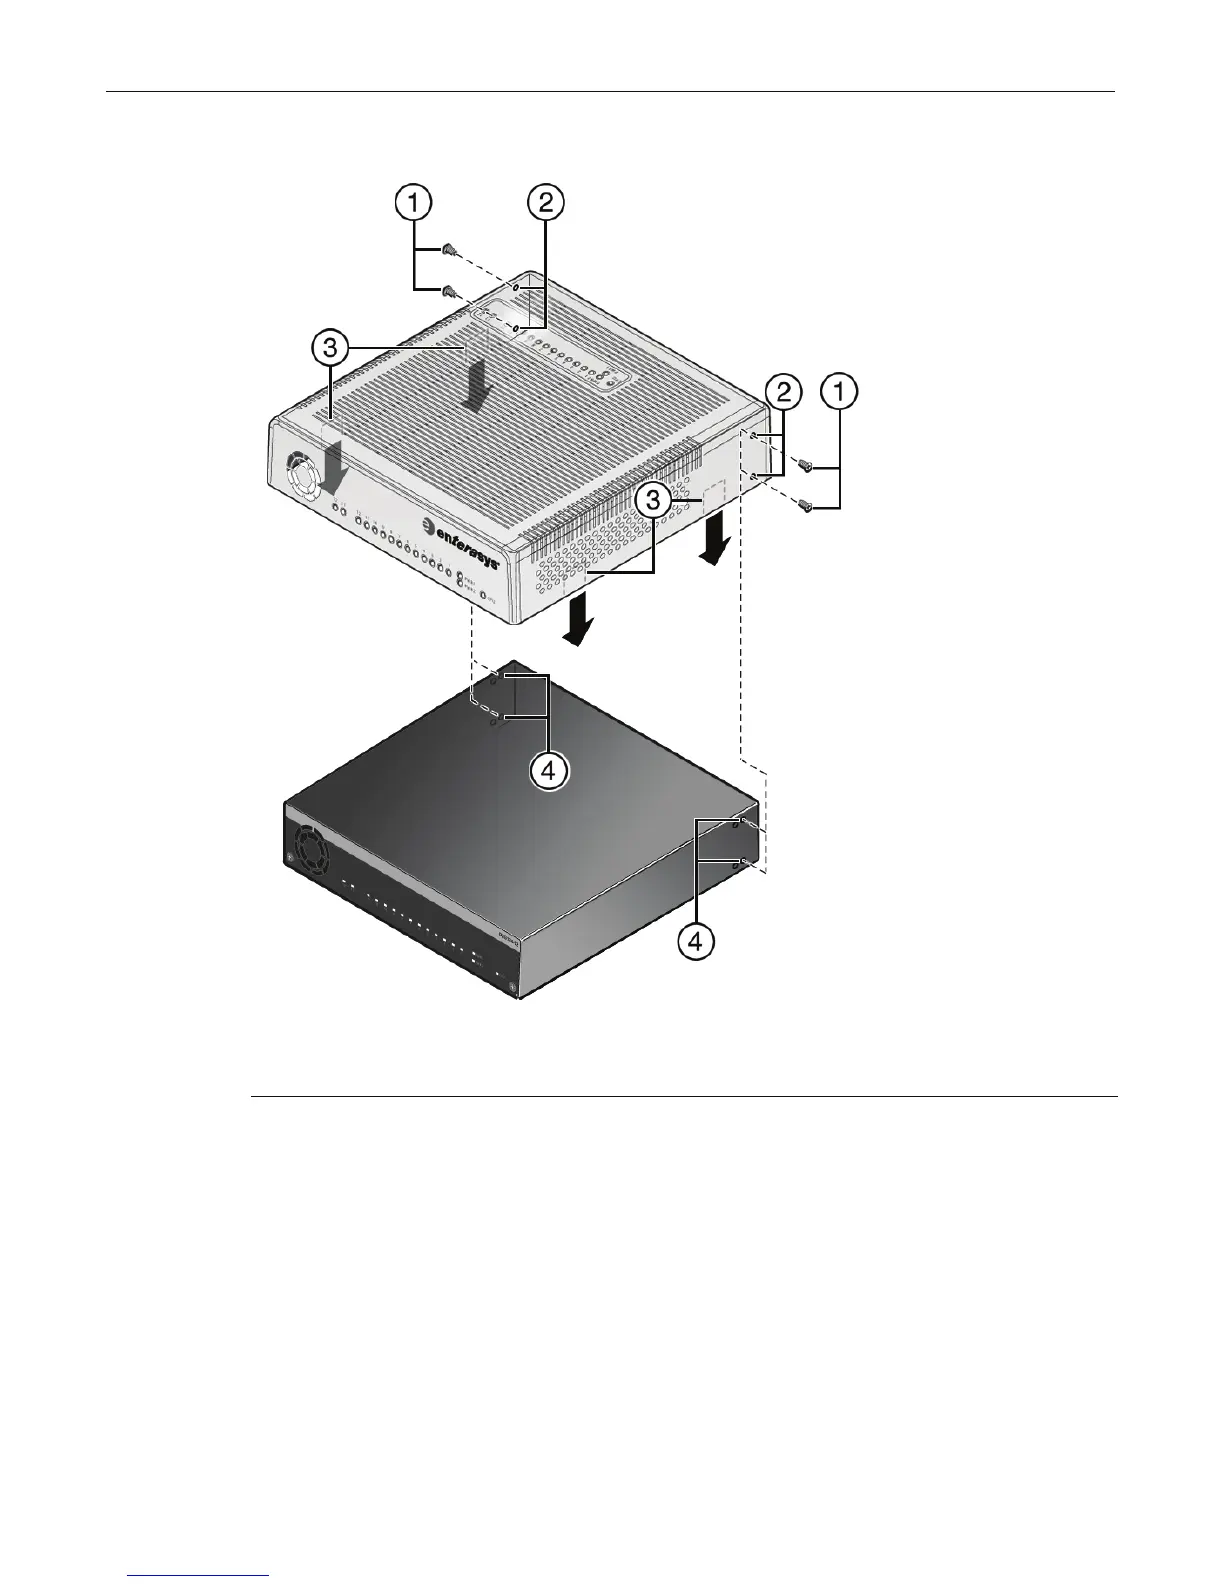
Installing the Optional Plastic Cover
2-34 Installation
Figure 2-27 Installing the Optional Plastic Cover (freestanding switch shown)
Toinstalltheplasticcover:
1. AlignthefanandLEDopeningsonthefrontpaneloftheplasticcoveroverthefrontpanelof
theswitch.
•Iftheswitchisfreestanding,frontpanelLEDswillalignasshowninFigure 2‐27,andthe
openendofthecoverwillalign
withtherearpaneloftheswitch,allowingaccesstothe
portsandnetwork,powerandconsolecables.
•IftheswitchismountedonthewallasshowninFigure 2‐11onpage 2‐13,frontpanel
LEDswillfaceup(towardstheceiling),andtheopenendofthecoverwill
facedown
(awayfromtheceiling),allowingaccesstotheportsandnetwork,powerandconsole
cables.
2. Securethecoverinplace.Whenpositionedsecurely,mountingtabsinsidethe edge ofthe
coverwillsnapintoplaceintocorrespondingnotchesontheswitch.
1 Cover mounting screws (four) 3 Cover mounting tabs
2 Cover mounting screw holes (four) 4 Switch mounting holes (four)