Mounting the Switch
2-10 Installation
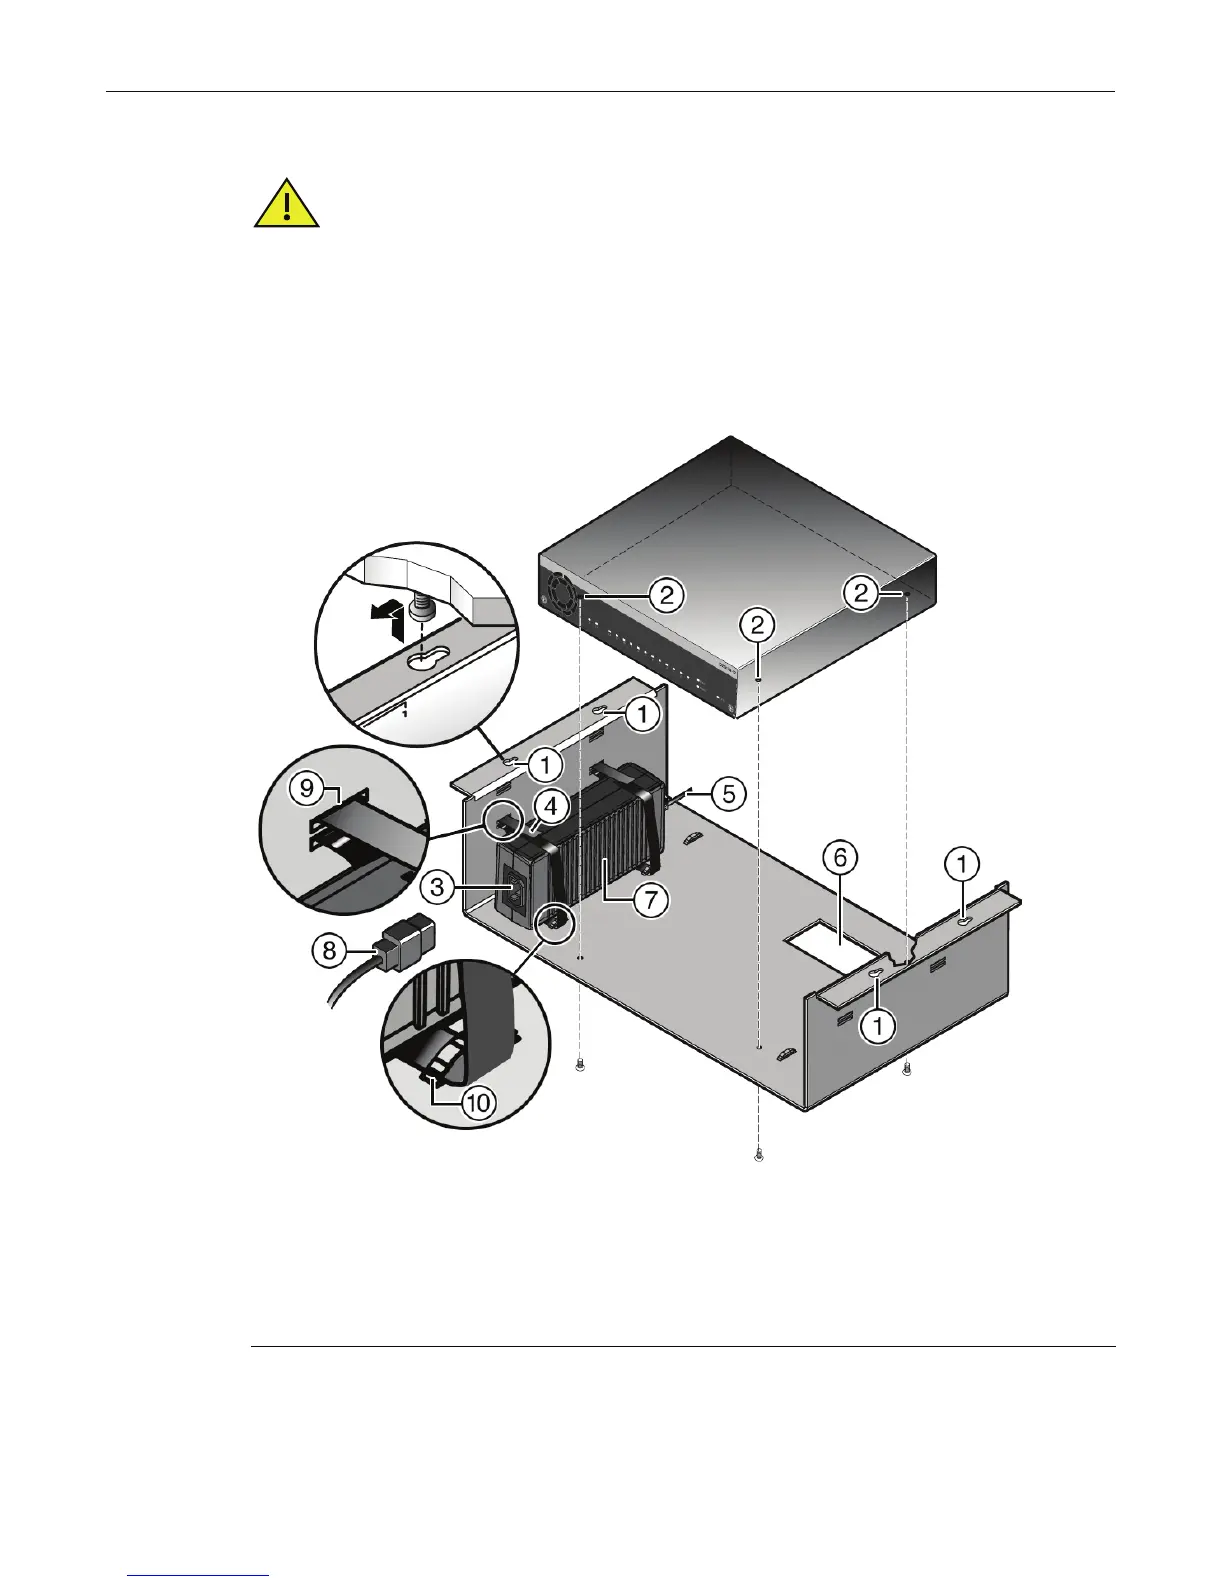
Installing the Switch Under a Table
Toinstalltheswitchinthetablemountkitandtheninstallitunderatable,refertoFigure 2‐9and
proceedasfollows:
Figure 2-9 Installing the Switch in the Table Mount Kit (shown with one D2-PWR supply)
1. Ensurethatyouhaveappropriatescrewsforsecuringtheassembledtablemountkittoyour
tablelocation.Thesefourscrewsarerequiredandarenotprovided
inthetablemountkit.
Caution: The table location and rack mounting screws/anchoring method that the installer selects
for mounting the D2 switch must be capable of supporting 60 lbs (27.2kg).
Advertencia: La ubicación de la mesa y el método de anclaje o los tornillos de montaje del estante
que el instalador seleccione para montar el interruptor D2 deberán ser capaces de soportar un peso
de 60 lbs (27.2 kg).
1 Table mounting screw holes (four) 6 Serial number access window
2 Switch mounting screw holes (three) 7 Power supply (D2-PWR shown)
3 AC power receptacle 8 AC power cord
4 Power supply hook & loop strap 9 Hook & loop strap through power supply mounting
holes
5 DC power cord 10 Hook & loop strap through bridge anchor