SC-F2000 Revision C
ADJUSTMENT CR Related Adjustments 225
Confidential
[Blue]: Button or menu name on the program screen / [Black]: Button or menu name on the operation panel of the printer
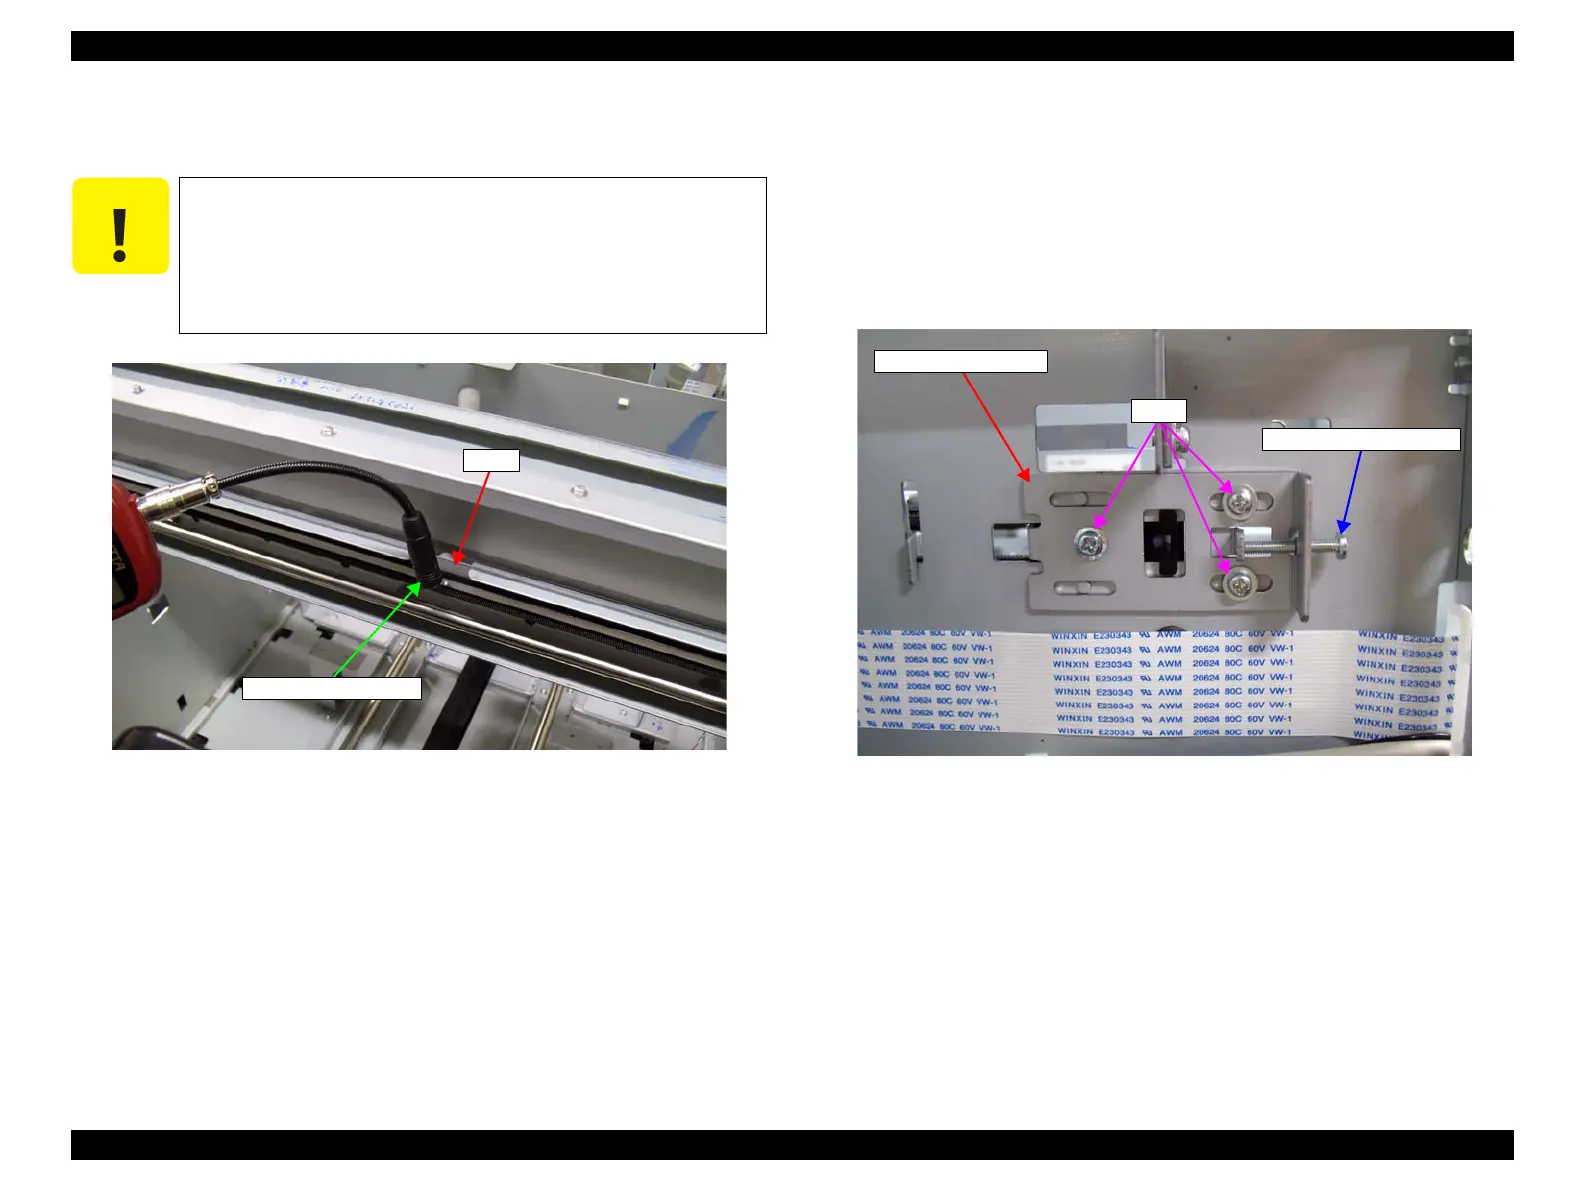
7. Press [MEASURE] on the tensimeter and flip the belt with tweezers or a similar
tool.
Figure 4-18. Measuring the belt tension
8. Measure the belt tension for three times, and check if the average is within the
standards.
Within the standards: Press F12 on the keyboard to finish the measurement.
(PRINT HEAD will be capped.)
Out of the standards: Go to Step 9
9. Loosen the three screws that secure the driven pulley holder.
10. Turn the adjustment screw to adjust the belt tension.
If larger than standard value: Turn the screw counterclockwise.
If smaller than standard value: Turn the screw clockwise.
After adjusting the tension, tighten the screws loosened in Step 9, and then back to
Step 6 to make sure the values.
Figure 4-19. Adjusting the belt tension
Be sure to measure the tension of the belt on the upper side. If
you measure the tension of the belt on the lower side, the
measuring value may be inaccurate.
Flip the belt as weak as the tensimeter can measure it.
Be careful not to let the microphone touch the belt when
flipping the belt.
Cutout
Measuring microphone
Driven Pulley Holder
Screws
Tension adjustment screw
 Loading...


