SC-F2000 Revision C
ADJUSTMENT TF Adjustments 257
Confidential
[Blue]: Button or menu name on the program screen / [Black]: Button or menu name on the operation panel of the printer
4.13.4 Obstacle Sensor Adjustment
REQUIRED TOOL
Thickness Gauge (1.30/1.55/1.88)
Screws (M3x10) for the adjustment: x 2 (Used in Step 9.)
EXECUTION MODE
Normal Mode
STANDARD VALUE
Green LED lights with the 1.55 thickness gauge.
Orange LED and Green LED light with the 1.88 thickness gauge.
PROCEDURE
1. Disassemble the printer until you can adjust the Obstacle Sensor (MEDIA
SENSOR FRAME ASSY). (
p. 179)
2. Loosen the four screws that secure the MEDIA SENSOR FRAME ASSY, and
press the assy down.
3. Turn the printer ON.
4. Start the Service Program and select [Obstacle sensor position adjustment].
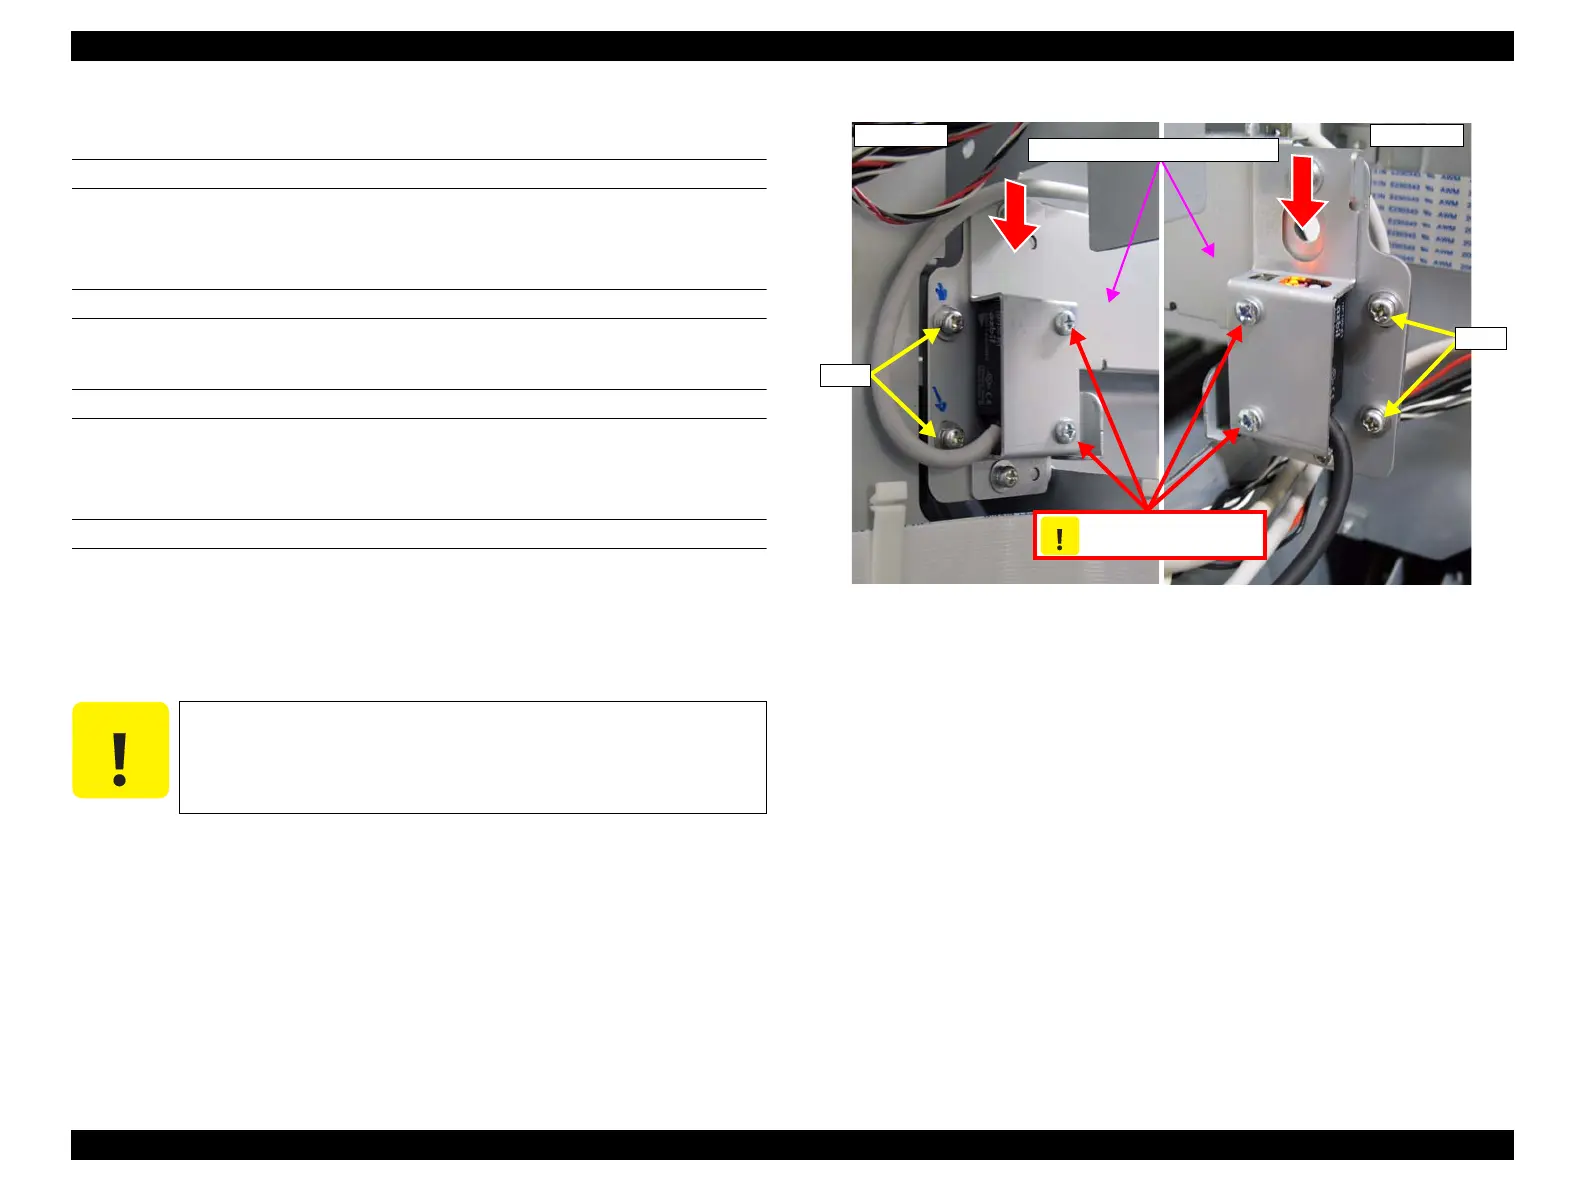
Figure 4-58. Fixing Screws
Do not loosen or remove the screws shown in Figure 4-58.
Home side Full side
MEDIA SENSOR FRAME ASSY
Screw
Do not loosen or remove
the screws
 Loading...


