EasyManuals Logo

Epson Stylus Photo R2000 Series User Manual

Epson Stylus Photo R2000 Series
230 pages
To Next Page IconTo Next Page
To Previous Page IconTo Previous Page
Page #107 background imageLoading...
Page #107 background image
EPSON Stylus Photo R1900/R2880/R2000/R2000s/SC-P400 Series Revision I
Disassembly And Assembly Disassembling the Printer Mechanism 107
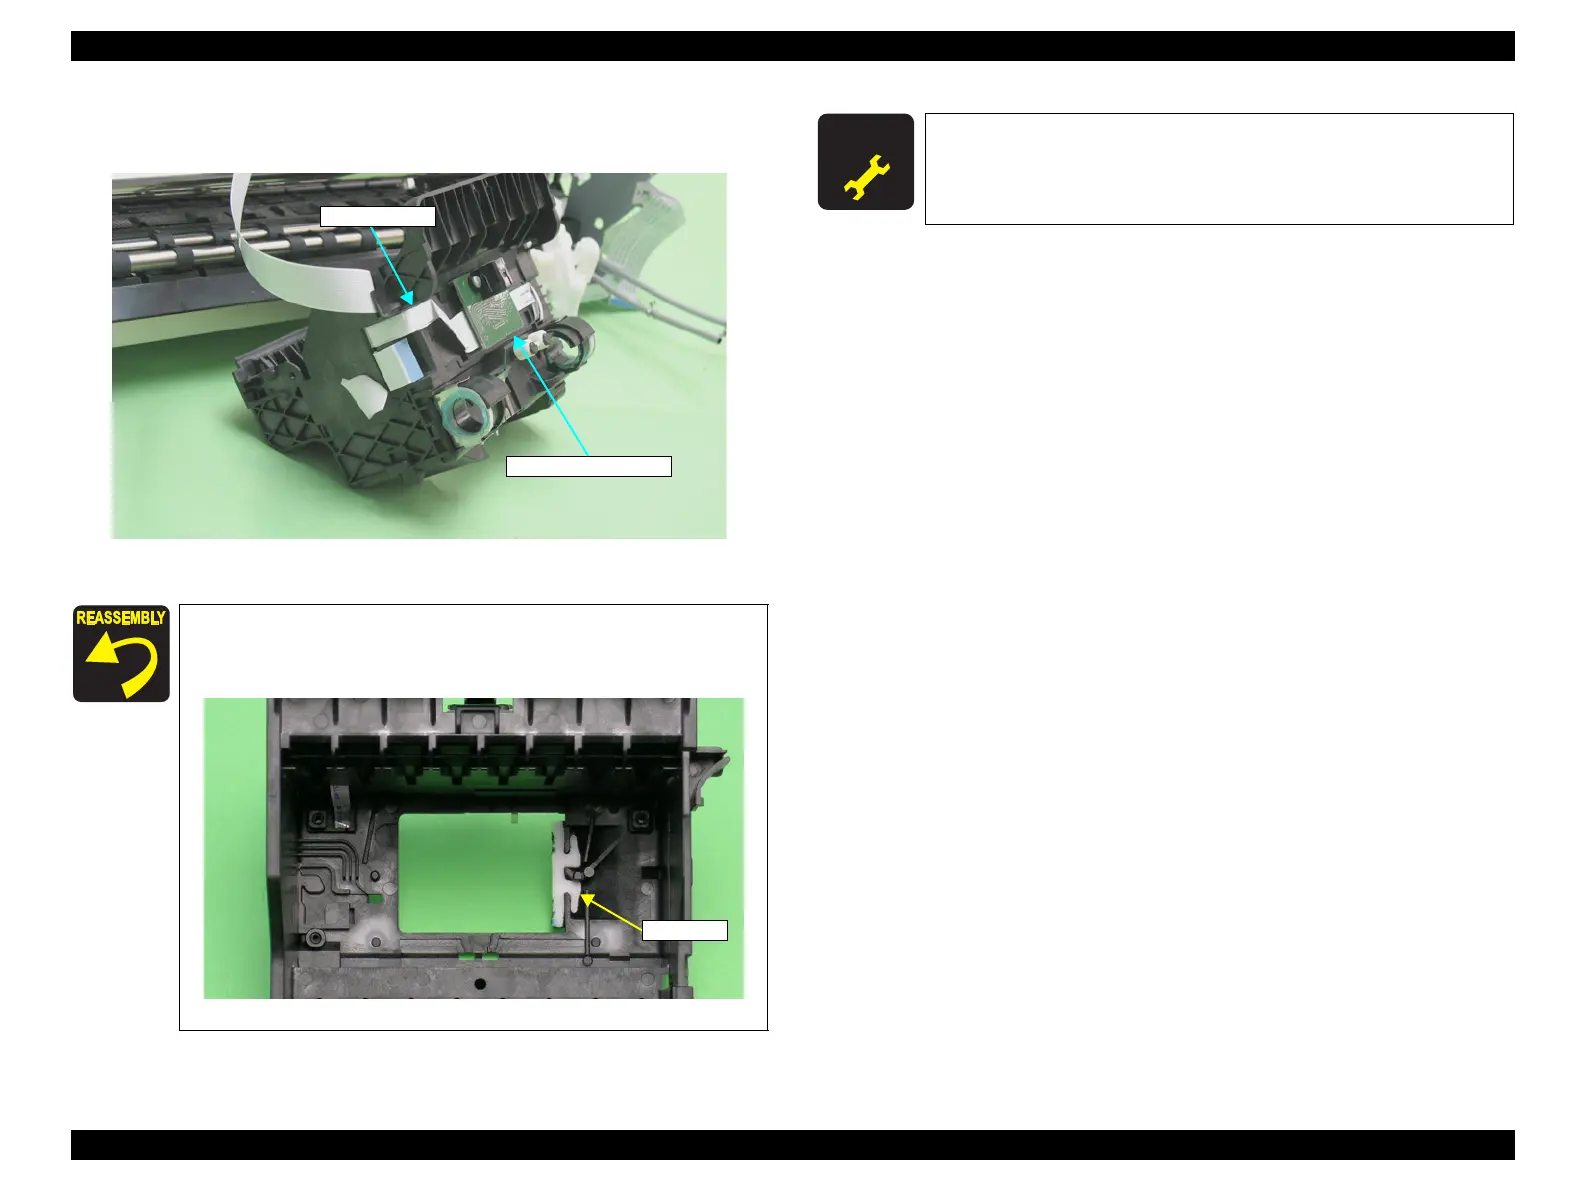
25. Disconnect the Sensor FFC from the connector on the CR Encoder Board, pull out
the Sensor FFC from the Carriage Unit, and remove the Carriage Unit.
Figure 4-90. Removing the Carriage Unit
When the Carriage Unit is removed from the Printer
Mechanism, the CR Pad may drop off. In such case, correctly
install it referring to the figure below.
Figure 4-91. Reinstalling the CR Pad
CR Encoder Board
Sensor FFC
CR Pad
A D J U S T M E N T
R E Q U I R E D
After replacing or removing the Carriage Shaft and Carriage Unit,
always make the required adjustments referring to the following.
“Chapter 5 Adjustment (p.139)

Table of Contents

Other manuals for Epson Stylus Photo R2000 Series

Questions and Answers:

Question and Answer IconNeed help?

Do you have a question about the Epson Stylus Photo R2000 Series and is the answer not in the manual?

Epson Stylus Photo R2000 Series Specifications

General IconGeneral
Print TechnologyInkjet
Max Print Resolution5760 x 1440 optimized dpi
Number of Ink Colors8
Borderless PrintingYes
Operating SystemsWindows, Mac OS
Ink TypeUltraChrome Hi-Gloss 2
Ink ColorsCyan, Magenta, Yellow, Red, Orange, Matte Black, Photo Black, Gloss Optimizer
Ink Droplet Size1.5 picoliters
ConnectivityUSB, Ethernet, Wi-Fi
Media Sizes Supported4" x 6", 5" x 7", 8" x 10", 11" x 14", 13" x 19"
Media Types SupportedPlain paper, photo paper, fine art paper, canvas
InterfaceUSB, Ethernet

Related product manuals