EPSON Stylus Photo R1900/R2880/R2000/R2000s/SC-P400 Series Revision I
Disassembly And Assembly Removing the Housings 85
3-3. Slide the Printer Cover Holder Right in the direction of the arrow while
pushing the part A, and pull out the Printer Cover Holder Right from the
bearing of the Printer Cover.
Figure 4-22. Removing the Printer Cover (2)
4. In the same way, remove the Printer Cover Holder Left and remove the Printer
Cover from the Upper Housing.
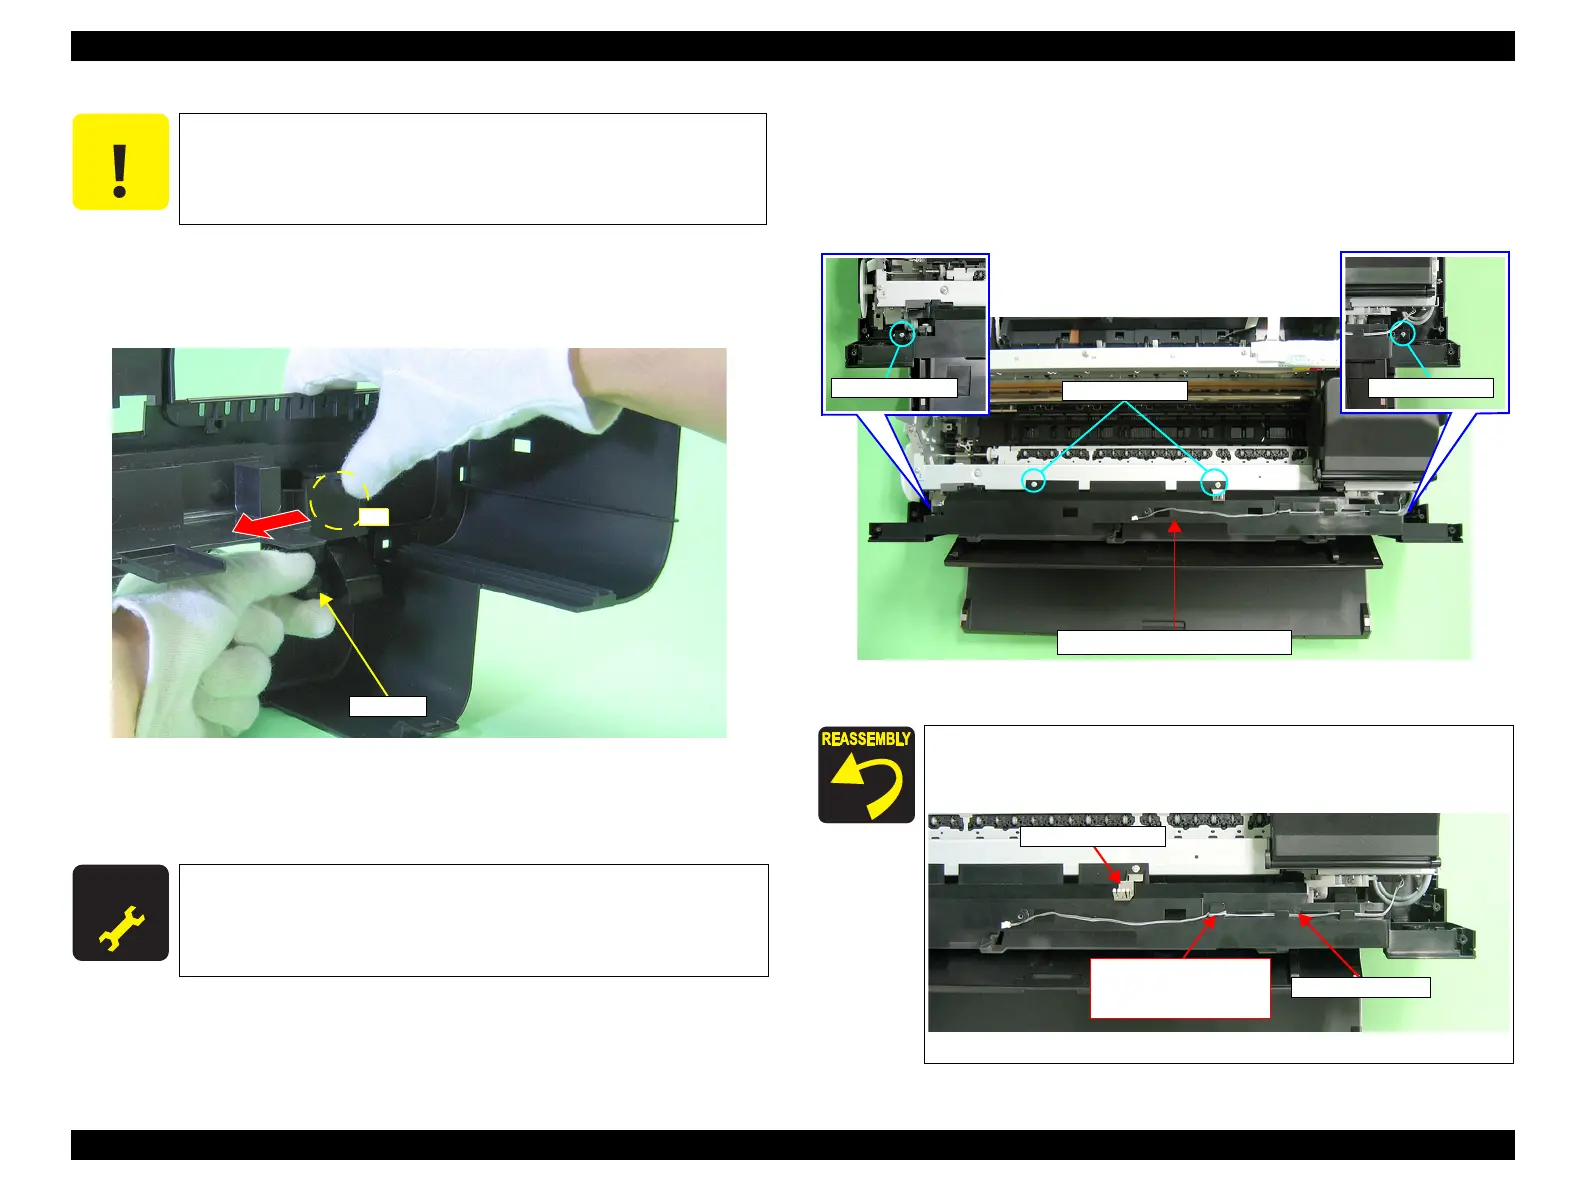
4.2.8 Upper Housing Support Assy
1. Remove the Upper Housing / Printer Cover. (p.83)
2. Remove the two C.B.S. M3 x 8 screws and two C.B.P. M3 x 8 screws that secure
the Upper Housing Support Assy, and remove the Upper Housing Support Assy.
Figure 4-23. Removing the Upper Housing Support Assy
When performing the following steps, be careful not to damage the
tabs of the Printer Cover Holder Right.
A D J U S T M E N T
R E Q U I R E D
If the Printer Cover creaks when opening/closing it, make sure to
lubricate the Printer Cover Holder Left/Right.
•“Chapter 6 Maintenance (p.163)”
Secure the Grounding Plate with one of the C.B.S. M3 x 8
screws together with the Upper Housing as shown below.
Route the CDR Sensor cable as shown in the figure below.
Figure 4-24. Routing the CDR Sensor Cable
C.B.S. M3x8
Upper Housing Support Assy
CDR Sensor cable
Grounding Plate
Wind the CDR Sensor
cable around the rib one
time.

 Loading...


