EasyManuals Logo

Epson Stylus Photo R2000 Series User Manual

Epson Stylus Photo R2000 Series
230 pages
To Next Page IconTo Next Page
To Previous Page IconTo Previous Page
Page #137 background imageLoading...
Page #137 background image
EPSON Stylus Photo R1900/R2880/R2000/R2000s/SC-P400 Series Revision I
Disassembly And Assembly Removing the Sensors 137
4.6.5 PE Sensor Holder
1. Remove the APG Assy. (p.91)
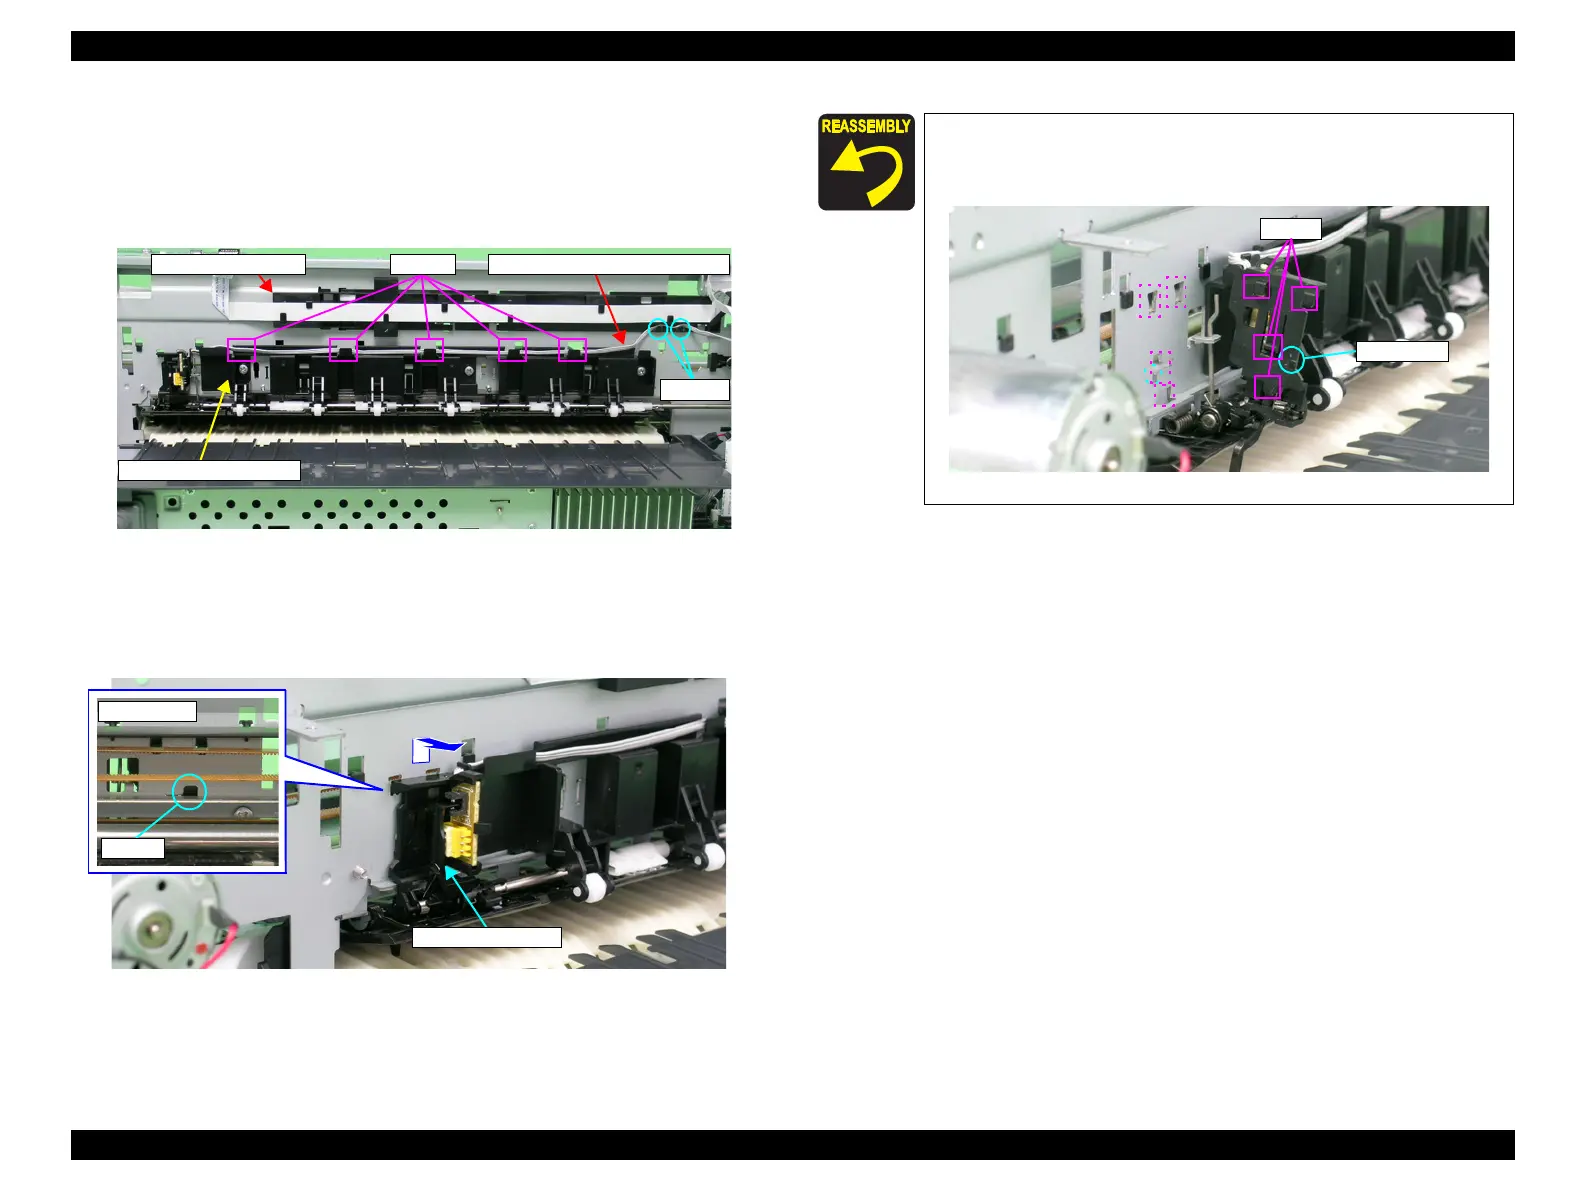
2. Remove the PE Sensor connector cable from the five tabs on the Release Holder
Assy and the two tabs on the Head Cable Cover.
Figure 4-171. Releasing the Cables
3. Release the tabs that secure the PE Sensor Holder from the notch on the Main
Frame with a flathead screwdriver, and slide the PE Sensor Holder upwards and
then remove it toward you.
Figure 4-172. Removing the PE Sensor Holder
Tabs
PE Sensor connector cableTabs
Release Holder Assy.
Head Cable Cover
PE Sensor Holder
Front Side
Tab
Align the four tabs and guide pin on the PE Sensor Holder with the
positioning holes on the Main Frame correctly so that there is no
gap between the PE Sensor Holder and the Main Frame.
Figure 4-173. Reinstalling the PE Sensor
Tabs
Guide
Guide pin

Table of Contents

Other manuals for Epson Stylus Photo R2000 Series

Questions and Answers:

Question and Answer IconNeed help?

Do you have a question about the Epson Stylus Photo R2000 Series and is the answer not in the manual?

Epson Stylus Photo R2000 Series Specifications

General IconGeneral
Print TechnologyInkjet
Max Print Resolution5760 x 1440 optimized dpi
Number of Ink Colors8
Borderless PrintingYes
Operating SystemsWindows, Mac OS
Ink TypeUltraChrome Hi-Gloss 2
Ink ColorsCyan, Magenta, Yellow, Red, Orange, Matte Black, Photo Black, Gloss Optimizer
Ink Droplet Size1.5 picoliters
ConnectivityUSB, Ethernet, Wi-Fi
Media Sizes Supported4" x 6", 5" x 7", 8" x 10", 11" x 14", 13" x 19"
Media Types SupportedPlain paper, photo paper, fine art paper, canvas
InterfaceUSB, Ethernet

Related product manuals