EasyManuals Logo

Epson Stylus Photo R2000 Series User Manual

Epson Stylus Photo R2000 Series
230 pages
To Next Page IconTo Next Page
To Previous Page IconTo Previous Page
Page #100 background imageLoading...
Page #100 background image
EPSON Stylus Photo R1900/R2880/R2000/R2000s/SC-P400 Series Revision I
Disassembly And Assembly Disassembling the Printer Mechanism 100
4.4.5 Carriage Shaft / Carriage Unit
1. Remove the Printhead / CSIC Assy. (p.94)
2. Remove the CR Scale. (p.92)
3. Remove the LED Board. (p.88)
4. Remove the APG Assy. (p.91)
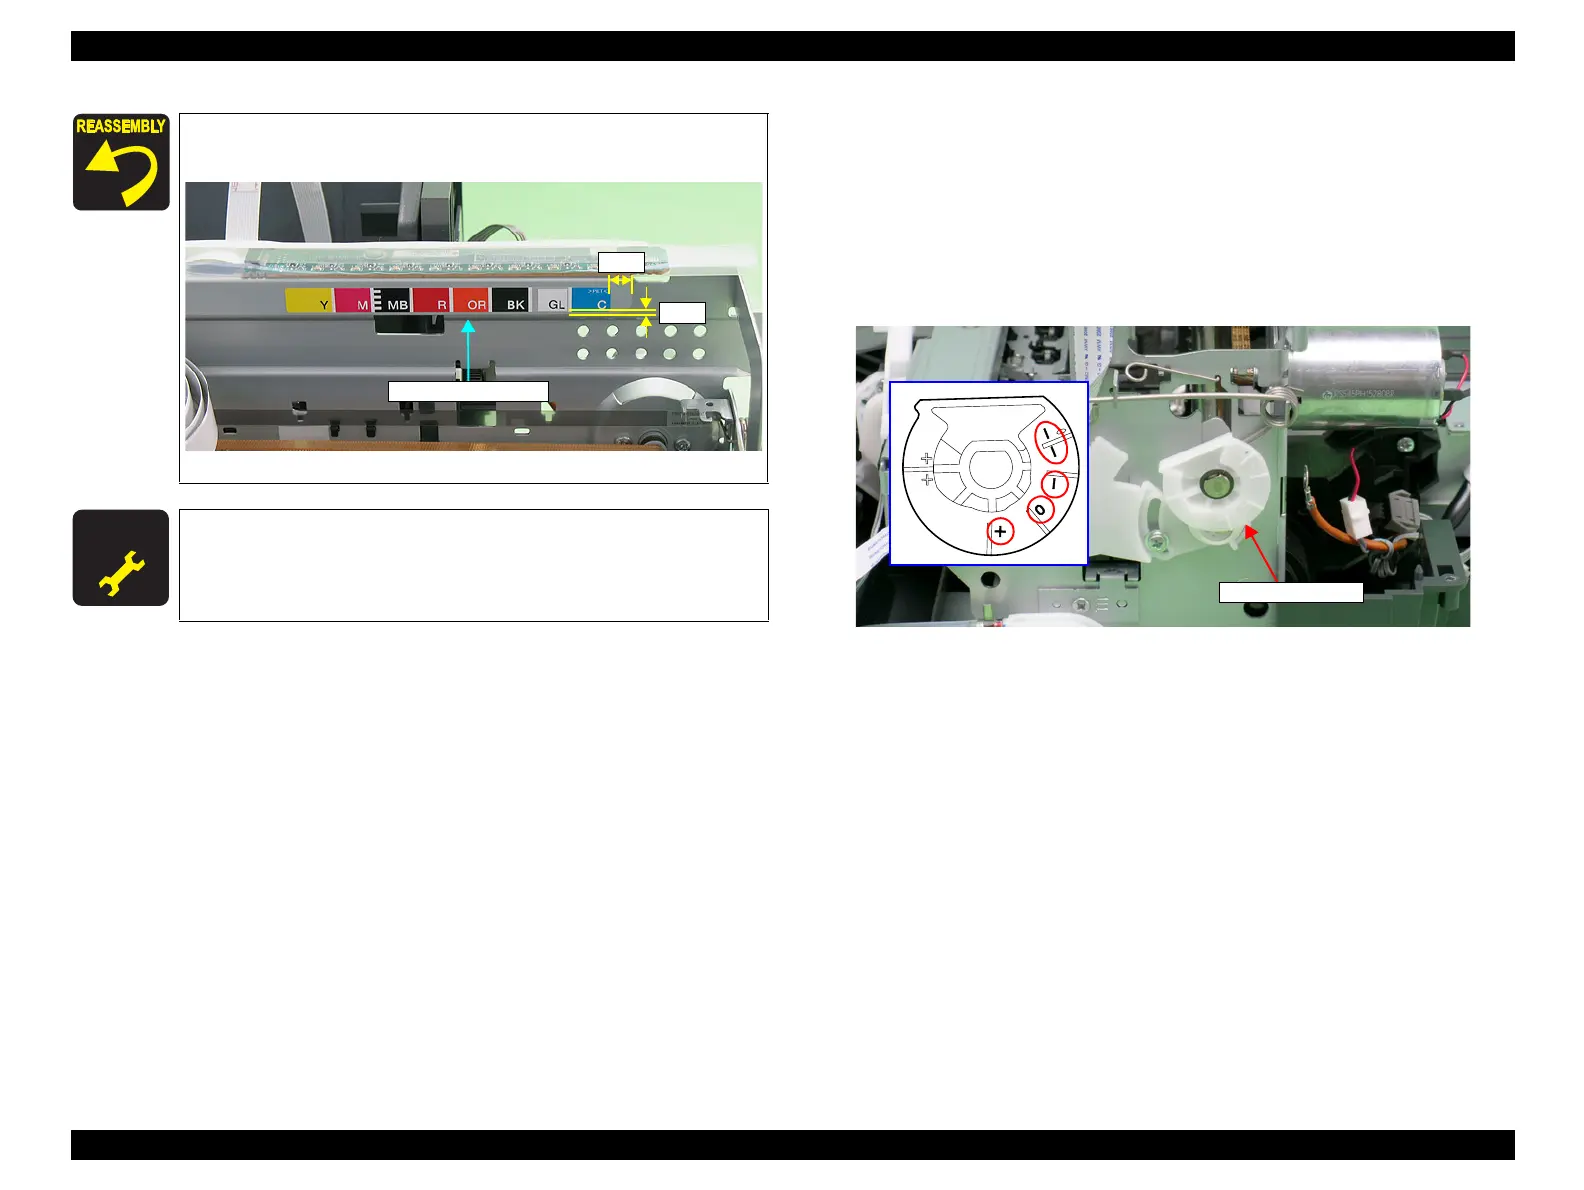
5. Rotate the PG Cam (Right) to adjust its positions other than PG++ downside.
Figure 4-67. Adjusting the PG Cam
Attach the Label, Ink Position;B at the position in the figure
below.
Figure 4-66. Attaching the Label, Ink Position;B
A D J U S T M E N T
R E Q U I R E D
After replacing the Printer Mechanism, always make the required
adjustments referring to the following.
“Chapter 5 Adjustment (p.139)
6mm
2mm
Label, Ink Position;B
PG Cam (Right)

Table of Contents

Other manuals for Epson Stylus Photo R2000 Series

Questions and Answers:

Question and Answer IconNeed help?

Do you have a question about the Epson Stylus Photo R2000 Series and is the answer not in the manual?

Epson Stylus Photo R2000 Series Specifications

General IconGeneral
Print TechnologyInkjet
Max Print Resolution5760 x 1440 optimized dpi
Number of Ink Colors8
Borderless PrintingYes
Operating SystemsWindows, Mac OS
Ink TypeUltraChrome Hi-Gloss 2
Ink ColorsCyan, Magenta, Yellow, Red, Orange, Matte Black, Photo Black, Gloss Optimizer
Ink Droplet Size1.5 picoliters
ConnectivityUSB, Ethernet, Wi-Fi
Media Sizes Supported4" x 6", 5" x 7", 8" x 10", 11" x 14", 13" x 19"
Media Types SupportedPlain paper, photo paper, fine art paper, canvas
InterfaceUSB, Ethernet

Related product manuals