EPSON Stylus Photo R1900/R2880/R2000/R2000s/SC-P400 Series Revision I
Disassembly And Assembly Overview 73
4.1.2 Tools
The following table indicates the tools recommended for use for disassembly,
reassembly and adjustment.
Note : All of the tools listed above are commercially available. EPSON provides the tools
listed with EPSON tool code.
4.1.3 Screws
The following table lists the screws used in this product. When disassembling and
reassembling the printer, refer to the following table and use the specified screws in the
specified positions.
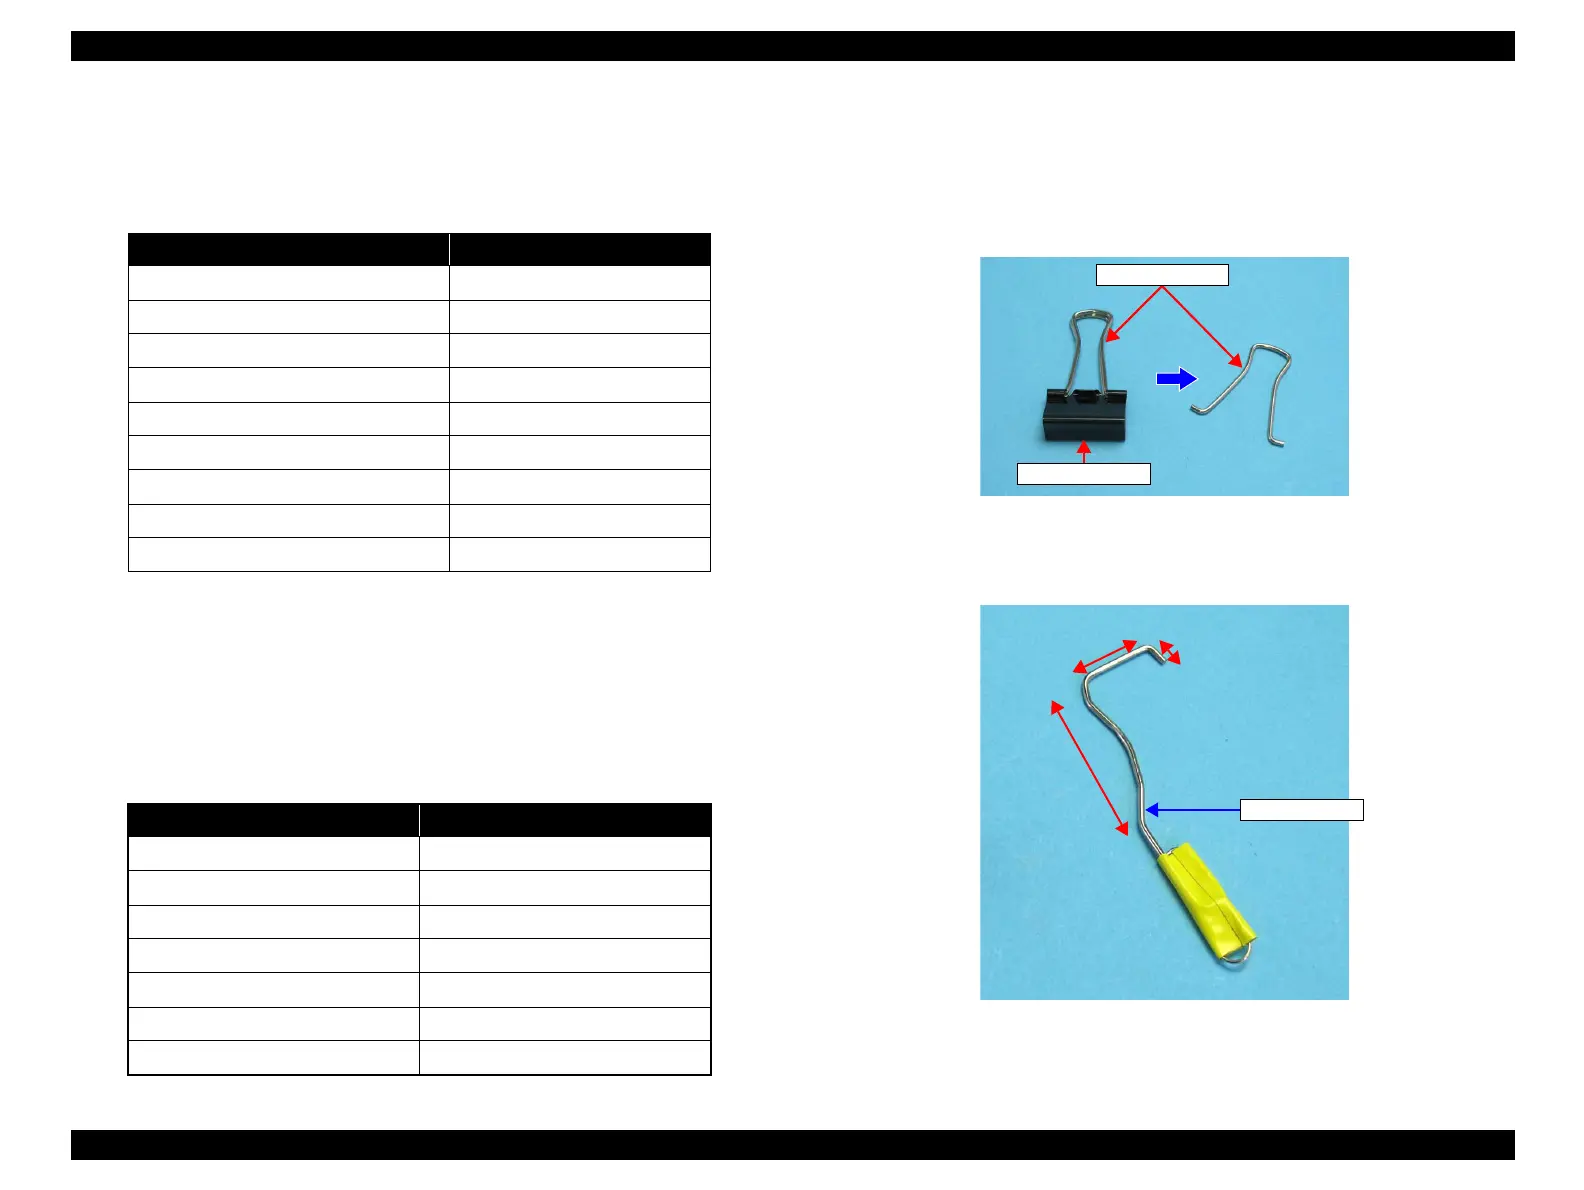
4.1.4 Making a Special Tool for CSIC Board
If using the special tool below, the CSIC Assy (refer to p.96) can be easily removed.
The method for making the tool is described below.
1. Prepare a handle part of a clip, or a similar metal wire piece.
Figure 4-1. Making the Special Tool for CSIC Board (1)
2. Bend the metal wire as shown below.
Figure 4-2. Making the Special Tool for CSIC Board (2)
Table 4-1. List of Tools
Tool Name Code
Phillips Screw Driver, No.1 1080530
Phillips Screw Driver, No.2 -
Flathead Screwdriver -
Tweezers -
Needle nose pliers -
Nipper -
Acetate Tape -
PF Tension Measuring Tool 1294120
Penlight -
Table 4-2. List of Screw Types
No. Name No. Name
1) C.B.P. M3x10 2) C.B.S. M3x6
3) C.B.S. (P2) M3x10 4) C.B.P. M3x8
5) C.B.S. M3x8 6) C.B.S. (P4) M3x8
7) C.B.P. M2.6x8 8) C.B.S. (P4) M3x6
9) C.B.P. M3x6 10) C.B.S. M3x10
11) C.C. M3x4 12) C.P.B. (P1) M1.7x5
13) C.B.P. M2.6x5 14) C.B.P. M2.6x5
7mm
25mm
50mm
Special Tool
Special Tool

 Loading...


