EPSON Stylus Photo R1900/R2880/R2000/R2000s/SC-P400 Series Revision I
Adjustment Adjustment 146
5.2 Adjustment
This section explains the adjustments that do not use the Adjustment Program.
5.2.1 PF Belt Tension Adjustment
When either of the following parts has been removed or replaced, this adjustment must
be performed to reduce load on the PF Motor and to secure paper feed accuracy.
PF Motor
PF Roller Shaft
The PF Tension Measuring Tool is used for this adjustment.
Figure 5-1. PF Tension Measuring Tool
5.2.1.1 PF Belt Tension Adjustment Method
1. Secure the PF Motor to the Printer Mechanism, and install the Drive Belt on the
Gear of the PF Scale and the Pinion Gear of the PF Motor.
2. Press the [POWER] button. The LCD of the Measuring Tool displays No. 0 and
No. 1.
3. From among No. 0 to No. 9, select the channel you want to store its setting by
pressing the [SELECT] button. The initial value may be selected as the channel.)
4. Press the [WEIGHT] button. The initial value will be displayed. Type the ten-key
pad so that “1.2g/m” is displayed.
5. Press the [WIDTH] button. The initial value will be displayed. Enter “5.0 mm”
with the ten-keypad.
6. Press the [SPAN] button. The initial value will be displayed. Enter “48mm” with
the ten-keypad.
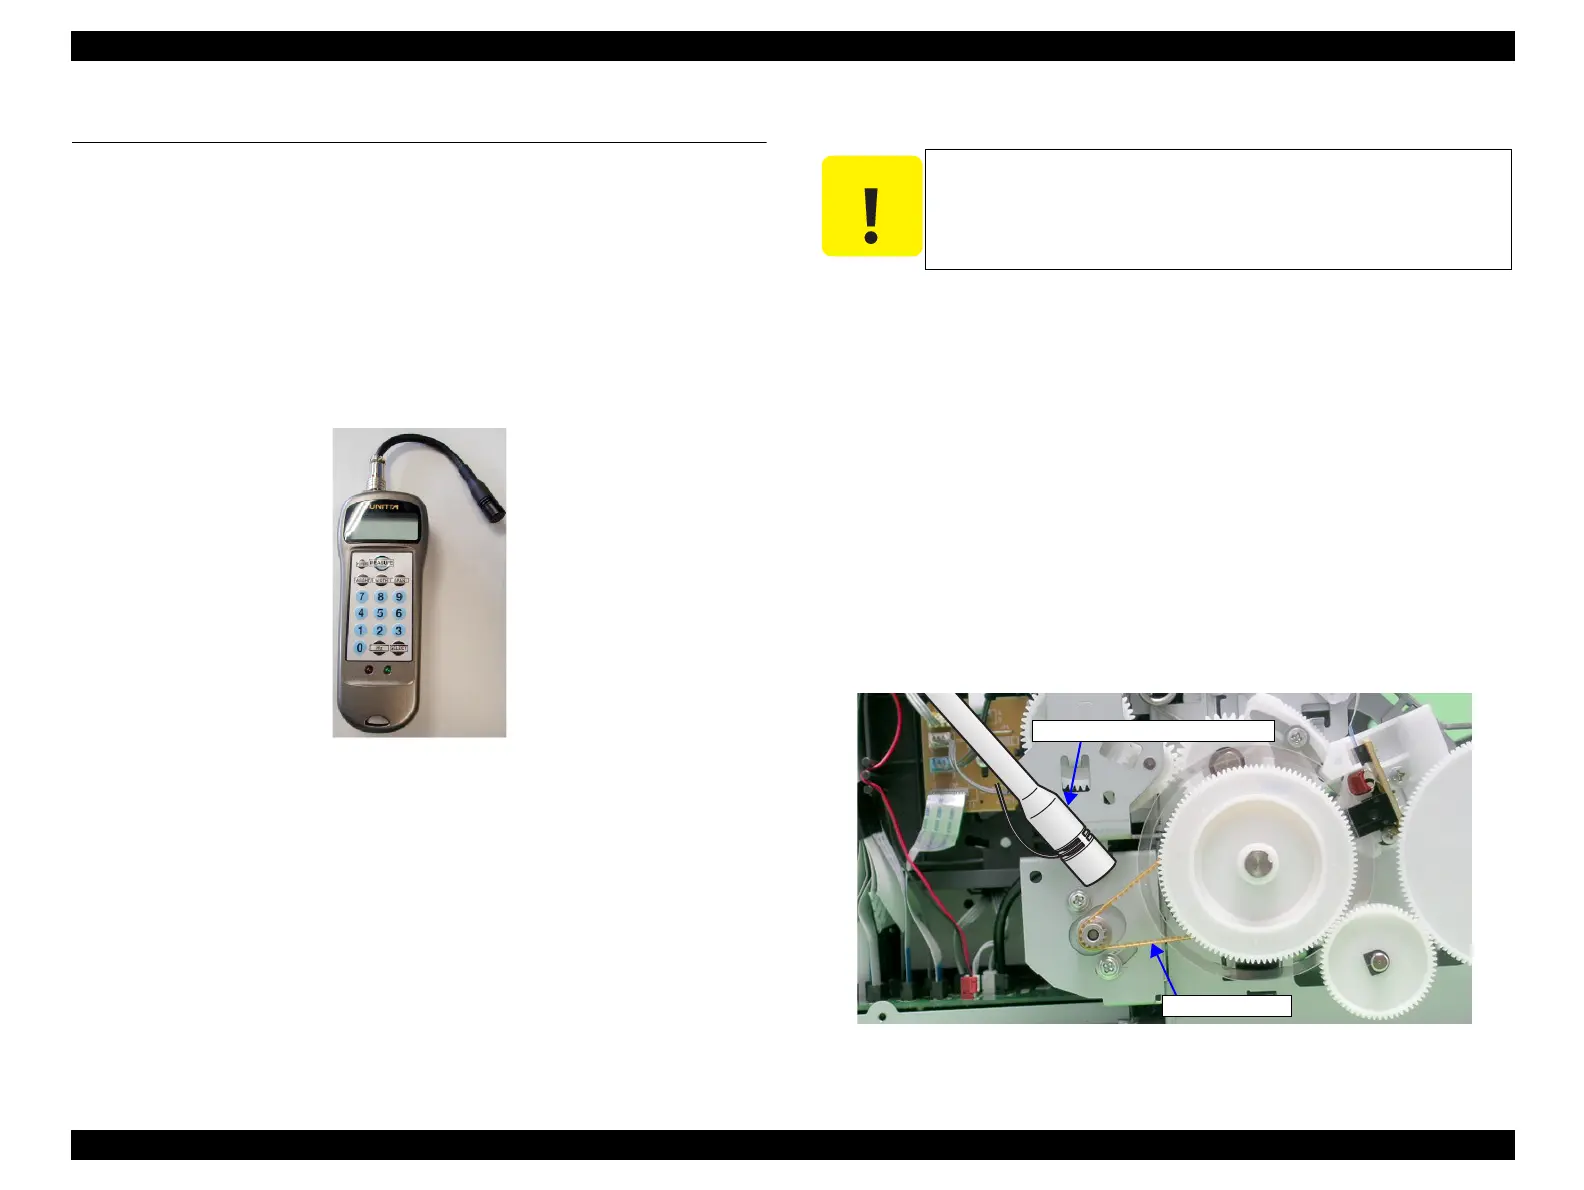
7. Bring the Microphone as close as possible to the center of the Timing Belt.
Figure 5-2. Microphone Position
Proper measurement may be interrupted by sounds picked up from
around. Make measurement in silent environment.
Microphone of Measuring Tool
Timing Belt

 Loading...


