EPSON Stylus Photo R1900/R2880/R2000/R2000s/SC-P400 Series Revision I
Disassembly And Assembly Disassembling the Printer Mechanism 124
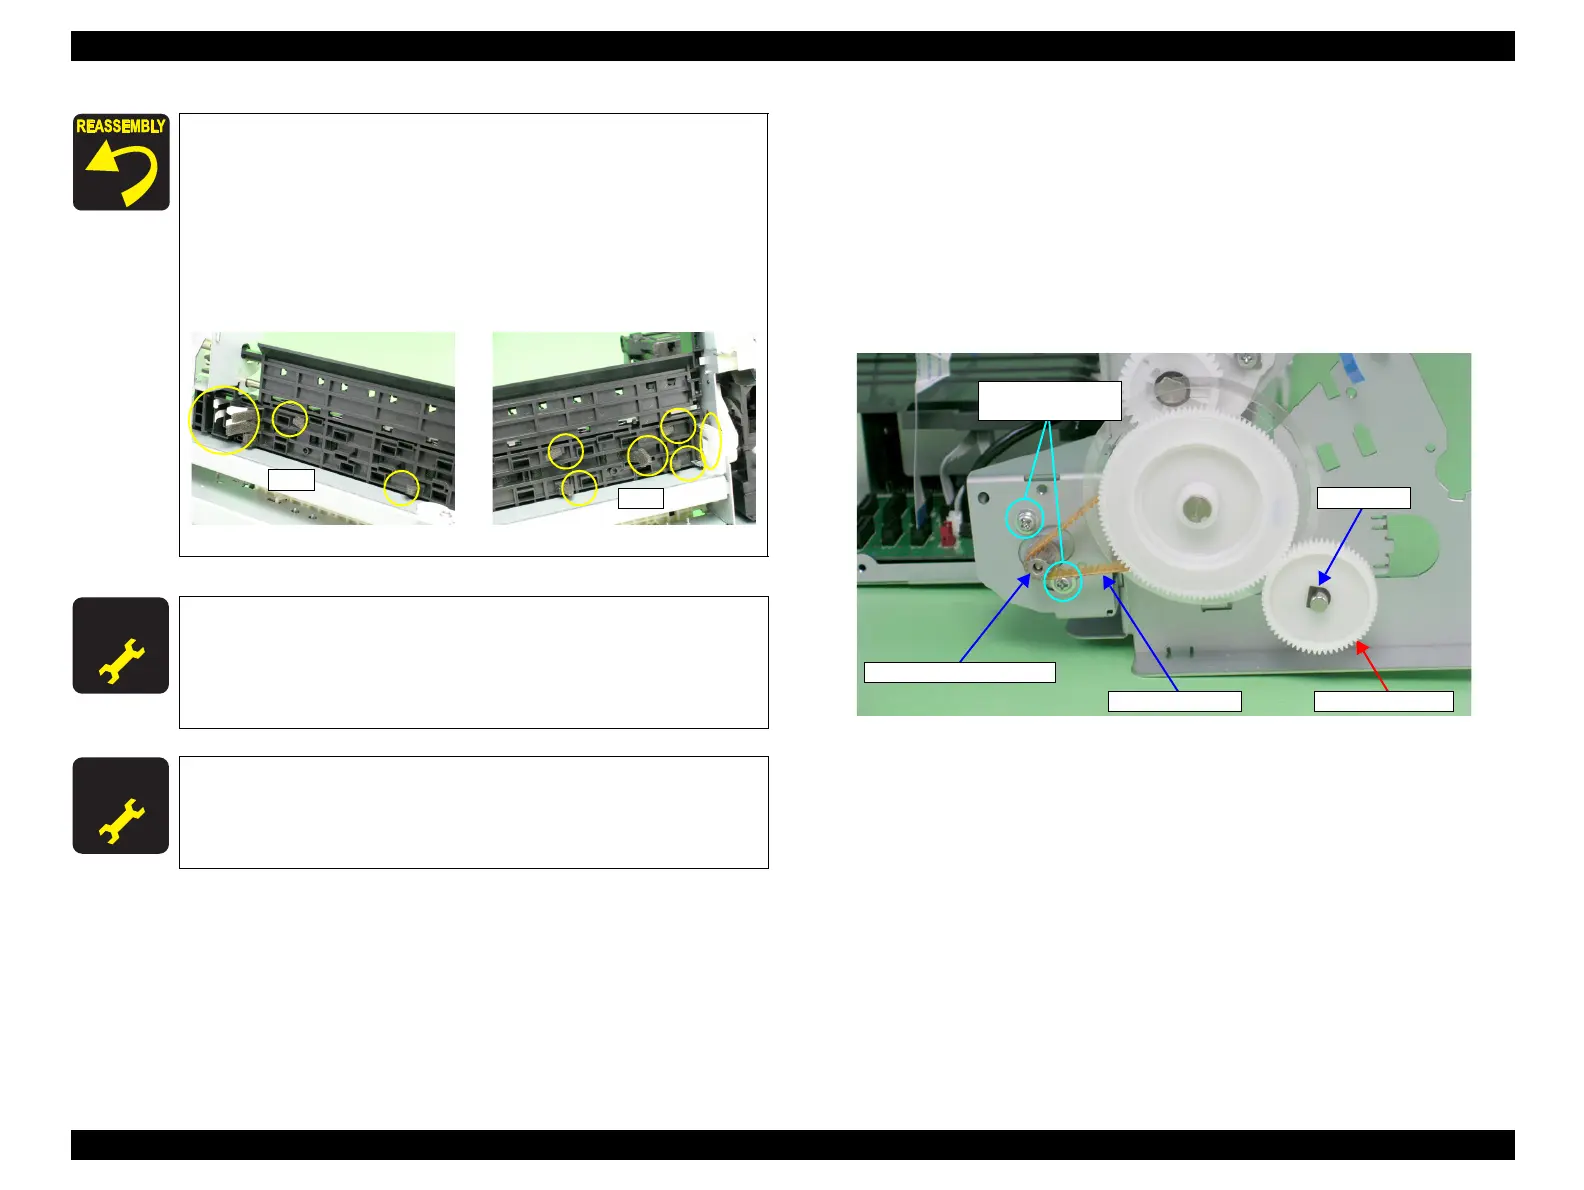
4.4.15 PF Roller Shaft
1. Remove the PF Encoder. (p.134)
2. Remove the Upper Paper Guide Assys. (p.129)
3. Loosen the two C.C. M3 x 4 screws that secure the PF Motor, and remove the PF
Drive Belt from the PF Motor Pinion Gear.
4. Remove the spacer that secures Spur Gear 31.5, and remove Spur Gear 31.5 from
the Printer Mechanism.
Figure 4-140. Removing the PF Drive Belt and Spur Gear 31.5
After installing the Front Paper Guide, lift the Printer Mechanism
to check the following points.
1. Make sure that the tabs on the Paper Guide Pad are not cut
midway.
2. Make sure that all the tabs are facing down (toward the Waste
Ink Pads) without any folds.
3. Make sure that the tab foldbacks are protruding completely
from the Front Paper Guide.
Figure 4-139. Checking the Front Paper Guide Pad
A D J U S T M E N T
R E Q U I R E D
After replacing the following parts, be sure to apply G-45 grease to the
area specified for each part.
EJ Grounding Spring: See Figure 6-10 on page 168.
Front Paper Guide and Paper EJ Roller: See Figure 6-11 on
page 168.
A D J U S T M E N T
R E Q U I R E D
After replacing or removing the Front Paper Guide and Paper EJ
Roller, always make the required adjustments referring to the
following.
•“Chapter 5 Adjustment (p.139)”
PF Drive Belt
PF Motor Pinion Gear
11) C.C. M3x4
(4±0.5 kgf.cm)
Spur Gear 31.5
Spacer

 Loading...


