EPSON Stylus Photo R1900/R2880/R2000/R2000s/SC-P400 Series Revision I
Troubleshooting Overview 65
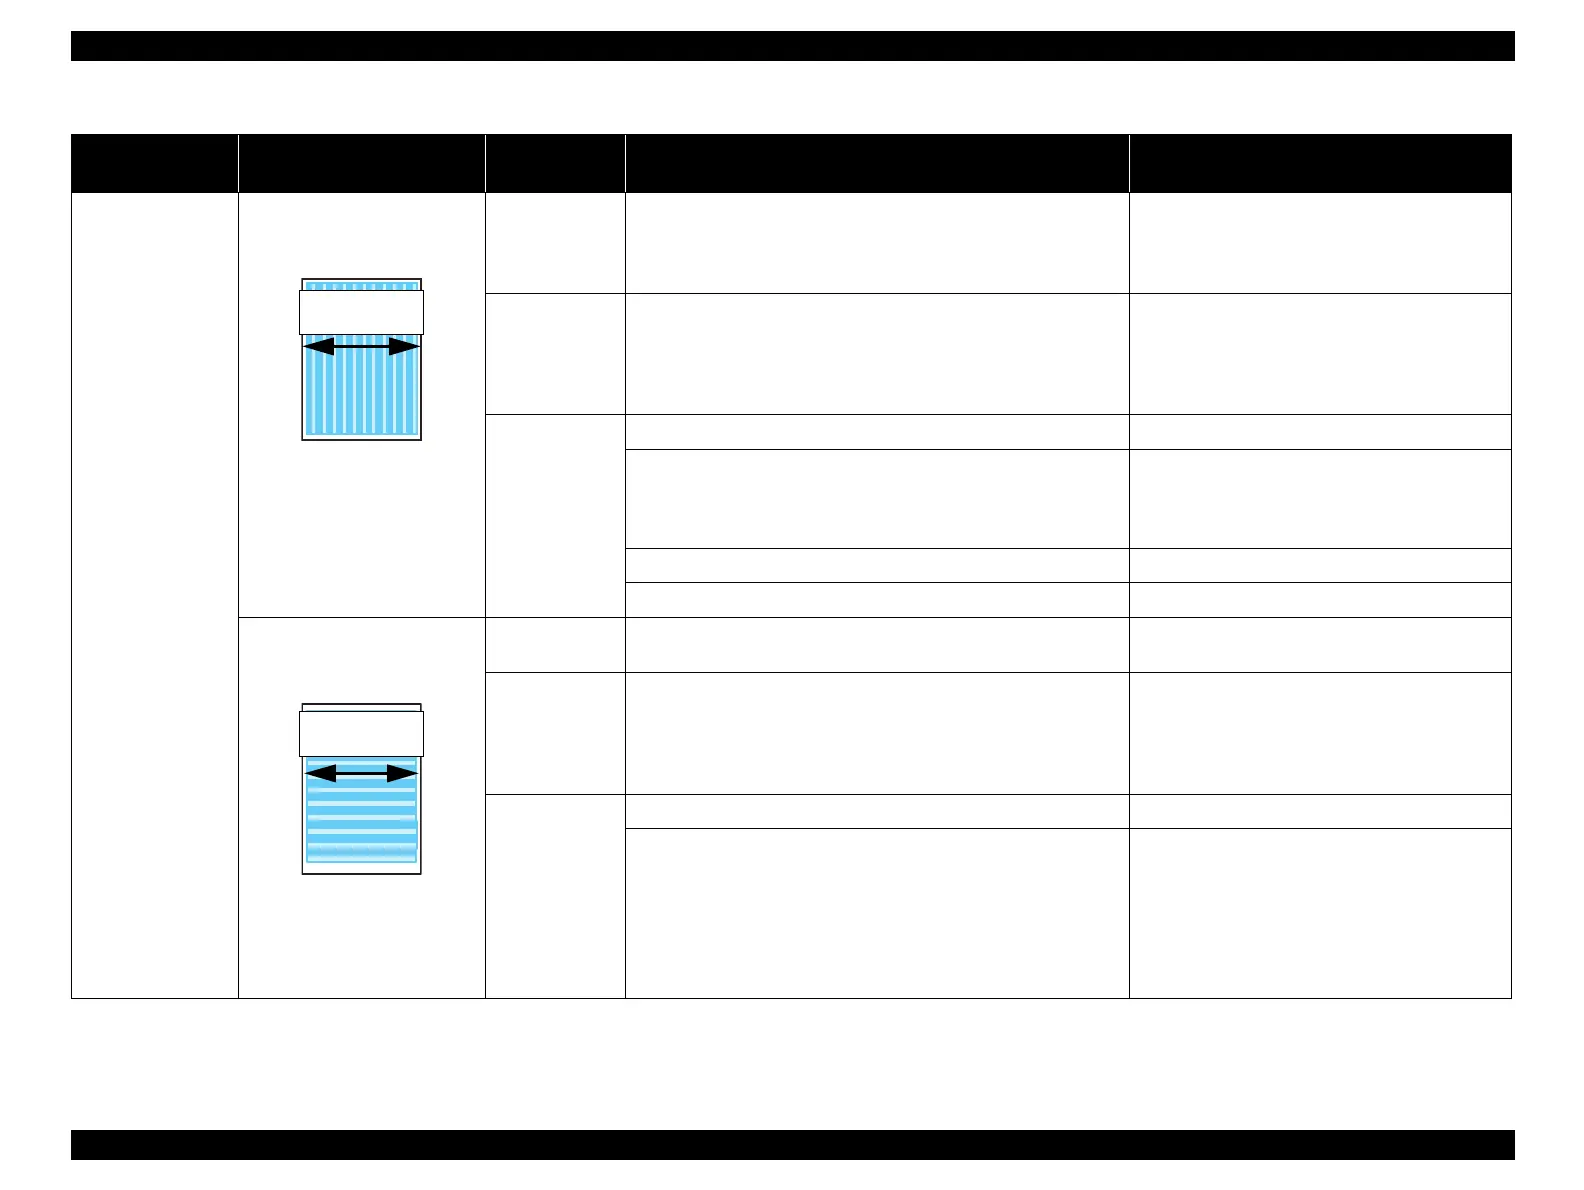
Vertical or horizontal
banding / Color
shading
The printout has banding vertical
to the CR moving direction and
is not evenly colored.
* If the trouble still occurs after
doing all measures described
in the right-hand columns,
replace the CR Motor with a
new one.
Adjustment 1. For printing in the Bi-D mode, check that the Bi-D Adjustment
has been performed properly.
1. Perform Bi-D Adjustment to eliminate
displacements between the upper and lower
lines.
Refer to Chapter 5 "Adjustment".
Print Head 1. Run a Nozzle Check, and check the printed pattern if it has
broken lines or missing segments.
1. Perform the Head Cleaning, then check the
Nozzle Check Pattern.
Refer to Chapter 5
"Adjustment"
.
If the trouble still occurs, replace the Print Head
with a new one.
Carriage Shaft 1. Check the surfaces of the Carriage Shaft for foreign matter. 1. Remove foreign matter from the Carriage Shaft.
2. Check that the Carriage Shaft is fully lubricated with grease. 2. Wipe the grease applied to the Carriage Shaft
with a dry, soft cloth, and then apply G-71
grease.
Refer to Chapter 6 "Maintenance".
3. Check that the Carriage Shaft is mounted horizontally. 3. Reassemble the Carriage Shaft correctly.
4. Check the Carriage Shaft for damages. 4. Replace the Carriage Shaft with a new one.
Narrow stripes of the same width
appear horizontally to the CR
moving direction.
* If the trouble still occurs after
doing all measures described
in the right-hand columns,
replace the PF Motor with a
new one.
Printer Driver and
the Paper
1. Check if appropriate paper is used in accordance with the Printer
Driver settings.
1. Use the appropriate type of paper in accordance
with the Printer Driver.
Print Head 1. Run a Nozzle Check, and check the printed pattern if it has
broken lines or missing segments.
1. Perform the Head Cleaning, then check the
Nozzle Check Pattern.
Refer to Chapter 5
"Adjustment"
.
If the trouble still occurs, replace the Print Head
with a new one.
PF Roller Shaft 1. Check the surface of the PF Roller Shaft for foreign matter. 1. Clean the PF Roller surface carefully.
2. Check the PF Roller Shaft for damages. 2. Replace the PF Roller with a new one.
Table 3-15. Print Quality Troubles
Observed Faults Details of the Fault
Faulty Part/
Part Name
Check Point Remedy

 Loading...


