18 |
ManagEMEnt
patiEnts
This is a list of all patients stored in the
database with their name, ID, and SSN
(social security number).
The Find function allows you to conve-
niently access any patient in the data-
base. Entering the first characters of a
patient name or of the ID (highlighted
yellow) is sufficient. The search function
returns all patients matching the search
criteria.
With [ Create ] you can add a patient to
the database.
If you double-click an existing entry in
the list or click the entry (highlighted
blue) and then the
[ Edit ] button, the
window Patient Data - General - Perso-
nal Data opens.
| 19
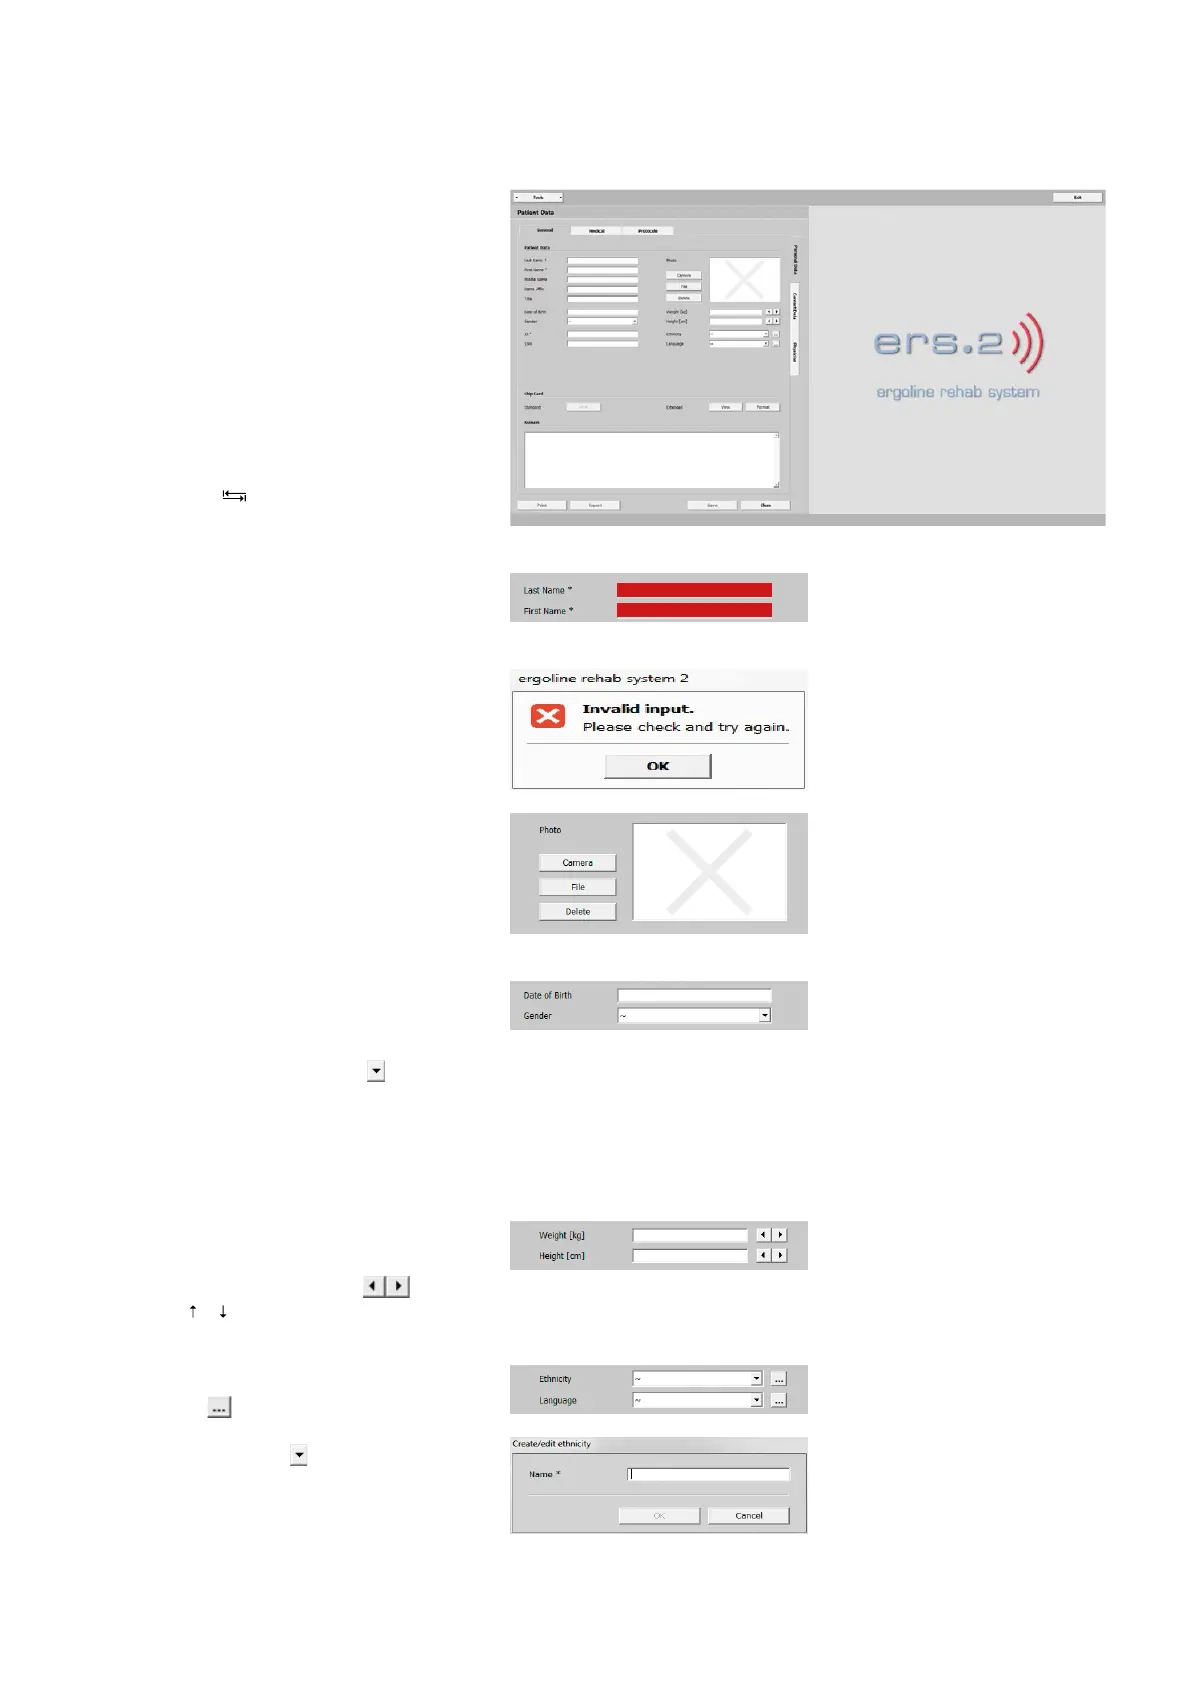
patiEnt data > gEnEraL
pErsonaL data
· Patient Data
At this point in the program, patients are
added to the database. Type the patient's
personal data such as last name and first
name in the appropriate text boxes.
Mandatory fields are identified with an
asterisk *. You can activate the text box-
es by clicking them or you can press the
TAB key [ ] to navigate between the
fields.
If boxes are left blank or are only partial-
ly filled, they turn red when you click the
[ Save ] button.
A warning will be displayed. Check all
entries and make changes where appro-
priate. Confirm by clicking
[ Save ].
The patient's picture can be added with
the [ Camera ] (web cam) or with the
[ File ] button (as a BMP, PNG, JPG, or GIF
file). With the [ Delete ] button, you can
remove the picture.
The date of birth is entered in the form
of digits, separated by blanks or periods
(DD [ space bar ], MM [ space bar ], YYYY).
With the drop-down arrow you open
the menu for selection of the gender
(male or female). As an alternative, you
can place the cursor in the text box and
type the initial letter(s) of the word (for
example, m for male).
Weight and height can be entered di-
rectly into the appropriate boxes. You
can use the arrow buttons
or the
keys [ ] [ ] on the keyboard to increase
or decrease the value.
Add options to ethnicity and language
via the button. Enter a designation
(name) and click [ OK ]. When you click
the arrow button , you can insert an
option from the drop-down list. Each
new entry will be appended to the list.