DTP CrossPoint 84 Series Matrix Switchers • Operation 40
Configuring the Input Audio
The input audio can be configured to tie the digital audio input (on the HDMI or TP
connector), the analog audio input (on the local connector), or to automatically select the
input, with digital having priority. Configure the input audio as follows:
1. Press the Esc button to clear any input button indications, output button indications, or
control button indications that may be lit.
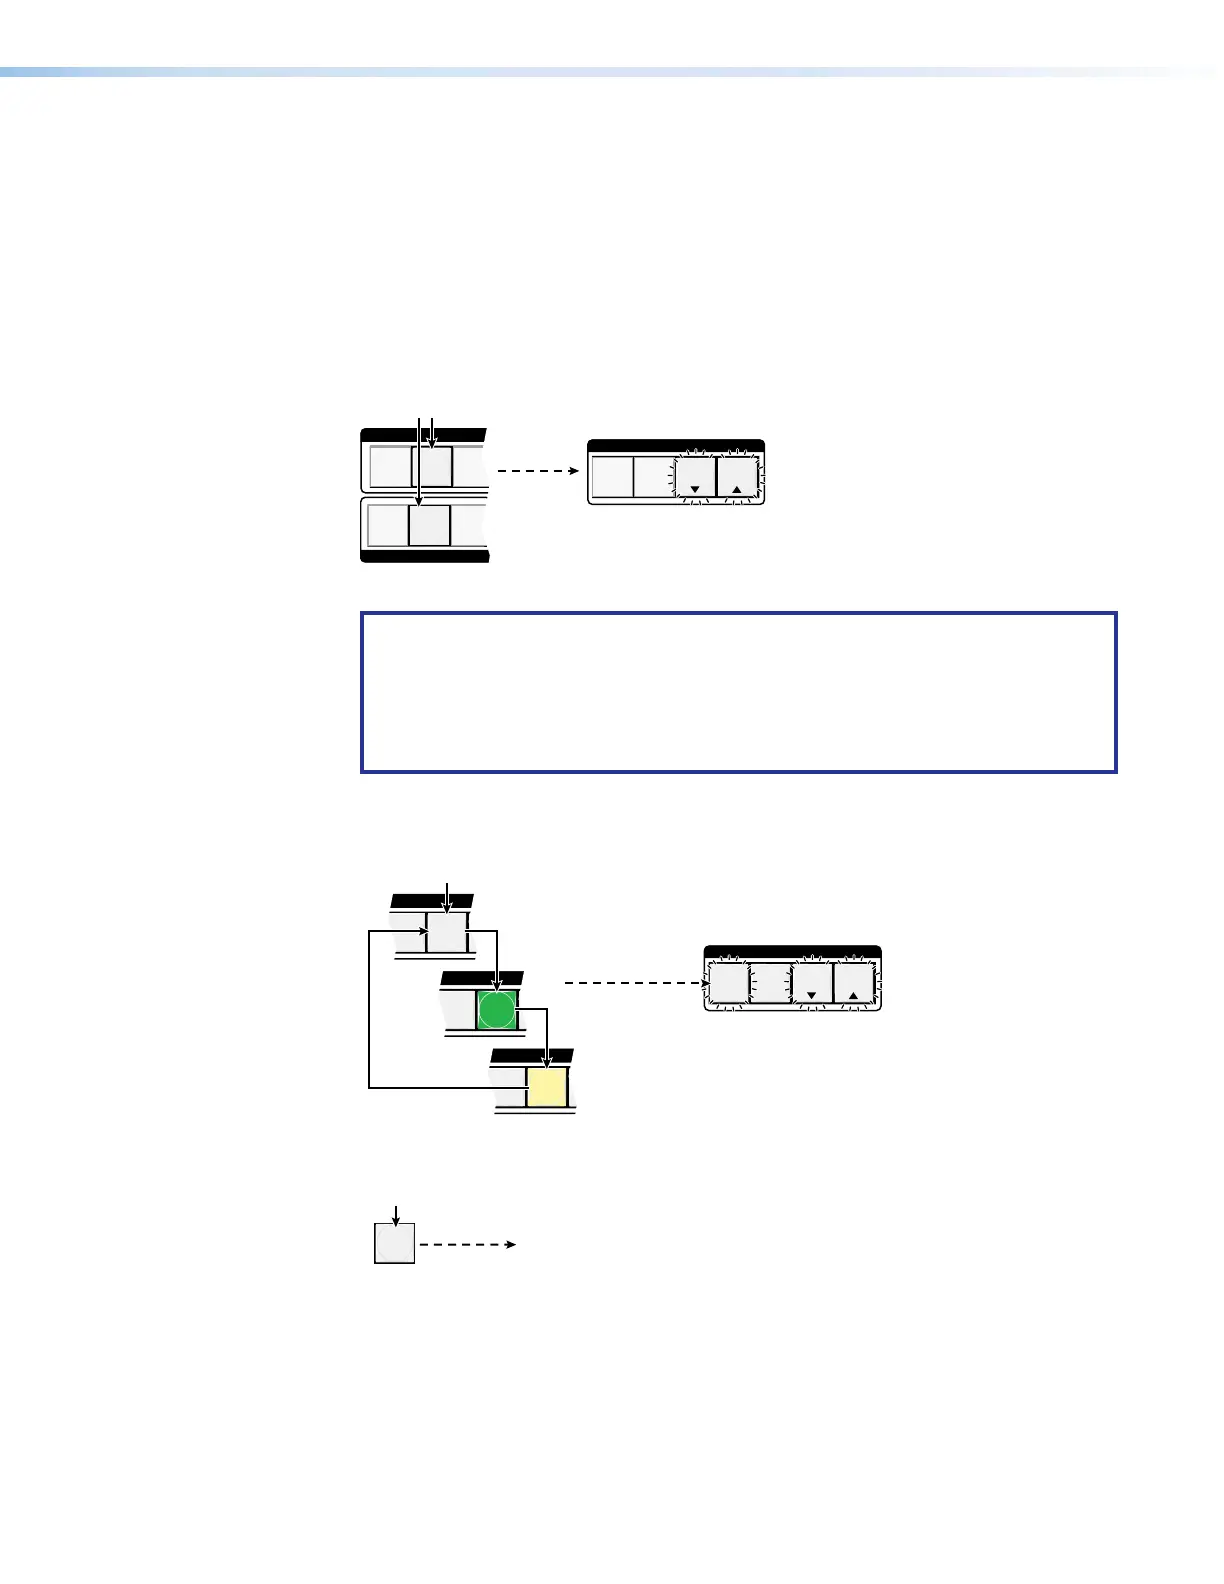
2. Select Input Audio Configuration mode: Press and hold the Input 2 and Output2
buttons simultaneously until the View and Esc button begin to blink (approximately 2
seconds).
1
2
3
1
2
3
OUTPUTS
CONTROL
ENTER PRESET
VIEW
ESC
Press and hold the buttons.
2 seconds
3. Release the input and output buttons.
NOTE: The audio configuration is protected when front panel Lock mode 2 is
selected. You can view the mutes in Lock mode 2 but you cannot change them
from the front panel (see Setting the Front Panel Locks (Executive Modes) on
page43).
If front panel Lock mode 2 is selected and you try to perform steps 4 and 5, the
actions are ignored.
4. Select the input and configure it: Press and release an input button to select that
input to configure. Repeatedly press the input, cycling through unlit, green, and amber
indications, to select the configuration.
4
5
INPUTS
4
5
INPUTS
4
5
INPUTS
CONTROL
ENTER PRESET
VIEW
ESC
Press the button repeatedly.
Press
Press
Press
The selected input button indicates the audio input configuration as follo
Unlit — auto mode Green — digital audio Amber — analog audio
The Enter button blinks to indicate
the need to save the change.
The View and Esc buttons
continue to blink.
5. Confirm the change: Press and release the Enter button.
ENTER
All input buttons and output buttons
return to unlit or background illumination.
Press the Enter button
to confirm the change.
The Enter button returns to
unlit or background illumination.