114 Eyecon 9420 & 9430 Instruction Manual
Audit reports
Press the View Data button to
run the report. This could take a
while depending on the size of
the report …
The report will be
displayed according
to the filters set.
Use the scroll bars
on the bottom and
side of the screen
to view the entire
report.
Press the Save All button to save the report to a USB memory stick.
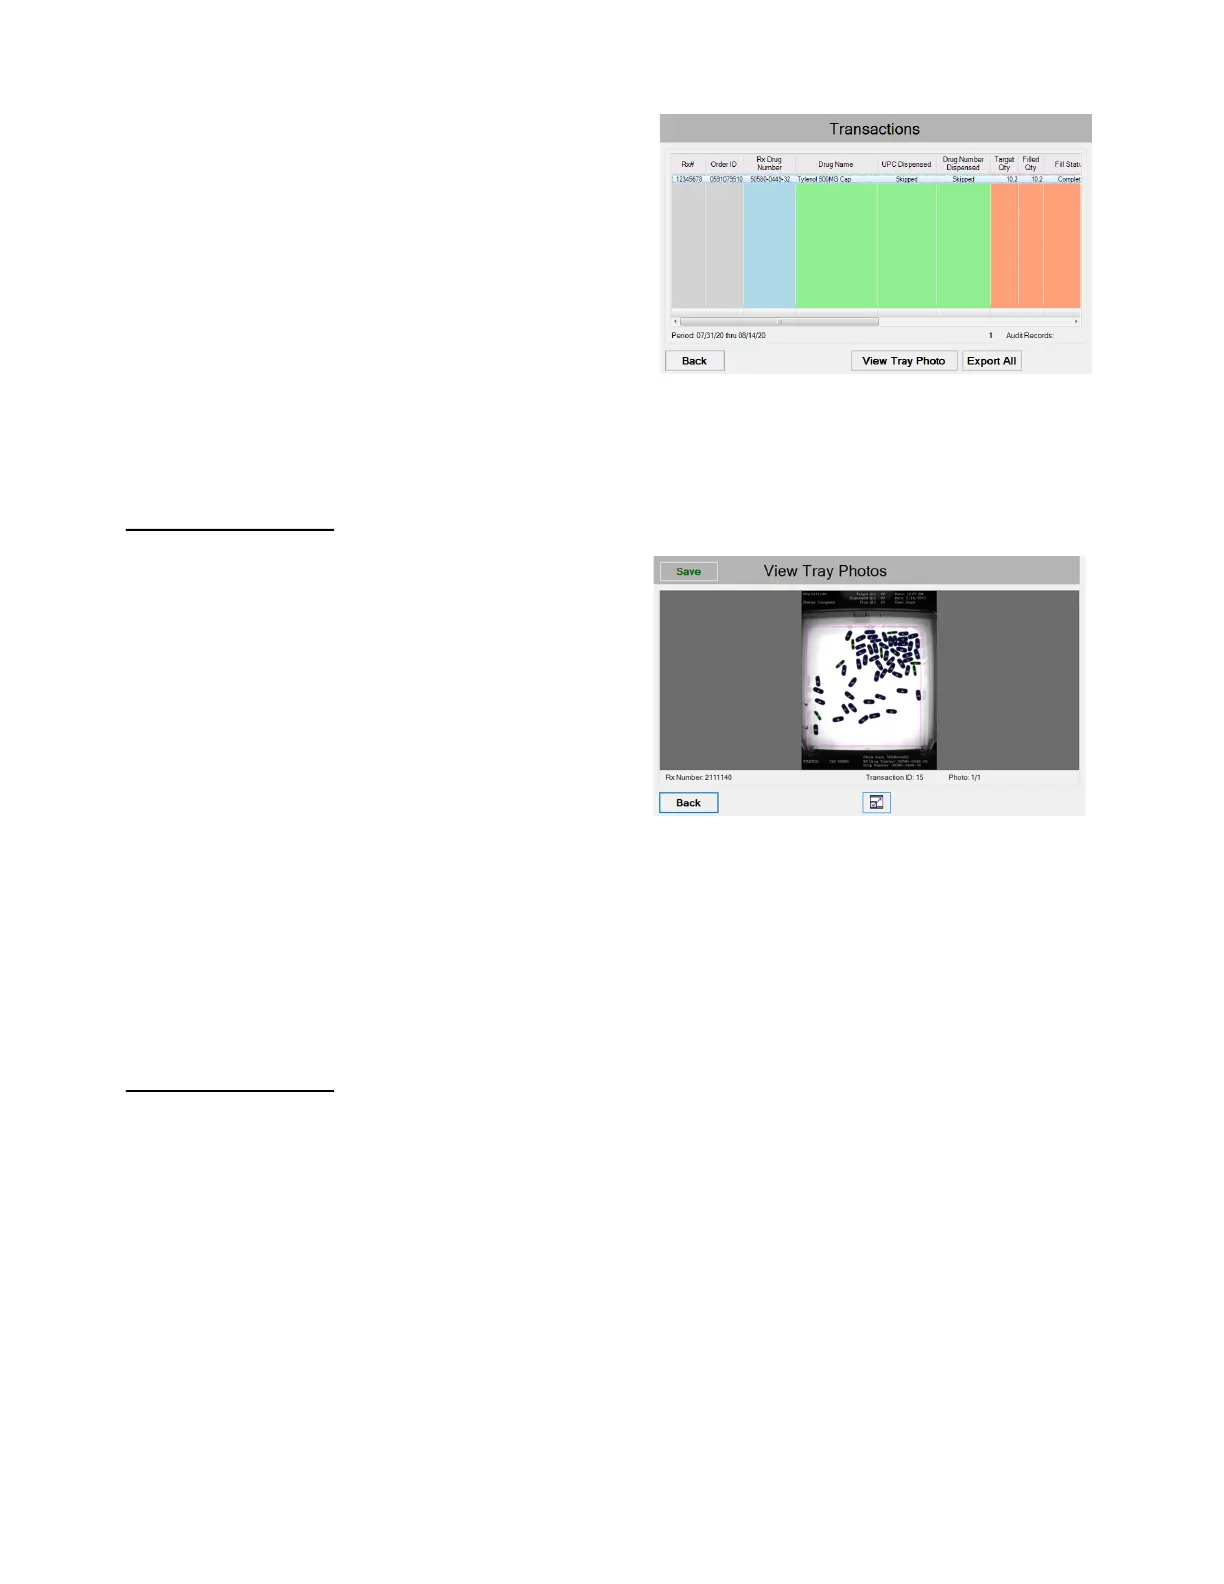
6.3.5 View Tray Photos:
To view a specific tray photo,
select a specific record and
press the View Tray Photo
button. An example of the screen
is shown at right. If more than
one image is available, use the
arrows to scroll to the other
images.
1. Press the Save button to
save the displayed photo
and the last viewed report
to a USB flash drive.
2. Press the zoom button at the bottom center of the screen to zoom the photo.
3. Press the Back button to return to the report Transactions screen.
4. Press the Back button again to return to the Auditor screen.
5. Press the Exit button when finished to return to the START screen.
6.3.6 Accessing the saved photos and reports
1. Insert the USB drive into your computer USB drive slot.
2. Open Windows Explorer.
3. Click on the drive letter of the USB drive in the left window. The drive letter
should be highlighted.
4. In the right window is a folder named “EyeconVPC”. Double click on this folder
to open it.
Inside the folder is a Transactions Report folder with the Eyecon name
and serial number. Inside this folder will be a csv folder and a Photos
folder.
 Loading...