Eyecon 9420 & 9430 Instruction Manual 47
3.6 Pharm. Mgmt. SW menu
3. Press Set to accept the settings and copy them to the Current Adapter
Settings, shown on the left side of the screen. Verify that the values were
successfully copied from the right side to the left side. If not, the entered
settings may not be compatible with your router. Check with your IT support for
assistance.
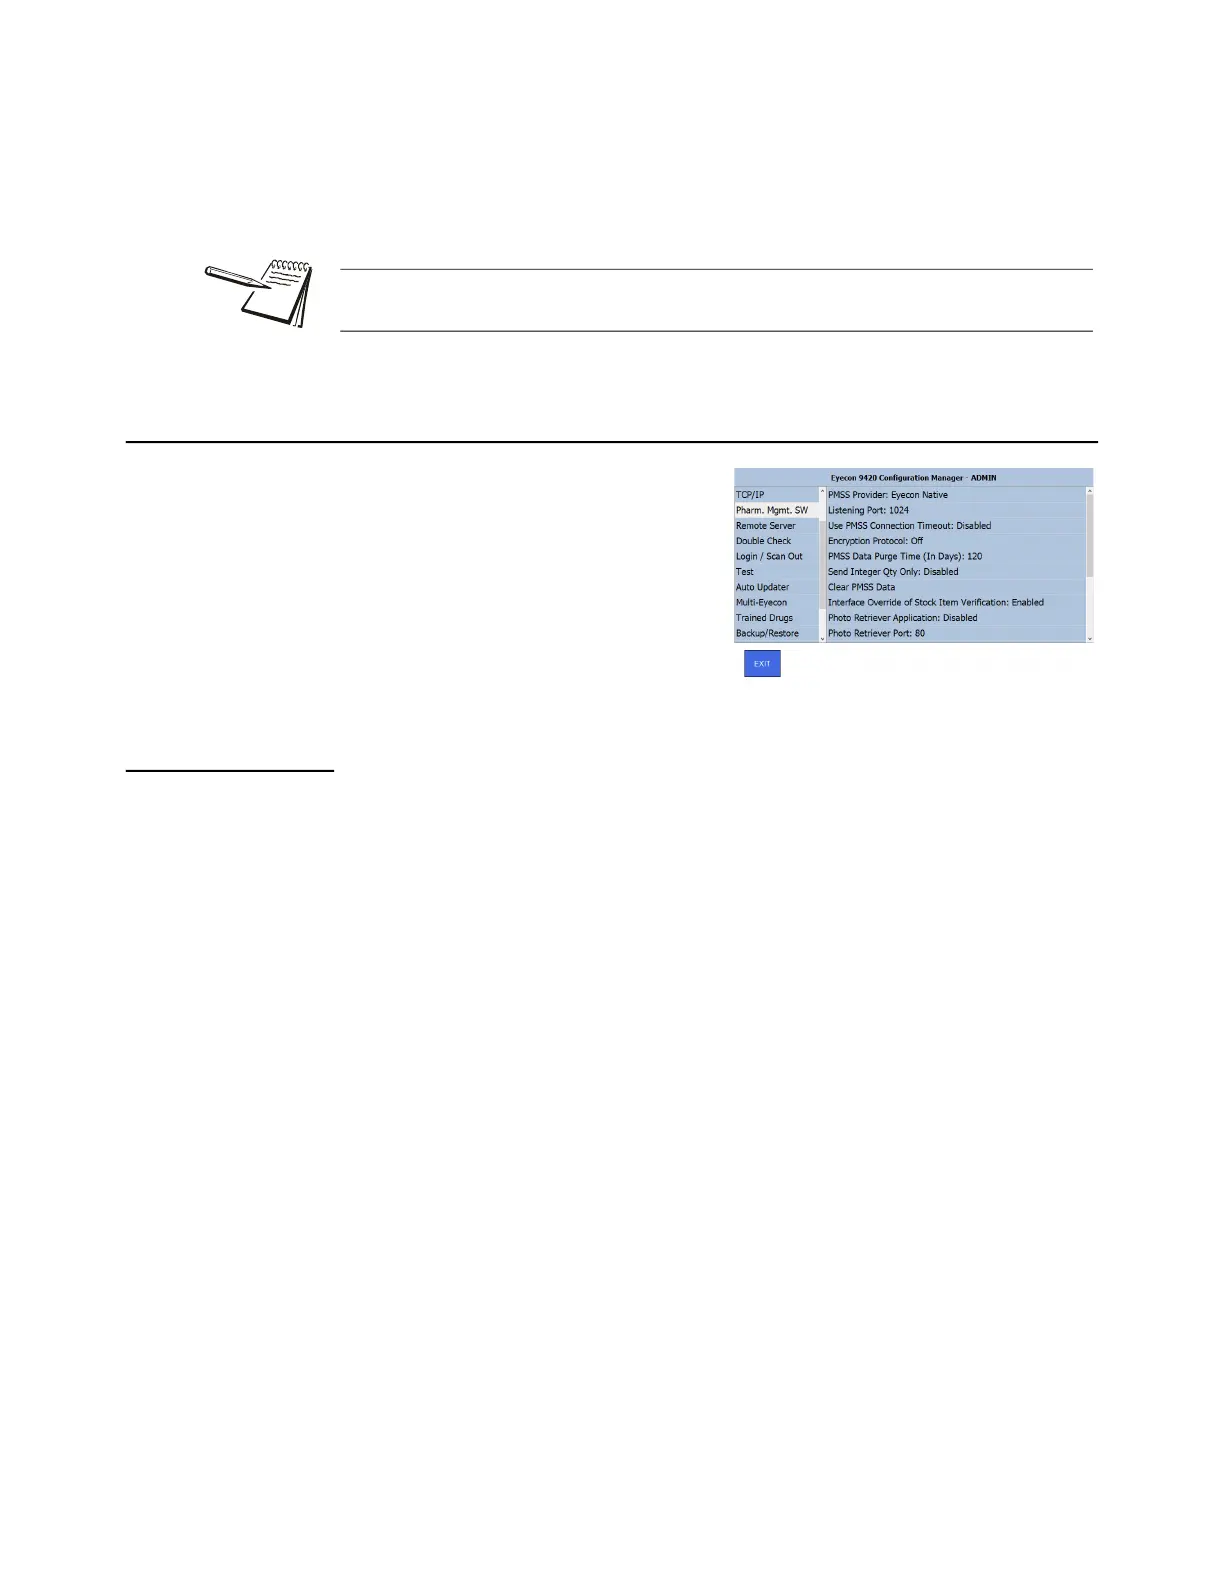
3.6 Pharm. Mgmt. SW menu
This stands for Pharmacy Management
Software. Tap on the Pharm. Mgmt. SW
menu to see the choices shown at right.
Section 3.6.1 has notes on things you need
to know about connecting to a
management system. Each menu item at
right is explained in the following sections.
3.6.1 General notes on connecting to a pharmacy management system
Here are the steps to connect an Eyecon with your pharmacy system.
1. In the Barcode menu on page 33, set the Barcode Type to PMSS.
2. Connect an Ethernet cable between your Eyecon and your network hub.
3. In the TCP/IP menu on page 46, establish an IP address.
4. Pick the PMSS provider in the menu item PMSS Provider: on page 48.
5. Specify a listening port. See Listening Port on page 48.
6. Set the Use PMSS Connection Timeout on page 49 to Disabled unless
otherwise directed.
7. Set the purge time. See PMSS Data Purge Time (In Days): on page 50.
To set up the Eyecon to send the Rx filling results back to the pharmacy system, follow
these steps:
1. In the Remote Server menu on page 53, set Send Count Results (Bidirectional):
to Enabled.
2. Set the Remote Server IP address to the IP address of the computer of the
pharmacy system. Consult your pharmacy provider for this information.
3. Set the Remote Server Port Number to the Port that the pharmacy system is
listening to. Consult your pharmacy provider for this information.
Pressing Cancel returns you to the TCP/IP menu without saving changes. Pressing
Exit saves the changes before returning you to the TCP/IP menu.