26 Eyecon 9420 & 9430 Instruction Manual
Settings menu
3 Settings menu
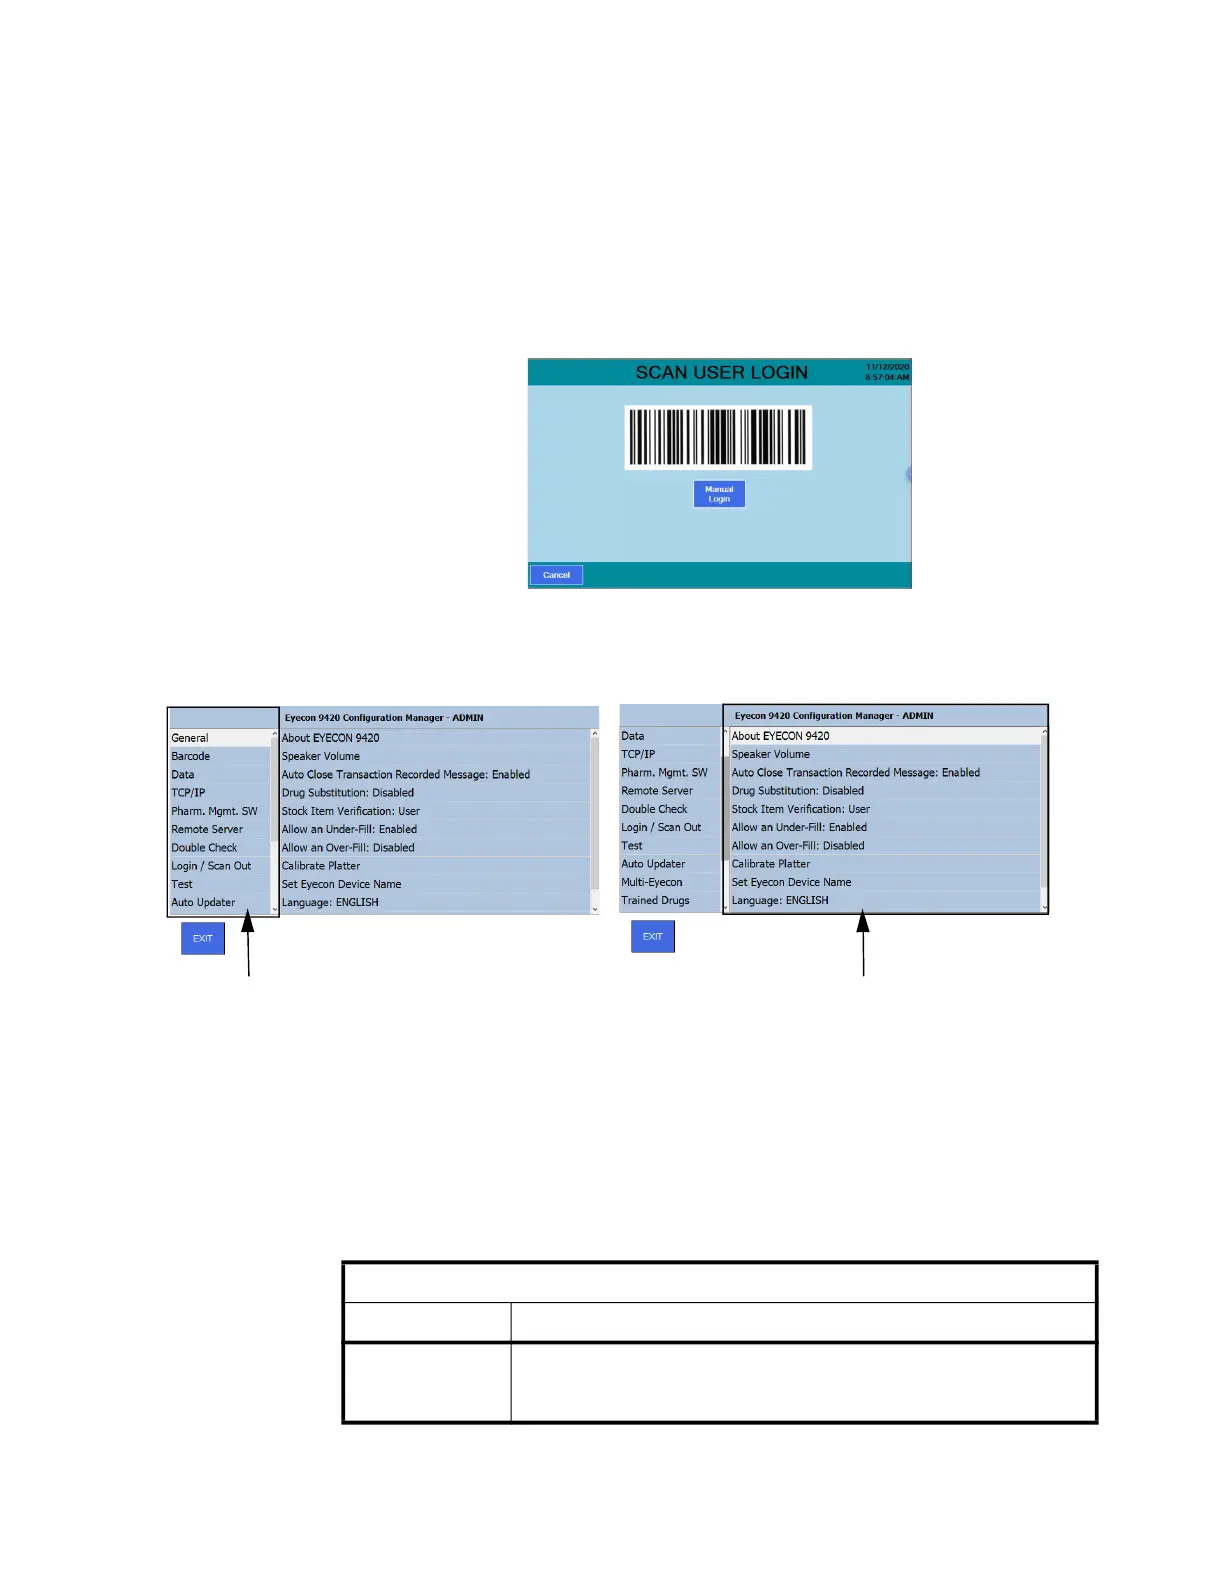
Depending on your Eyecon’s configuration, users may need to scan in when accessing
the Settings Menu.
To access the Settings Menu, press the Settings button on the START screen.
If your Eyecon has been configured to require User Login and User Login credentials
have been created on the Eyecon, they can scan their login barcode or press the
Manual Login button and key in their login ID as shown in the image below.
Next you will be prompted to key in a password.
Otherwise, users will go directly to the Settings Menu.
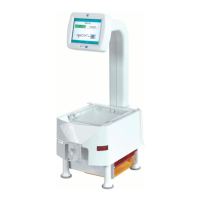
Notice the left side of the screen contains the top level menu and, since they can’t all
fit on the screen, you can use your finger to swipe up or down on either the left or right
side of the menu. When you touch the item you want in the top level menu on the left
side, the choices under that item appear on the right side of the display.
Table 3.1 shows the entire main list of items and a quick description of what they are
used to configure or view.
Table 3.1 Configuration Manager List
Top level menu Parameter level menu
Eyecon 9420 Configuration Manager
Main Menu Item Description
General
Access this to see information about the 9420, enable or disable the Auto Close
Recorded Message, Drug Substitution, Stock Item Verification, Allow an Under-
fill or Over-fill and to calibrate the platter.