1.12.4. Checking power supply adequacy
This test is done at the end of the installation and configuration to
determine the power supply adequacy during exposure.
It is done by measuring the line voltage drop during exposure, using
the parameters for a typical panoramic radiography.
Be sure the mains room switch and system mains switch are
turned OFF.
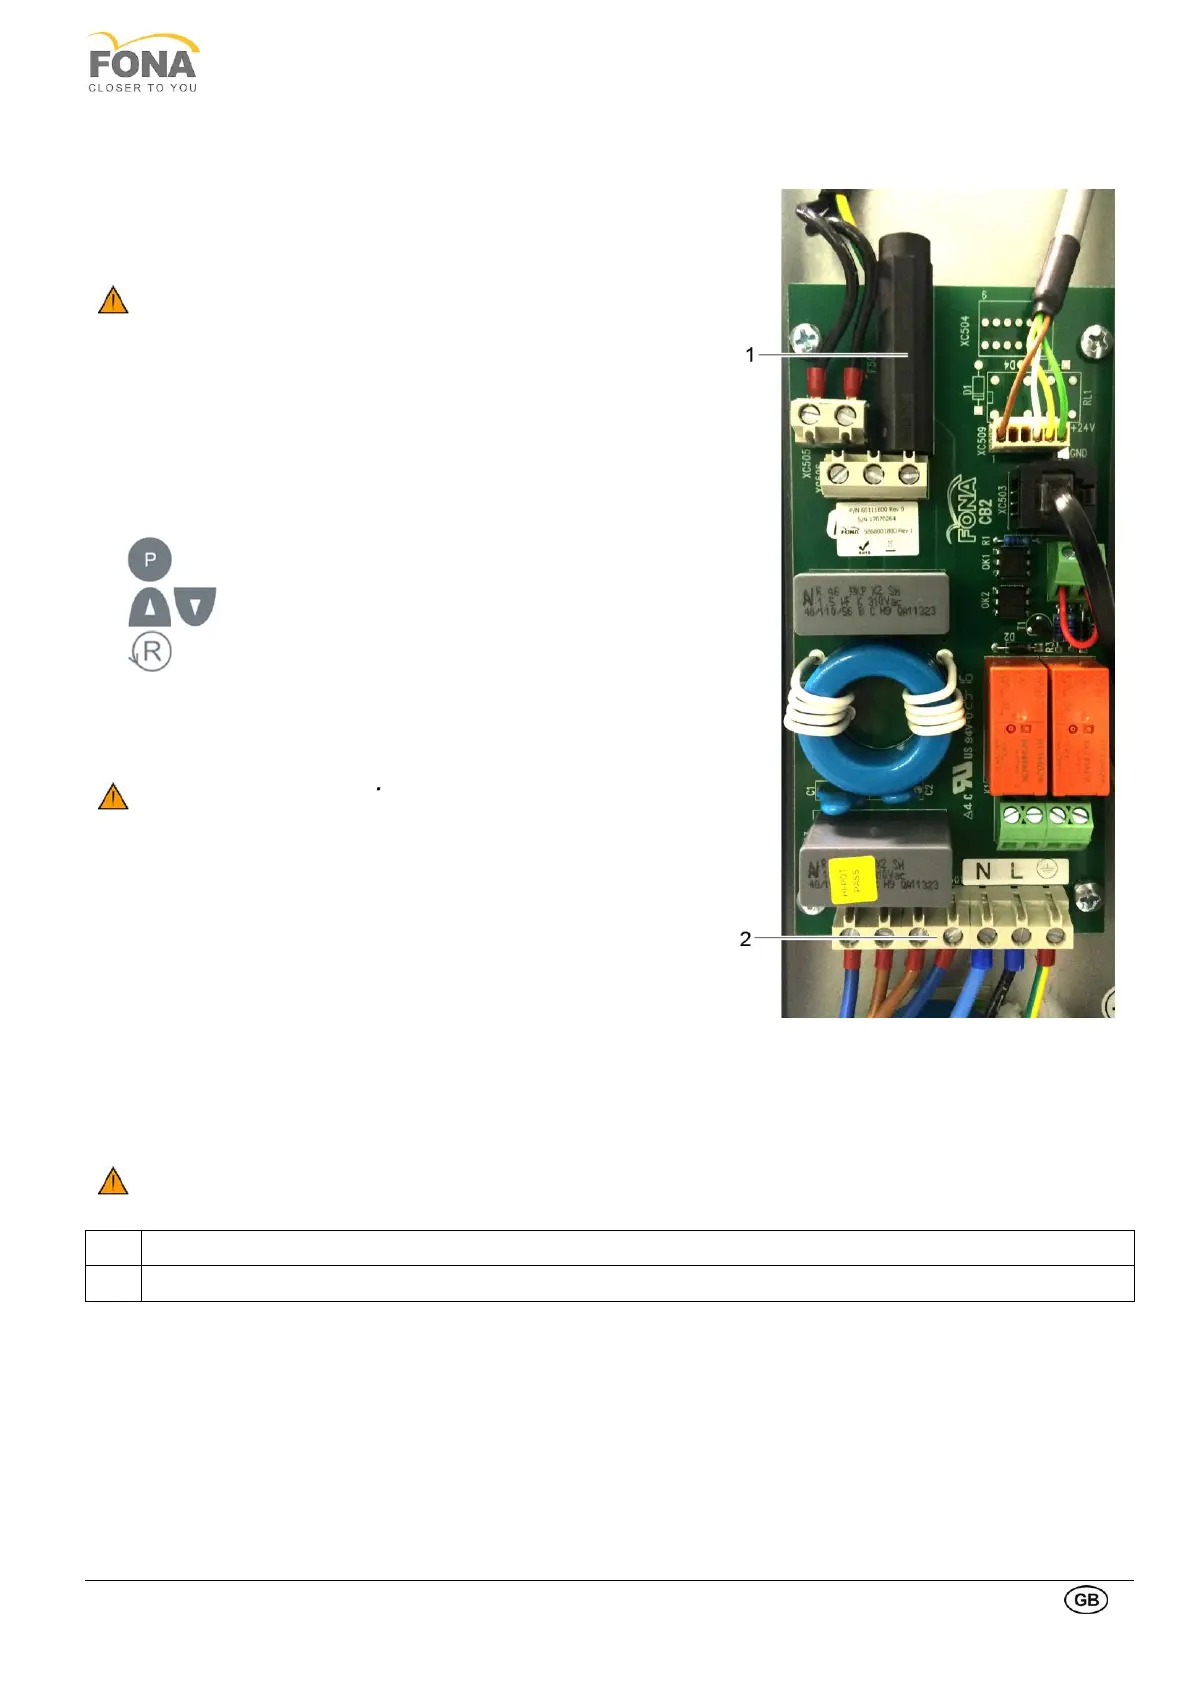
• Select 300 VAC line voltage range on multi-meter and connect
measuring leads to the L and N points on the mains input block
XC501.
• Turn ON the mains room switch and system mains switch.
• Switch the unit ON.
• Do Reset and wait for initialization.
• Prepare the Pan Calibration Utility DG Suite program on PC and
establish exposure readiness.
• Select P1 program
• Select 73 kV / 10mA at control panel
• RETURN Arm Movement to bring the arm position START,
ready to start the exposure
• Run the acquisition program to receive the radiographic image
being created.
ATTENTION RADIATION Upon depression of the exposure key
radiation is generated.
• Expose by keeping the exposure key pressed till end of movement.
• During exposure read the minimum voltage under load.
• After the end of the exposure read the voltage at no load.
• Compute voltage drop under load (difference of voltage with no
load – minimum voltage under load).
• Max permissible voltage drop under load:
• 5 V at 230 VAC
• 5 V at 115 VAC
• Turn unit OFF and remove meter leads.
• Put back covers.
If the voltage drop is not within the specified, range advise the
customer, that an adequate power supply must be installed.
Disconnect unit and do not release for use.
Mains Input Block (starting from right Ground, Live and Neutral mains input)
 Loading...