1.10. SYSTEM START-UP
1.10.1. Preparing the unit for test
A. Switching ON the Unit
By pressing the mains switch in the lower part of the vertical carriage under the mirror, the
unit is supplied as indicated by the green light of the mains switch.
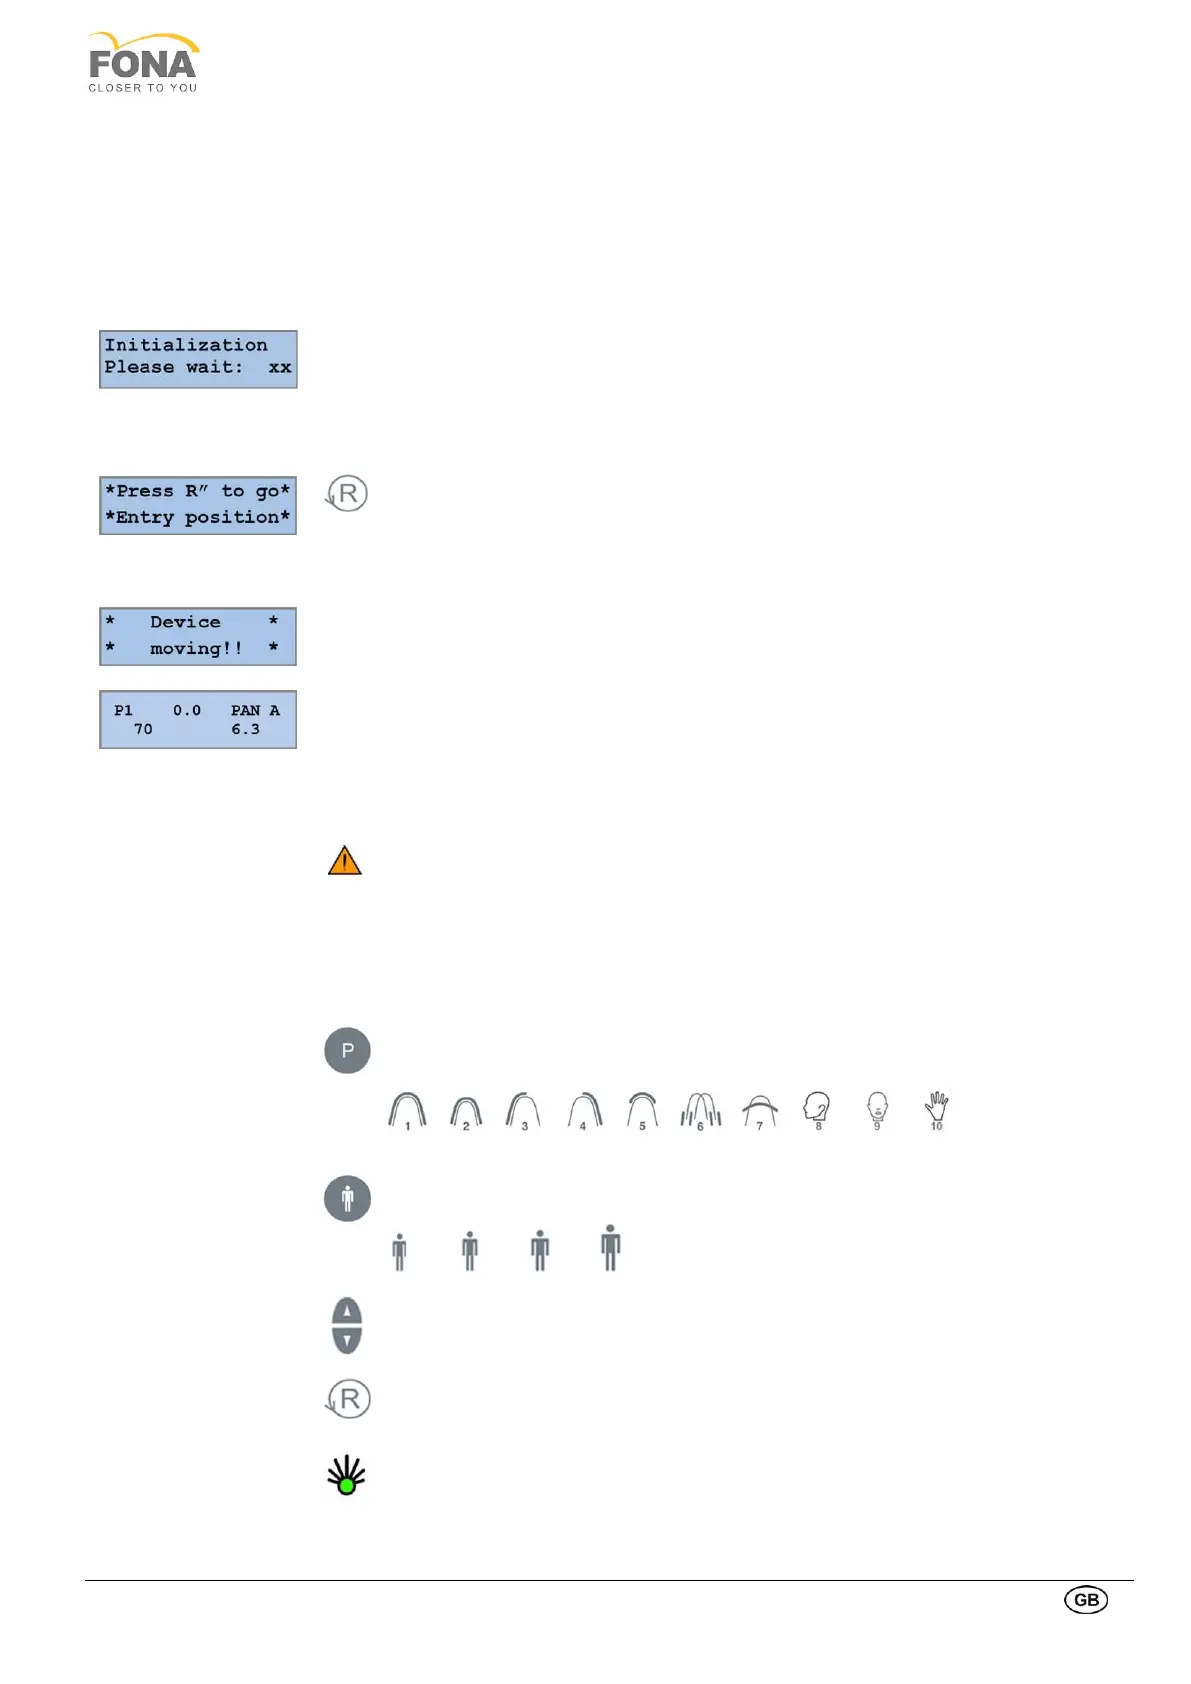
• The display on the control panel turns on and the firmware version is displayed
• System initialization is started
• Start of the reset function has to be performed
By pressing the RETURN Arm Movement key the rotation arm locates the reference
points and moves to the PATIENT ENTRY position (see next page), with control panel and
X-ray source to the right of the patient, image receiver to the left.
During the reset, the label “Device moving!!” is displayed.
The selected program with the technical parameters (kV and mA) is displayed.
“X-Ray Sensor Not Connected” if the digital sensor is not connected. To continue you need
to connect the digital sensor on the PAN side or the CEPH side as described above. During
sensor connection, the sensor is reset and the progress is shown on the control panel.
If this message appears when the digital sensor is connected on the PAN side or the CEPH
side, check that the green light on the digital sensor release button is on and that it is
properly fitted in place, otherwise push it into place on the holding magnet.
Key for PROGRAM selection, to change from 1 to 10 and back.
Key for PATIENT build setting: Small, Medium, Large, Extra Large.
The pre-programmed technique factors are selected.
Manual correction of tube voltage and of tube current can be done using the
INCREASE or DECRESE keys at display sides.
RETURN Arm Movement to bring the arm from position PATIENT ENTRY to
position START, ready to start the exposure.
When the unit reaches the START position, the green light of the READY indicator
on the control panel is turned ON.
 Loading...