48
The automatic spot-welding sequence is as follows:
Pull back and release the torch trigger.
Gas pre-flow time elapses.
Arc ignites with start-arc current.
Current rises via the set up-slope to the spot-welding current
value set on the dial
.
LED control lamp lights up.
The spot-welding time (0,5 - 8 secs.) set on the dial elapses.
The current drops via the down-slope (dial ) to a minimum
current value of 8 A over the speed set, and then switches off.
The gas post-flow time elapses.
TIG WELDING WITH HIGH-FREQUENCY
IGNITION (HF) - START UP
WARNING! When the TRANSTIG is being used for TIG
welding, the manual electrode cable will always be live
when:
the mains master switch is ON
the functional selector switch is in the or
position and
when the “start welding” signal has been given from the
torch trigger.
Make sure, when the manual electrode cable is not in use,
that it is either disconnected from the machine or else
fastened to the machine in such a way (insulated) that the
electrode holder and the coated electrode cannot touch any
electrically conductive or earthed parts such as the housing,
gas cylinder, workpiece etc.
I
O
I
H
t
H
t
End of welding
Gas post-flow time
Start of cycle
Gas pre-flow time
Arc ignition
Current-rise via up-slope
Spot-welding with set welding
current I
H
in conjunction
with spot welding time t
H
Current-drop
via down-slope
Pull back and release the torch trigger
Fig. 35
Spot-welding gas nozzle
Tungsten electrode
Spot-weldGas discharge opening
Fig. 36
Note! In the event of any trouble, the welder can manually
interrupt the automatic spot-welding sequence by pulling back
and releasing the trigger again!
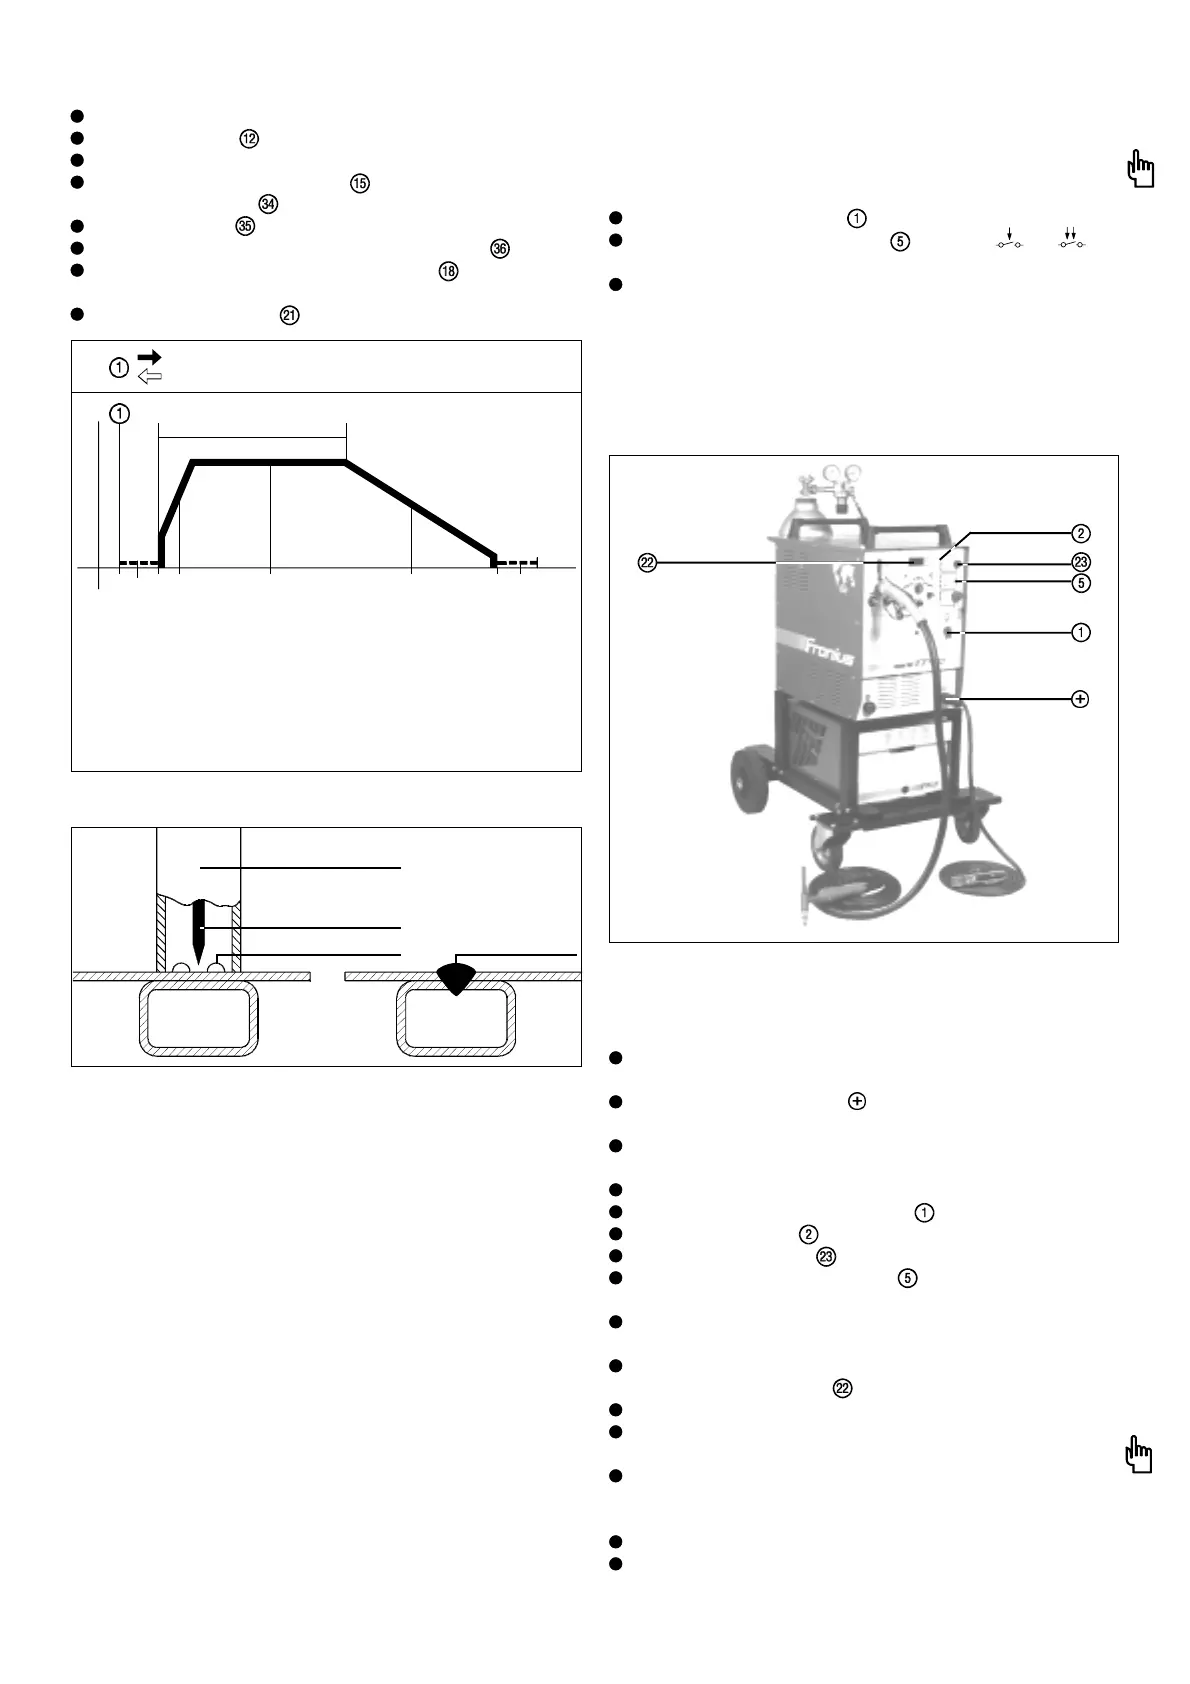
Fig. 37 Transtig water-cooled: TIG welding machine consisting of power
source with control unit, FK 7 cooling unit, manual torch, earth cable,
gas cylinder with pressure regulator.
Setting up
Fit the mounted torch with a tungsten electrode and a gas
nozzle (see the instruction manual for the torch concerned).
Plug the earth cable into the current socket and latch in place
firmly.
Connect the gas hose from the machine to the gas pressure
regulator.
Plug in the mains plug.
Switch on the mains master switch -
- mains control lamp lights up.
Set HF-selector switch to the "1" position.
Shift the function selector switch into the 2-step or 4-step
position, as required; respective LED lights up.
If necessary, connect a remote control unit (see description of
remote control operation on p. 42).
Select welding parameters (command value for main current I
H
is displayed on ammeter ).
Open the gas cylinder valve by turning it anticlockwise.
Pull back the torch trigger and release it (4-step operation)
Warning! High-frequency ignition is now switched on !
Turn the setscrew on the underside of the gas pressure
regulator in a clockwise direction until the working manometer
shows the required flow-rate in litres/min.
Set the gas pre-flow and post-flow times on the power source.
Pull back and release the torch trigger once again
(= welding OFF)