50
Fig. 42 Example of a Soft Start ignition phase in 4-step operation, with higher
start-arc current I
S
than ignition current (Tungsten electrode: 1.6 diam)
Pull back torch trigger and hold down
Release torch trigger
Gas pre-flow time
Start of cycle
Tungsten electrode
touches workpiece
Short circuit phase
Tungsten electrode
is lifted off workpiece
1,6 ø
Current rises
via ignition current
(as set on dial to the
pre-set start-arc current I
S
tilt the torch backwards until the edge of the gas nozzle is
resting on the workpiece, leaving a gap of between 2 and 3 mm
between the tip of the electrode and the workpiece. (Fig. 39a)
Close your visor.
Switch on the welding current with the torch trigger - shielding
gas starts flowing
Resting the torch on the edge of the nozzle, gradually tilt it
upwards until the tip of the electrode touches the workpiece
(see Fig. 39 b)
The arc ignites when the torch is raised and moved into the
normal position (Fig. 39 c)
Start welding
AUTOMATIC SWITCH-OFF FOR COOLING UNIT
In order to prevent the torch cooling system working unnecessarily
under no-load conditions, the machine has an automatic cooling-
unit switch-off feature.
The FK7 cooling unit is automatically switched off approx. 2 mins.
after any of the following:
MANUAL ELECTRODE WELDING
START UP
Fig. 41 Example of a Soft Start ignition phase in 4-step operation, with lower
start-arc current I
S
than ignition current (Tungsten electrode: 1.6 diam)
Pull back toch trigger and hold down
Release torch trigger
1,6 ø
Gas pre-flow time
Start of cycle
Tungsten electrode
touches workpiece
Short circuit phase
Tungsten electrode
is lifted off workpiece
Pre-set start-arc current
(dial
)
Pre-set start-arc current I
S
Current rises via up-slope
Pre-set main current I
H
Pre-set main current I
H
Current rises via up-slope
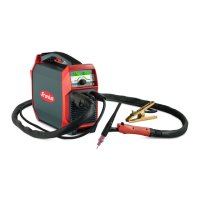
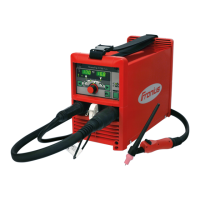
Fig. 43 Transtig water-cooled as a manual electrode welding machine,
consisting of power source with control unit, FK7 cooling unit, manual torch
with TP3 / TP4-SP (option) and welding cables.
Mains master switch is switched on, function selector switch
is on TIG
or , no welding is in progress.
Mains master switch is ON, function selector switch is in
or position, TIG torch switching sequence is tested
through in open circuit.
Completion of a TIG welding operation
Mains master switch is ON, function selector switch is
switched over from
to TIG or .
Setting up
Plug the welding cables into sockets and (which way
round will depend on the type of electrode used - observe the
electrode manufacturer's instructions) and secure by turning in
a clockwise direction. (Cable cross-section: 50 - 70mm
2
)
The TIG torch does not need to be dismounted.
Shift mains switch to "1"
The control lamp indicates that the machine is operational.
Shift the function selector switch into the position.
LED indicator
and welding current indicator light up.
WARNING! When the TRANSTIG is being used for manual
electrode welding, the tungsten electrode on the mounted
welding torch will always be live when the mains master
switch is ON and the functional selector switch is in
the
position. Make sure, when the torch is not in use,
that it is either disconnected from the machine or else
fastened to the machine in such a way (insulated) that the
tungsten electrode cannot touch any electrically conductive
or earthed parts such as the housing, gas cylinder, work-
piece etc. (If necessary fixing the tungsten electrode approx.
10 mm back from the edge of the gas nozzle!)
Connect TP3 / TP4-SP remote control unit if required
(see description of remote control operation on p. 42)
Pre-select welding current (command value for main current I
H
is displayed on ammeter )
If using remote control unit, set arc force and Hot-Start
(see "TP3 / TP4-SP remote control unit")
Initiate the welding operation.

 Loading...
