74
IMPORTANT: In the
and arc-force ranges, due
to the slope of the characteristic, the welding amperage will de-
pend either on the arc-drop voltage of the electrode being used
or on the gap between the electrode and the workpiece, and thus
may not correspond exactly to the value set on the scale.
Practical tips!
When the setting on the arc force control dial is adjusted upwards,
the following may be observed when rutile, basic-sheathed, CEL
or special electrodes are being used:
Easy ignition
Reduction in welding misfires
Less electrode burn-on
Good root penetration
Harder arc
Occasionally an increase in spattering
When welding thin sheet metal the danger of "burning through"
increases
With filling-welds, there will be a tendency for the arc to become
somewhat harder
With fine-globule electrodes (such as titanium) the above will
fewer be observed, as metal transfer occurs without a short
circuit being produced.
REGULATEUR D'AIDE A L'AMORÇAGE "HOTSTART"
seulement actif dans phase d'amorçage de électrode
Avantages:
amélioration des caractéristiques d'amorçage aussi avec
des électrodes d'amorçage difficile
fusion amélioré du métal de base dans la phase d'amorçage
et par conséquent nombre réduit de soudures froides
inclusion de scories largement évitée
est ajouté proportionnellement au courant de soudage réglé
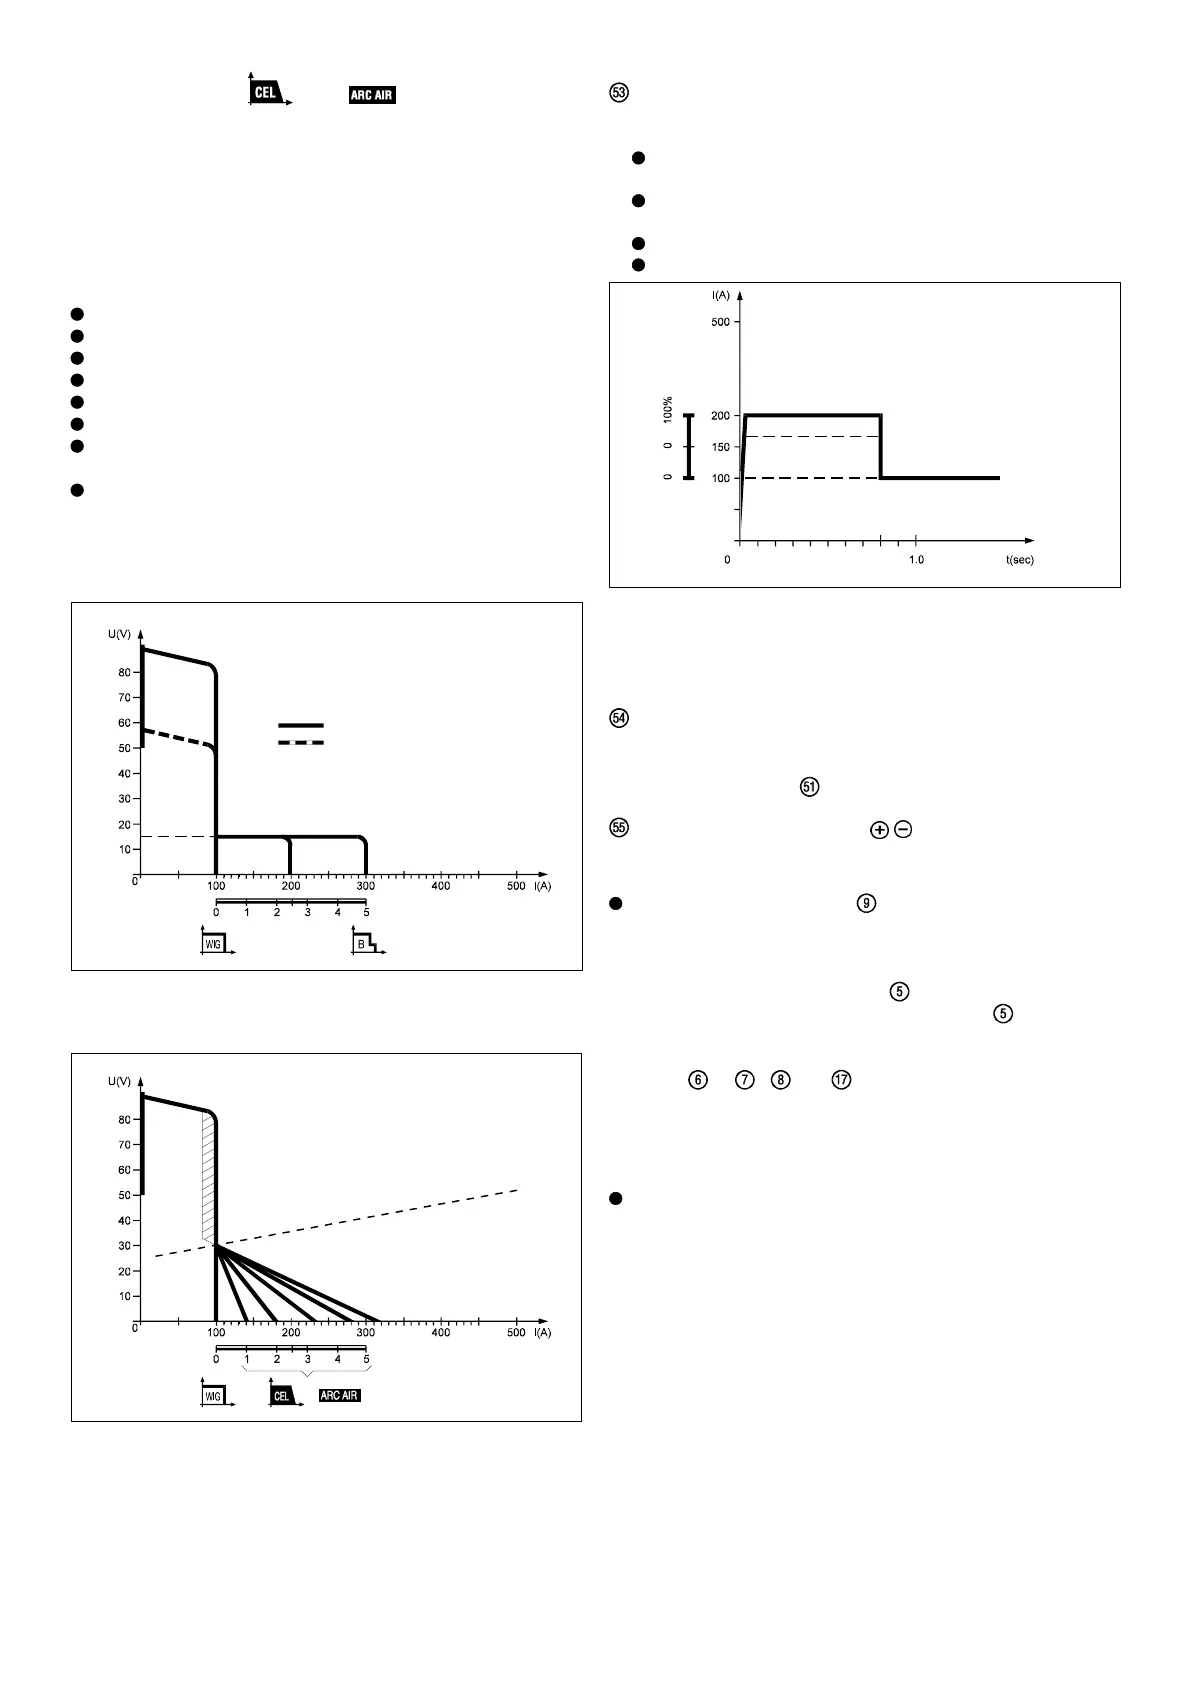
Fig. 27a Effect of arc force control dial on constant-current characteristic at the
moment of short circuiting. Welding current setting 100 A
Fig. 27b Effect of arc force control dial on falling characteristic at the moment of
short circuiting. Welding current setting 100 A
ARC CHARACTERISTIC
ARC FORCE CONTROL DIAL
DYNAMIKREGLER
TT 450
TT 330
Fig. 27c Phase d'aide à l'amorçage HOT-START courant de soudage réglé: 100 A
Aide à l'amorçage
IMPORTANT: Le courant total d'AIDE A L'AMORÇAGE "HOT-
START est limité automatiquement par le courant de court-circuit
maximum de l'installation
RANGE SWITCH
This divides the overall welding range of the machine into two
overlapping sub-ranges. The welding amperage can be set
continuously on dial
.
POLE-CHANGING SWITCH
Not in use!
Connecting up the remote-control unit:
Link the connecting-socket on the power source with the
socket on the remote control unit via the remote control cable.
Plug in the connectors the right way round, and screw the
swivel nuts down as far as they will go.
Shift the function selector switch
into the correct position for
the operating mode required. (See p. 37, Pos.
for a detailed
description).
If a correct connection has been made, the appropriate control
lamps
or / and will light up on the TC3 control
unit.
Welding without a remote control unit:
The parameters for HOT START and ARC FORCE are set to
average values in the machine (see Fig. 49 on p. 56)
Welding CEL electrodes and ARC-AIR gouging are only
possible within certain limitations.