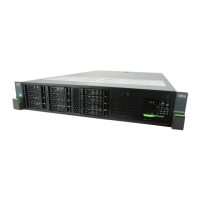
Figure 317: Label positions of the ETERNUS JX40 S2 / DX100 S3 modules.
Verify the labels against the ID numbers displayed at the operation panels. If there are
none or wrong labels at the modules, label them correctly.
Label the new expansion module(s) with the always next currently unused identifier. Also
affix a label to both ends of their power cables.
A label sheet was provided together with the original ETERNUS CS800 S6
delivery.
3. Shutdown the ETERNUS CS800 S6 via the remote management pages (see "Reboot &
Shutdown" on page 457).
Shutting down the system can take up to 15 minutes. The server goes into standby
mode, its power-off indicator lights up green.
4. After the server has switched off itself, also the ETERNUS DX100 S3 storage module
should switched off. Therefore press and hold the power ON/OFF button of the storage
base module for at least 4 seconds until the READY LED does not glow any more. Then
wait a few minutes until DX100 S3 has shut down (its power LED goes off).
5. Depending on the needs, relocate the existing modules or just mount the new ones in the
rack according to the numbering scheme of the modules. The sequence of the modules
should be as shown in figure "Recommended Positions of the Modules in the Rack for
Scale" on page 484.
CAUTION!
If you have to unmount or to relocate the existing modules, ensure not to change
their order. Double check the labels, see step 2.
6. The SAS cabling of the ETERNUS DX100 S3 storage modules has to be prepared in the
form of a so called reverse cabling: The cabling chain behind CM#0 of the CE module
goes from the first to the last DE while the chain behind CM#1 goes from the last to the
first DE.
ETERNUS CS800 485
17 Storage Expansion