4
Use
Installing or removing a sterilisable handle
62 / 116
Maquet PowerLED II
IFU 01811 EN 10
4.3 Installing or removing a sterilisable handle
WARNING!
Risk of infection
If the sterile handle is not in good condition, there is a risk that particles
could fall from it into the sterile environment.
After each sterilisation and before using a sterilisable handle again, check
that there are no cracks.
WARNING!
Risk of infection
The sterilisable handles are the only parts of the device that can be sterilised.
Any contact by the sterile team with another surface results in a risk of infec-
tion. Any contact by non-sterile personnel with these handles results in a risk
of infection.
During the procedure, the sterile team must handle the device using the ster-
ilisable handles. On an HLX handle, the locking button is not sterile. Non-
sterile personnel must not come into contact with the sterilisable handles.
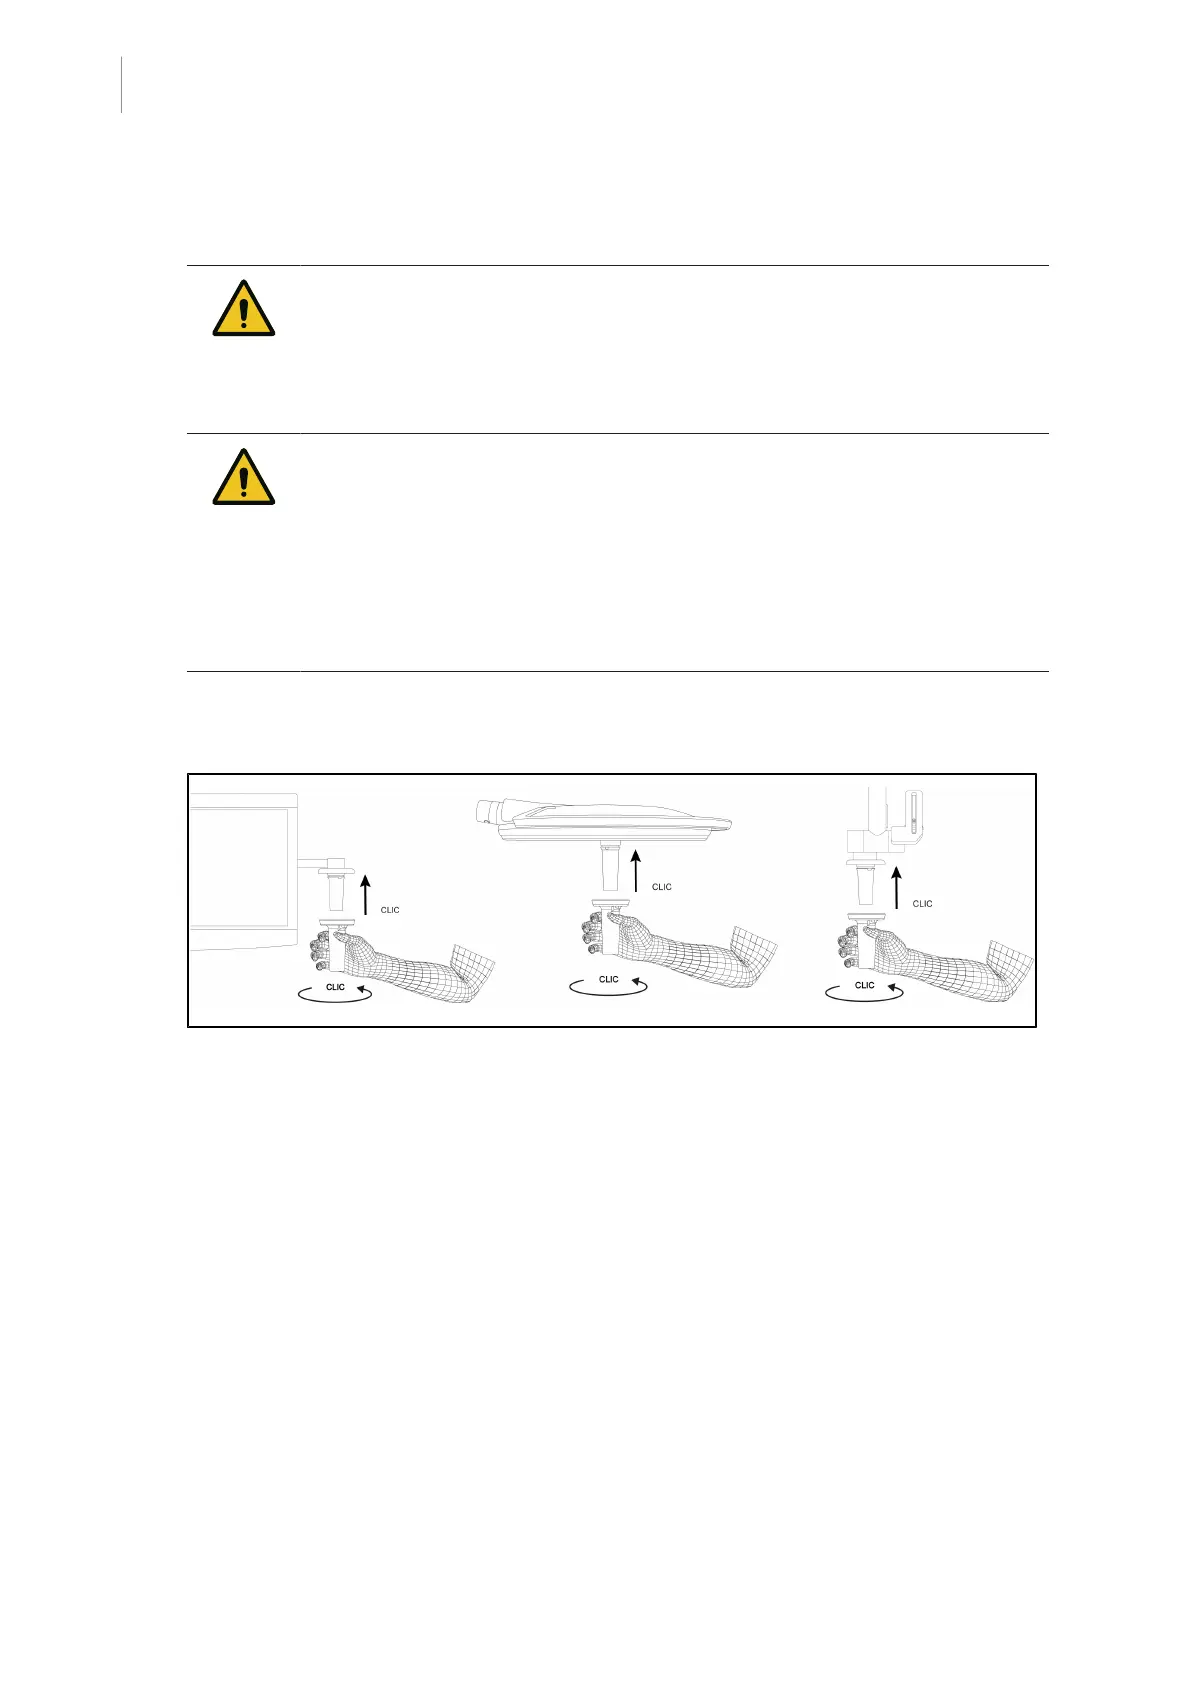
4.3.1 Installing or removing an STGPSX01 sterilisable handle
Fig.63: Installing an STGPSX01 sterilisable handle
Installing an STGPSX01 sterilisable handle
1. Inspect the handle and check for cracks or soiling.
2. Insert the handle on the mount.
Ø A click is heard.
3. Turn the handle until a second click is heard.
4. Check that the handle is firmly in place.
Ø The handle is now locked in place and ready for use.
 Loading...