4
Use
Positioning the camera mount
86 / 116
Maquet PowerLED II
IFU 01811 EN 10
4.8 Positioning the camera mount
4.8.1 Attaching a camera to the SC camera mount
NOTE
Only medical video cameras compliant with IEC60601-1 and featuring moulded
detachable connectors and a 1/4'’ thread may be fitted on this mount. The choice
of camera, cables and their routing through the mount remains under the respons-
ibility of the customer.
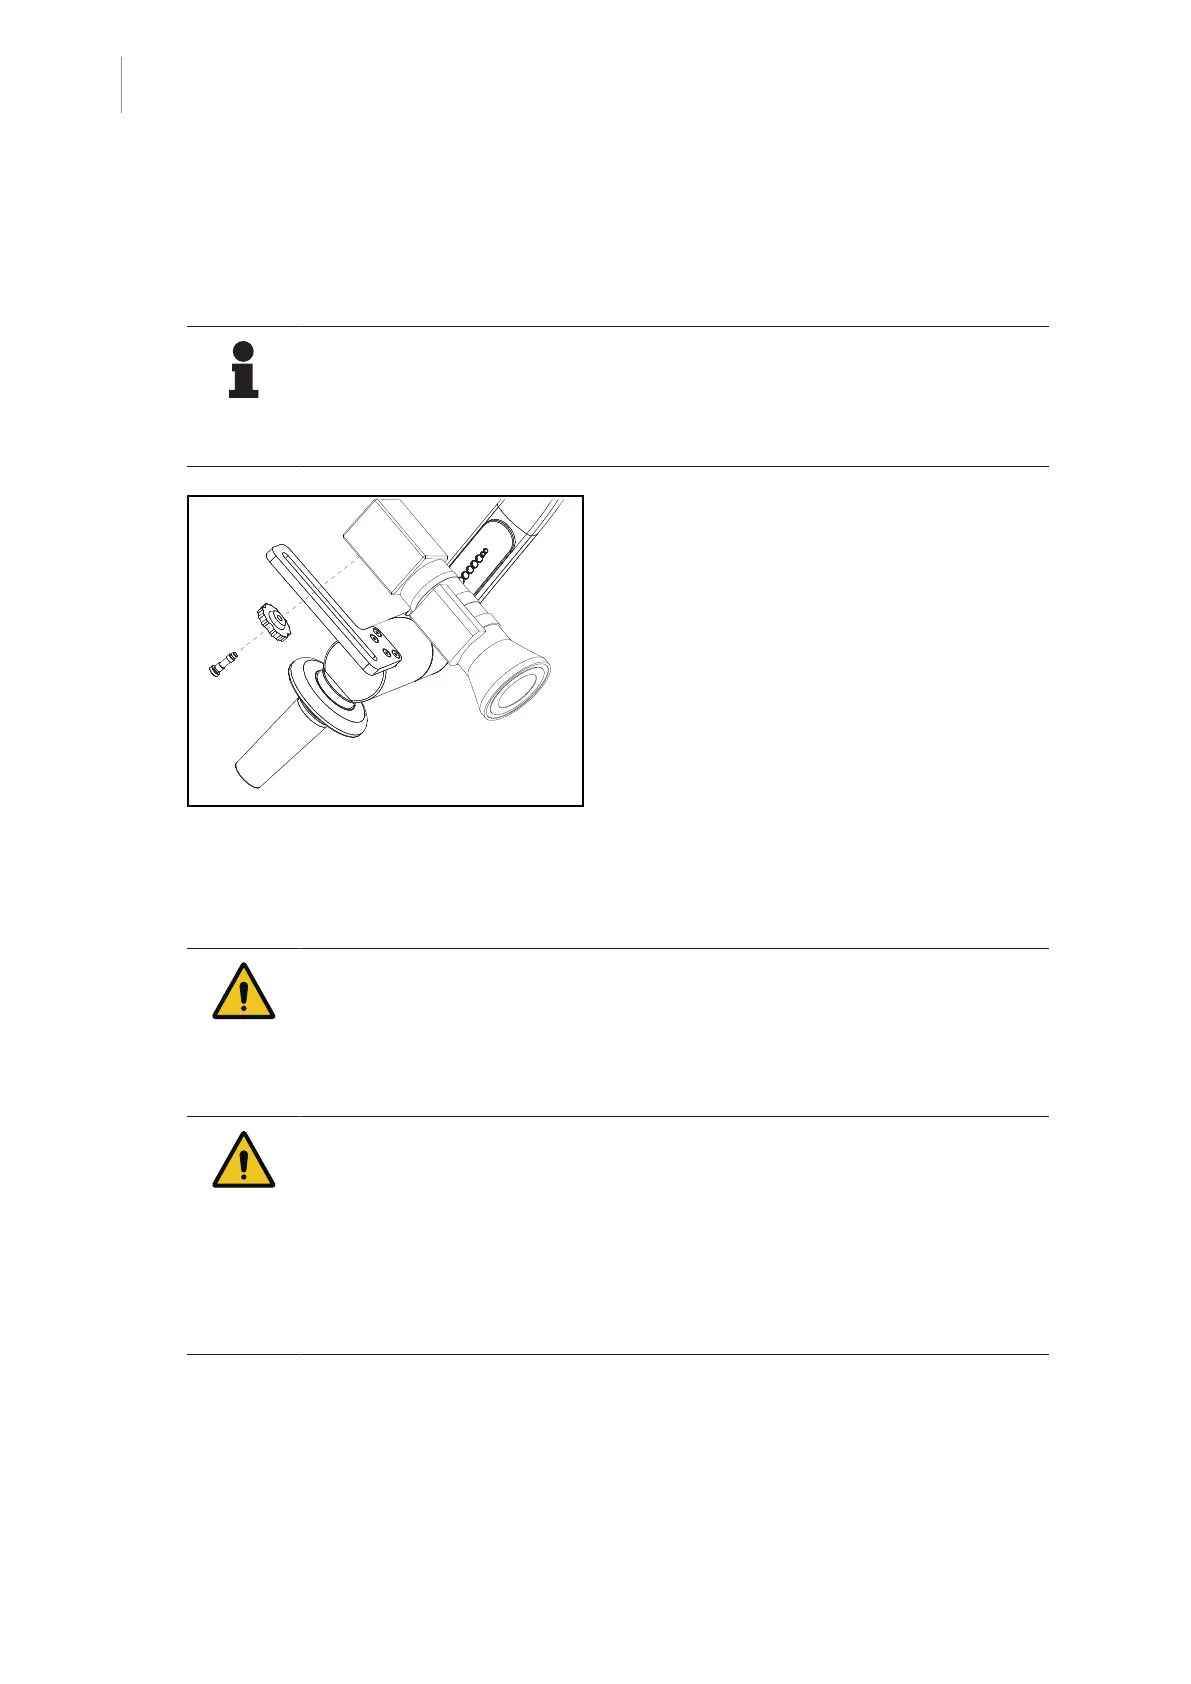
Fig.111: Attaching the camera to the SC mount
1. Pass the screw through the hole in the
mounting plate.
2. Place the camera on the mounting plate
and tighten the screw fully.
3. Position the camera enclosure correctly
relative to the mounting plate.
4. Turn the lock nut clockwise to fasten the
camera in place.
5. Connect the cables after routing them
through the suspension arm to the camera
module.
4.8.2 Handling the camera mount
WARNING!
Risk of infection or tissue reaction
A collision between the device and another item of equipment may result in
particles falling onto the surgical site.
Pre-position the device before the patient arrives. Move the device carefully
to avoid a collision.
WARNING!
Risk of infection
The sterilisable handles are the only parts of the device that can be sterilised.
Any contact by the sterile team with another surface results in a risk of infec-
tion. Any contact by non-sterile personnel with these handles results in a risk
of infection.
During the procedure, the sterile team must handle the device using the ster-
ilisable handles. On an HLX handle, the locking button is not sterile. Non-
sterile personnel must not come into contact with the sterilisable handles.
 Loading...